Showing posts with label baking. Show all posts

Monday, April 30, 2018

Binge Baking

I have a confession to make. I get a LOT of food magazines. In my defense, some are gifts (Cooks Illustrated), some are just sent to me (I'm looking at you, Eating Well and Cook's Country) and some I really just like to read and try the recipes (Bon Appetit, Rachel Ray Every Day and Cooking Light). Plus I really look forward to Wednesdays, when the Washington Post (our local paper) puts out its weekly Food section. AND, my neighbors and I swap our magazines, so I also get Southern Living, Better Homes and Gardens, Martha Stewart Living, Woman's Day and Women's Health. There's a lot of inspiration each month, so it's not surprising that I don't make the same meal more than once (the only things I make on a sort of regular basis are tacos -- but with different proteins -- meatloaf and chili). Sometimes I think my kids would like a little regularity, but they don't complain.

It's kind of hard to keep up with all of them, but some months I find more to try than others. Case in point was this week. This month's Bon Appetit had a feature on the "New Basics" that had a very interesting Sesame Tea Cake that I wanted to try and the paper had a feature on baking with salted butter that sounded interesting. I don't usually have a lot of time to do multiple bakes in a week, but this weekend kind of opened up when some of our activities were canceled, so I took advantage and made all the things in one weekend. YIKES! My family and neighbors were happy, because I shared some with them!

The first thing I tried was the Sesame Tea Cake from Bon Appetit. It involved finding black sesame seeds, but to my surprise, my area grocery store, Wegmans, carried them in the international foods aisle. Whew! For those who can't find them in your grocery store, you can also get them on Amazon, of course or my favorite spice shop, Penzey's.


I thought it turned out really nicely, and for those who don't like very sweet treats, this is perfect for you! Slightly sweet, but a little nutty and salty, even my kids liked it (my husband and older son ate almost half of it before we brought the rest over to our friends' house to try). It was also fairly easy to put together -- no complicated techniques or anything. With its pretty swirl pattern, it would make a nice addition to a brunch dessert platter as well!

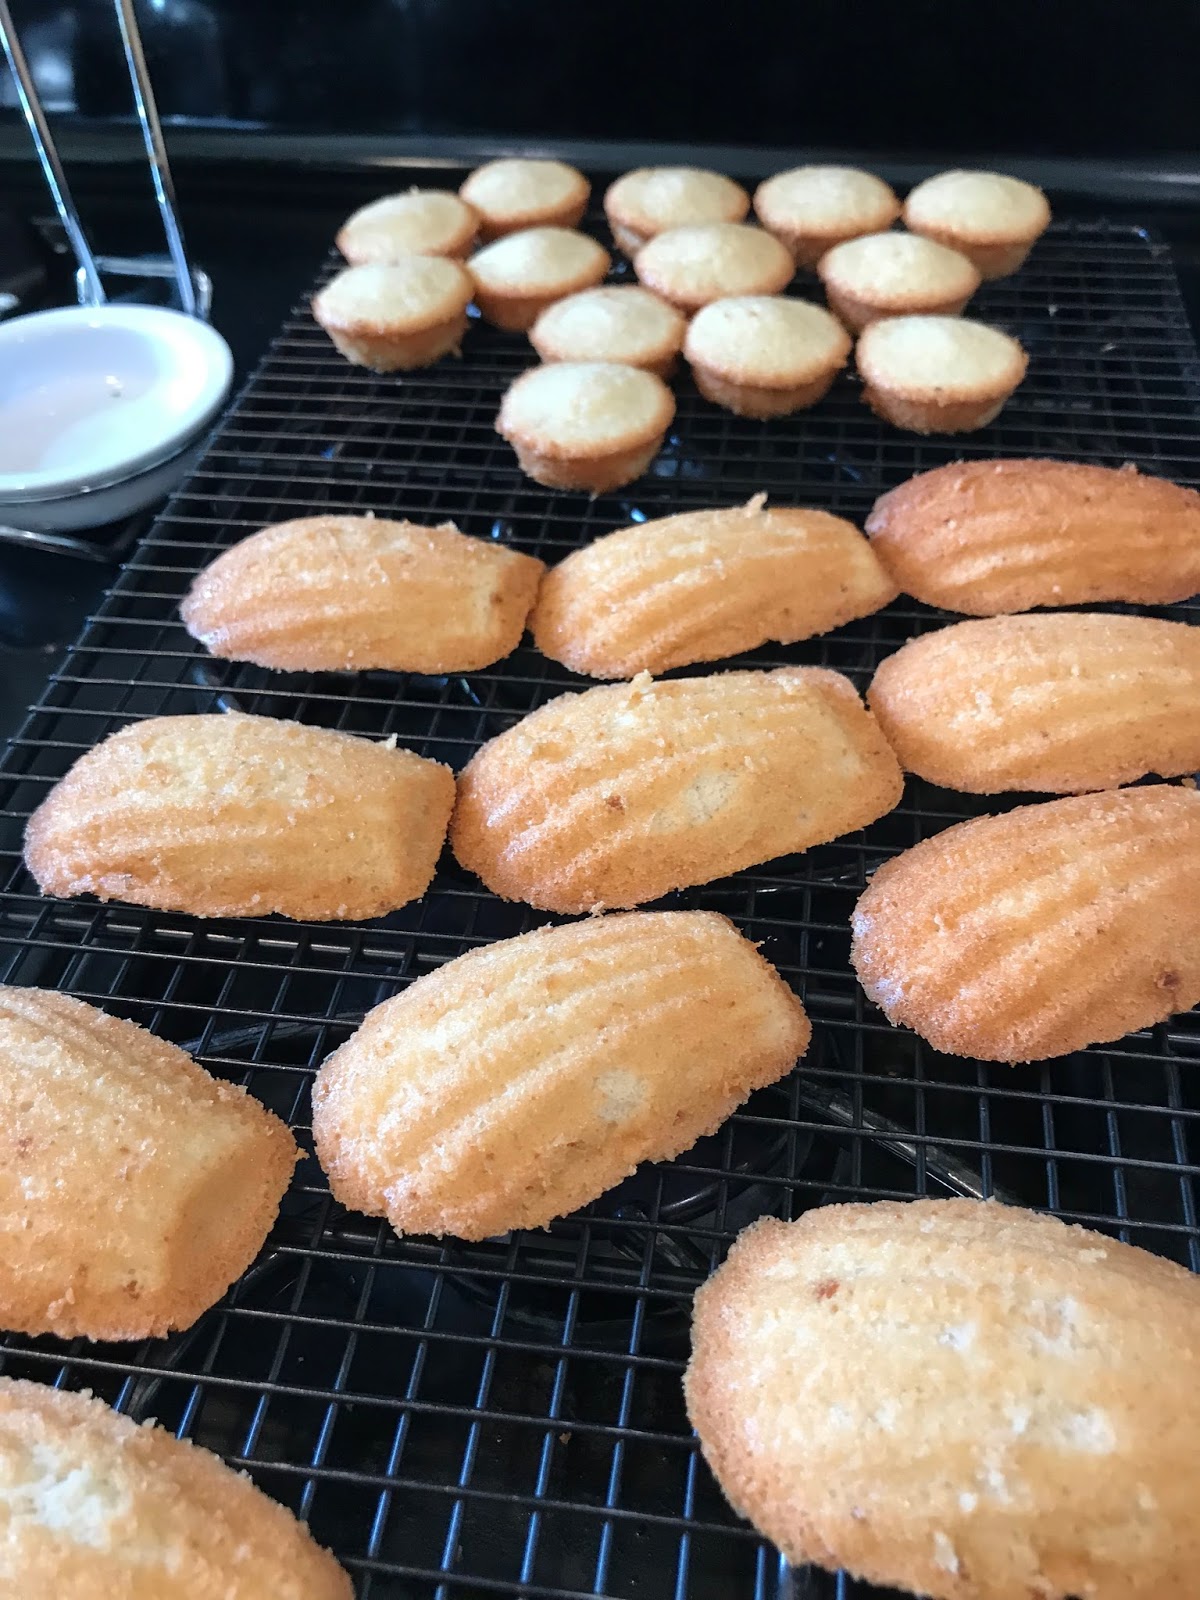
Next up was a couple of recipes from the Washington Post Food Section. They had an article that featured recipes with salted butter. Now, I don't think I've ever used salted butter (like, at all), so I was really intrigued to try these out. Because I bought a full pound (the only amount available), I decided to try two of the recipes. First up was a recipe for financiers, a fancy-sounding name for a little almond cake. This was a little more complicated because the recipe called for browning the butter and separating eggs, but those were the hardest steps. You also have to plan a little (or not have a timeline), because the batter goes in the refrigerator for at least an hour. On the plus side, once the batter has rested, it's super simple to pop them in the oven. I used mini muffin tins, as directed by the recipe, but had a good amount of leftover batter. The consistency was similar to a madeleine batter, so I made the rest using my madeleine tin. They turned out pretty well! If you really wanted to get fancy, you could dust with a little powdered sugar before serving. These go really nicely with a cup of tea. :-) You can find the financier recipe on the Washington Post website.


After I made the financiers, I still had 2 sticks of salted butter to use up, so I made the Milk Chocolate and Raspberry Jam Blondies from the same article. Unfortunately, I didn't have any milk chocolate handy, nor did I have raspberry jam. What I DID have was semisweet chocolate chips and some jammy balsamic cherries, so I gave it a shot. I really liked them! I left part of the pan unsullied by the cherries, because we have a purist in our house, so he wouldn't have liked them like that.  In the end, everyone was happy!


Now, I think I need to figure out which of these I'm going to either freeze or bring to work, since there's no way we need to have all of these sweets in the house (even with 2 teenage boys)! Plus, there's a recipe for Fluffernutter cookies I've been wanting to try....

Sunday, April 1, 2018

Nutella Makes Everything Better


As Spring is slowly showing her face, I realize indulgent comfort food is going to take a back seat to fresh spring vegetables (Hello, Asparagus!) and fruits (Yay, Strawberries!), but I wanted to post my take on Nutella Stuffed French Toast.

Normally, I made French toast by soaking it overnight, then baking it in the oven, similar to this recipe, since I've always had a hard time getting the right texture doing the stove top method (mine always seemed too soggy). However, on this occasion, I was inspired by a loaf of brioche that was on sale, which is the best type of bread to make French toast with, in my opinion. I know it's already rich, since brioche has egg in the bread itself, but it gets this wonderful crunch on the outside and melting texture on the inside that is the perfect kind of French toast!


The egg-milk batter that I dipped the bread in was pretty much your standard mix, but I added a little orange peel to complement the Nutella. And to up the crunchiness factor, I coated the French toast with corn flakes. I saw something similar on a cooking show (It might have been Diners, Drive-ins, and Dives where they did the same thing, but used Cap'n Crunch cereal).

This is my dipping set up:


Honestly, the trickiest part was transferring the dipped brioche from the dipping/crunch station to the frying pan (Once you dip the bread into the milk/egg mixture, the bread gets a little delicate), but after a couple of times, I got the hang of it.


And then, it was done! Served with a sprinkle of powdered sugar and some slices of Cara Cara oranges (our favorite), it was a big hit with the family! I thought it was sweet enough without syrup, but the kids put syrup on it anyway and liked it that way, too (we use pure maple syrup so it's not quite so sweet). Hope you enjoy making this!


Crunchified Nutella Stuffed French Toast

(makes 5 servings)

Ingredients:

One loaf of brioche bread (about 8-10 slices of bread)
Nutella
4 eggs
1/2 cup milk (any kind will do: skim, 1%, 2%, whole) -- I used 2% because that's what we have
1 tsp grated (or chopped -- it should be in small pieces) orange peel
approx. 1 cup corn flakes (may need more -- keep the box around...)
butter for the skillet
powdered sugar (optional)
maple syrup (optional)
fresh fruit for serving (optional)

To make:

Spread Nutella (using approx 1-2 Tbsp per slice) on 4/5 of the slices of bread. Cover with the other pieces of bread so that you have 4-5 Nutella "sandwiches." NOTE: start with 8 slices of bread -- for 4 "sandwiches," but I had enough of the milk-egg mixture to make a 5th serving. 

Combine eggs, milk and orange peel in a shallow pan (I used a 8-inch square dish). Pour the corn flakes in another shallow dish (I used a small plate with sides so that the corn flakes didn't slide out everywhere). Set up your dipping station:


Melt 1 Tbsp butter in a skillet. I used a small skillet to make just one at a time. If you have a larger skillet to make more than one at a time, you might need more butter. Temperature of the skillet should be about medium to medium high.

While the butter is melting in the skillet, dip one Nutella sandwich into the egg/milk mixture, then turn over to coat the other side. It should feel a little soggy. Pull the sandwich out, let the liquid drip off the bread for a second, then put on the corn flakes, pressing down onto the bread a little so the corn flakes will adhere. Flip the sandwich to get corn flakes on the other side.

Transfer the dipped sandwich onto the hot skillet. Cook on one side for about 3 minutes (check to make sure the corn flakes don't burn, but they will get a deep, golden brown, then flip to cook the other side.

Repeat with the other Nutella sandwiches. You might need to add butter to the skillet as you go (there should be a thin layer/sheen on the skillet to make sure nothing sticks) and I had to keep a close eye on the French toast, making temperature adjustments as I went to make sure nothing burned.

If you like, sprinkle a little powdered sugar on top and serve with fresh fruit and maple syrup on the side.

Enjoy!


Saturday, August 8, 2015

Summer's Bounty: No recipe recipes


I am totally digging our garden (ha! look at that pun!). But honestly, it's been great, with kale, fresh basil and summer squash. We had peas earlier, and we're still waiting on tomatoes and watermelon to ripen.

So tonight, I am going to let you loose without a recipe. You can do this. I know you can.

First, get some summer squash or zucchini, tomatoes and onion. Slice them all really thin. The amounts depend on how much you want to make. I made this vegetable gratin (that's the fancy word for baked vegetables) for dinner for three of us, so I had two tomatoes, one onion and about 3 squash (I actually cut up 4, but didn't use some of it, so I'm estimating here).
 
Then, you pour some olive oil in the bottom of the baking pan you are using. I suggest one that is fairly shallow (wider with narrow-ish sides) and thinly slice garlic over the oil:


 Then, layer the veggies thusly and sprinkle salt and pepper over everything. I also sprinkled dried thyme. Feel free to add whatever herbs you like. Fresh rosemary would be good. Or basil.


Bake in a 400 degree oven for 25 minutes, then take the pan out and grate fresh parmesan over all of it. Return to the oven for another 5-6 minutes, until all of the veggies are softened. Pull it out and you will have something that looks like this:


Sorry for the poor photo quality. I was using my phone instead of my camera, because the camera's battery needed to be recharged. But you get the idea.

It was really good! I served it with flatbread and a watermelon salad (watermelon, diced red onion, basil, crumbled feta cheese, salt, pepper, olive oil):


It's summer, so take advantage of all the fresh veggies that are available! Enjoy!


Tuesday, July 7, 2015

Who Needs Birthday Cake?

My oldest son is now a teenager. Wow! I'm not sure what I was expecting, some sort of sudden onset of moodiness and emotions, but he's still pretty normal, so I'm counting my blessings for now.  I'm still trying to wrap my head around the fact that he's going to be in high school soon, doing all the high-school-y things that kids do. I'm not really ready for that...

The thing about Max is that he's never been much of a cake guy. He likes cake, kind of, but doesn't really like frosting (I know, sacrilege!). He gets my creative juices flowing, though, to figure out something fun to celebrate his birthday, but with something that's not cake.

In the past, I've made a cookie cake (cookies stacked in layers with whipped cream, sort of like an ice box cake), ice cream cake (this one I made for Elliot, but I made one for Max with chocolate cake, peanut butter ice cream, and Reese's peanut butter cups chopped and scattered on top), and had root beer floats. This year, we had three different celebrations (family, then a sleepover with friends, then a larger neighborhood families party), so my challenge was particularly difficult. Luckily, Max had an idea of what he wanted, so I just had to figure out the execution.

For our family night, we had molten lava cakes with strawberry filling. Basically, I made a generic molten lava cake but added a teaspoon of strawberry sundae topping to the middle of the cake (1/4 cup of batter in the ramekin, then teaspoon of topping, then another 1/4-1/3 cup of batter on top). I love lava cakes, because you can prepare them ahead of time (like, hours) and put the ramekins in the fridge until you are ready to bake. And people love individual dessert. :-) Served it with vanilla bean ice cream, whipped cream and more strawberry sauce on top. Although I prefer the traditional molten lava cake, Max seemed to really like it, so I'll call it a win!


The next night, we went a little bit over the top. I made a skillet brownie (the linked recipe is the one I used, cutting the chocolate chips in half and adding 1/2 cup peanut butter chips),  then topped it off with vanilla ice cream, homemade chocolate and peanut butter sauces, whipped cream (natch!), chopped peanuts and chopped dark chocolate. Oh my word! That was GOOD!


Finally, for the larger party (about 10 kids and 11 adults), we did a sundae bar with different ice creams, fresh fruit (strawberries, blueberries), cookies, chocolate chips, nuts, sprinkles, whipped cream and lots of different sauces. It was a lot of fun, and the kids really enjoyed it! Unfortunately, I apparently didn't take a picture of the sundae spread, although I swear I did. The sundae bar was pretty easy, since it kind of built from the previous festivities. For Max's sleepover, we did a pancake bar, where I made pancakes and we had different syrups and fruits to put on top. We had stuff left over, so pretty much everything was already prepped for the ice cream sundaes (I did cheat and used canned whipped topping, because it's easy and fun - the kids could put their own on). :-)

What are your alternatives to birthday cake? I would love to hear about your ideas!

Monday, June 29, 2015

Sunny Summer Lemon Bars


I don't know what it is, maybe the color, maybe the refreshing taste of citrus, but lemons always equal summer to me. I use a ton of them, from slices in my water or iced tea, to squeezing over salad for a refreshing alternative to dressing, I buy them by the bagful when the weather starts to heat up.

One of my favorite summer treats are lemon bars. The creamy, tart filling with the rich, buttery crust is irresistible! So when I saw a recipe posted on the New York Times website, I had to give it a try. This particular recipe is a little different from the one I normally make, in that it uses egg yolks in addition to regular eggs and olive oil as the surprise ingredient. They were also sprinkled with a touch of sea salt. The technique was also different, because it called for cooking the filling, essentially making a curd, before you poured it over the crust and baked for a little bit longer.

As you might be able to tell from the photo, this version has a much deeper yellow color, thanks to the egg yolks. It also called for adding lemon zest to the crust as well as the filling. I found, however, that you really couldn't taste the lemon in the crust, since the filling had such a strong lemon flavor. If my family's reaction was any indication, you can save your olive oil for salad dressing (or maybe these little cakes), because only one out of three preferred this kind of bar. It was good, but overly rich -- too rich for something lemony, in my opinion.


Just for comparison, I made the version from my Cook's Illustrated cookbook (an excellent book, by the way - it's a great, basic cookbook). The sacrifices I make for you people! LOL! This recipe was more traditional (at least for the lemon bars I've been exposed to) in that you whisk all the filling ingredients together and pour directly onto the hot crust, then bake (be careful transferring the pan back into the oven!) until the filling is set. Martha Stewart has a recipe that's very similar (just cut the sugar back a little and add lemon zest from one lemon to the filling). I preferred this version. I thought it was a cleaner citrus taste and the crust was lighter (flakier?).


If you love lemon bars as much as I do, maybe you would like to try these, too. Let me know what you think!

Friday, March 6, 2015

Snow Day Bonus: Loafin' Around


Yesterday, we got almost 10 inches of snow, and this morning we had a record low recorded at the airport near our house. The kids have been in school exactly 2 days this week, and it seems as if they haven't been in school a full week since January. It's been rough.


This is what it looked like outside out house yesterday morning. It snowed for another 3 hours after this.


You would think that with this forced indoors activity, I would be wildly productive, but you would be wrong. I do have lovely, uncalloused heels (home pedicures each week) and have gotten sucked into reruns of Supernatural. I keep telling myself that I'll just watch to see if Dean actually goes to hell or if they figure out a way to get him out of his contract with the demon, Lillith. Like I said, it's been rough.

Previous years, I would have been doing a lot of baking, but in an attempt to not gain a bazillion pounds each winter, I have tried not to bake as much. That control ended yesterday when I went on a baking binge. All carbs all day, people.


I did not make anything original, but I had been saving a couple of these recipes for a while to try out. The top loaf is a Chocolate-Coconut Poundcake from Bon Appetit. As pretty as it looks, it was amazingly easy, and contains coconut oil, which makes it almost healthy (not really). The middle loaf (the recipe actually makes 2 loaves) is Whole Wheat Pumpkin Bread. The one I was really excited about was the bottom loaf, Rustic Chocolate Chip Tea Bread. I saw it in yesterday's Washington Post. It's tasty and quite easy to make, using one bowl and a liquid measuring cup. The kids loved it and were a little disappointed that my friends ate the rest of the loaf when they came over for an impromptu happy hour last night. I promised to make more soon -- it's that easy!

Hope it is warm and sunny where you are, and if it's not, pray for spring to some soon!

Cheers!

Sunday, March 30, 2014

Failure...And Coming Back

I'm going to confess that I don't always hit home runs in the kitchen.  As a matter of fact, I pretty much suck at making any kind of candy that requires more than just melting some chocolate and spreading it on a slab (i.e., chocolate bark).  Chocolate bark, I can do.  But when I have to boil stuff to a specific temperature, I fail. Every. Single. Time.  But, as an optimist (or crazy person), I keep trying, thinking I will finally "get it."  But then I don't.  Again.

This week's debacle comes from the latest issue of Bon Appétit magazine in the form of  Pecan Buttermilk Fudge:


Seriously, how could you not want to try and make that?  I also happened to have some extra buttermilk to use up. So there was that. Plus my eternal optimism.  I tend to ignore that niggling voice that says, "But Marna, you suck at making fudge from scratch." Should have listened to that voice.  I think I overcooked the fudge, because it set harder than a two-day-old baguette.  I had to literally chisel pieces using a steak knife and a meat tenderizer.  Not lying. I was too embarrassed to take a photo of that mess.

But. But. The reason I didn't throw it all in the trash is because the crumbly shards I was able to scrape off tasted really good, the texture notwithstanding. So, I broke the slab in half and put it away for a couple of days until I figured out what to do with it.

Then I figured it out. Not how to make fudge. No, that still eludes me.  I figured out what to do with this impossible-to-eat (seriously jaw-breaker hard) slab of overcooked sugar.  Here's the problem: since the recipe is based on a mistake and I'm not sure exactly what I did wrong, there's no way to replicate this.  Besides, who wants purposely screw up a batch of fudge, then use the results to make something else? That's just crazy.

Besides, the recipe would go like this:

Crust: 4 whole graham crackers
3 Wasa whole grain crackers
1/8 cup granulated sugar
3 Tbsp melted butter

Crush crackers in food processor into fine crumbs.  Stir in sugar and melted butter.  Pat into 8x8 inch pan.

Filling: 1 batch of jacked up Pecan Buttermilk Fudge
approx. 1/3 cup caramel sauce (I used Smuckers brand)

Melt the jacked up fudge on low power (I used level 4 for 7 minutes) until softened. Stir until smooth, then add the caramel sauce. Combine thoroughly, then pour over crumb crust. Bake in an oven that you set to preheat to 425 (because you're making a quiche crust so the oven was preheating for that anyway). Take the bars out when the topping is slightly bubbling around the edges.  I think it took about 5-7 minutes.

Topping: approx. 1 c. chocolate chips

Sprinkle chocolate chips over the bars, then let them melt.  Carefully spread the chocolate chips smooth over the bars.

Like I said, this can not be replicated. So, sorry about that. But if you want to try this out, go for it!

Here's the good news.  The crumb crust I made was really good.  Combining the Wasa crackers with the graham crackers gave it great texture and not too sweet. Plus it held up when I poured the melted fudge/caramel sauce mixture. I think I'll substitute Wasa crackers for some graham crackers every time I make a graham cracker crust.

But I guess the point of this post is not to share a recipe, but to show all of you that it's okay to make mistakes.  And to experiment. And be willing to keep trying, even though you've failed many times before. Honestly guys, it's just food. Get in that kitchen and start cooking!


Monday, March 17, 2014

Happy St. Patrick's Day...and another snow storm


So, everybody's home again (snow day #14 for anyone keeping track) due to a storm that dumped another 7 inches on us. This, after we had 60 degree days just 2 days ago.  I like winter, I really do (I grew up in Minnesota, after all, and have Viking blood coursing through my veins, so that should surprise no one), but enough already! Mostly, though, when I'm cooped up inside and it's cold out, all I really want to do is stuff my face with baked goods.  Not cool.  Why can't I crave, say, carrots on a cold day?  I'm sitting here, drinking my tea, pretending it's tastes as good as hot chocolate and feeling a little grumpy.

On the plus side, it's also St. Patrick's Day. The day that everyone is a little bit Irish, even if it's just to drink Guinness.  :-) According to family lore, I actually am a teeny bit Irish.  Unfortunately, I don't have any traditional, handed-down-through-the-generations, secret family recipes to help me commemorate the day, so I had to rely on the internet for help.  I decided to try Martha Stewart's crock pot version of corned beef and cabbage, because I love a crock pot recipe where you can just dump everything in and cook it, but also wanted some Irish soda bread to serve with it.  I did a little research to try and find the most "authentic" recipe (and by authentic, I mean the one that sounded like it had the most history attached to it, because, let's face it, I have no idea what "authentic" or "traditional" Irish soda bread is supposed to be).

Did you know, according to "people on the internet" (whom I assume know more than I do), that traditional Irish soda bread does not have raisins/currants in it?  That it actually only has 4 ingredients (flour, baking soda, salt and buttermilk)?  Neither did I, but I am all for simple, tasty recipes.  So I found this one on allrecipes.com that I thought I would try.  I also read that the flour in Ireland (at least in the past) was kind of poor, without a lot of gluten, so some people in current times use pastry flour to replicate that.  I, one the other hand, did not have pastry flour.  But of course, I couldn't just leave well enough alone. So I used a blend of all purpose flour, cake flour and whole wheat flour.


I also found out that corned beef and cabbage isn't exactly the traditional meal for the Irish on St. Patrick's Day, either. WHAT?!?!  Corned beef is the lutefisk of Irish food traditions?? (for non-Norwegian-Americans, lutefisk is a traditional Norwegian fish dish, usually served by Norwegian-Americans at Christmas, but is hardly ever eaten by actual modern-day Norwegians, probably because no one wants to eat gelatinous, re-hydrated, fish that only tastes good if you dump a boat-load of melted butter on top)   My world was rocked today.


 Before baking:


After: 


 Just before eating:


But I digress. This post was really going to be about soda bread.  Let me tell you, this bread is so tasty and so easy, you will want to make it whenever you want fresh bread with a meal (say, with soup, for brunch, whatever).  Seriously, it's that easy. Except for the flour blend, I did not change anything from the original recipe. Honest. Okay, I did incorporate a couple of technique-type tips from the comments section into my instructions. But that's all. Really.

"Traditional" Irish Soda Bread

1/2 cup cake flour
1/2 cup whole wheat flour
1 cup all purpose flour
1/2 teaspoon Kosher salt
1/2 teaspoon baking soda (mine was on the "heaping teaspoon" side of things)
1 cup of buttermilk
caraway seeds (optional)

Heat oven to 400 degrees. While the oven heats up, put the dry ingredients in a bowl, then stir with a fork to combine.  Start adding the buttermilk, first about half a cup, then stirring to combine with the dry ingredients, then the other half a cup.  Keep stirring everything together with a fork until it comes together (there might still be some flour left in the bottom of the bowl), then use your hand to knead the rest of the flour into the mixture (I did this in the bowl - no need to dump it out and get flour all over the place).  Pat the dough into a disk and put it in a cast iron skillet. With a sharp, serrated knife slash a cross in the top, then sprinkle with caraway seeds (optional).

Put skillet in the pre-heated oven and bake the bread about 15-20 minutes, until it's lightly golden on the outside and sounds hollow when you thump it lightly with your finger.  Take the skillet out, and, while the skillet is still warm, cover the bread with a 9-inch cake pan for 5 minutes. (This helps keep the outside crust from getting too hard).


Makes one loaf -- 8 nice wedge-shaped slices.  Enjoy warm with some good butter.  :-)

Bonus recipe:

Roasted Cabbage

I had some cabbage that wouldn't fit into my crock pot, so I took those two slices and roasted them in the oven while the bread was baking.  Just toss the cabbage with olive oil, salt and pepper, put on a rimmed baking sheet, then roast for about 20 minutes, until it's starting to get brown on the edges.  Pull out of the oven and sprinkle with a little apple cider vinegar (or not, it's good without it too, but I liked the idea of a not-too-sour sauerkraut flavor).


And here's a final photo of our "traditional" Irish meal:


Sunday, February 16, 2014

Snow Day Shenanigans

Who's a little tired of winter?  <raising my hand enthusiastically>

Here in Virginia, we got a big snow storm that cancelled classes Thursday and Friday, and with President's Day on Monday, that means the kids have been home for 5 straight days in Loudoun County. We've already had 11 snow days, and frankly, I'm done with all of it.  Fortunately for me, my kids are old enough to get their snow gear on and play outside with their friends without my direct supervision, so I had some extra time the past few days. The majority of that time has been watching the Olympics, I won't lie, but I managed to get a few more things done.

After making snowmen pancakes for breakfast (nothing fancy, folks, just three small, connected blobs of pancake batter with chocolate chips for eyes and buttons), the kids went outside and I started making this:


I had seen this recipe for chocolate swirl bread and thought is looked so good! It's from the Woman's Day January 2014 issue.  While none of the steps are really difficult, it is a little fussy.  The results were so good, though, I would definitely make it again, but doubling the recipe.  I figure, if I'm going to go through all that work, I might as well get two loaves out of it, because the first loaf will be gone in minutes!

Even though it's a yeast dough, I found it really easy to work with.  Maybe it's the eggs that are in it. When you first turn the dough out, it will look a little shaggy:


But it only takes a couple of kneads to get it nice and smooth:


See what I mean about being easy to work with? It rolls out beautifully!


The chocolate filling is also easy, basically just melting all the ingredients together and stirring until smooth.  If you are not familiar with the spreading tool in the picture below, it's an offset spatula.  If you are spreading anything -- cake batter, bars, icing, fillings -- you really need one of these!  It works so much better for getting everything smooth and even than using a regular flat knife or spatula.  This particular one is from Pampered Chef (the one pictured is the large one. I also have the small spreader). 


Rolling the dough is always my downfall -- I never think I get the roll tight enough.


Making the "braid." Don't worry -- it's not complicated, more of a twist than an actual braid.


Popping it in the parchment-lined pan:


Clearly, I could have done better at forming the dough...

Making the crumb topping, I went old-school, using two knives to cut the butter into crumbs.  When I make this again, I'm going to use the food processor.  So much easier and faster!

Before:


After:


You pat in the crumbs before you put the bread in the oven. Here's the finished product:


It's a beautiful bread, worthy of gift-giving, I think. And, as I mentioned before, none of the steps are hard. Don't you want to have some of this??  So, so yummy!


Wednesday, February 5, 2014

Unexpected Ooey, Gooey Caramel Rolls


I love sweet rolls: caramel rolls, cinnamon rolls, whatever.  But most of the time I don't have time to mess with yeast, waiting for the dough to rise, etc. So I was looking for a faster, easier cinnamon roll recipe, when I came across something that sounded pretty good at the blog Iowa Girl Eats (if you've never read her blog, I highly recommend it).  But remember that I had that sweet potato caramel from the experiment last time?  I did, and had to figure out what to do with it, since it's been sitting on my counter for 2 weeks.  So the gears in the brain started grinding away and I thought, "Why not a sweet potato caramel roll?"  The addition of sweet potato is the "unexpected" part. :-)

Now, I am under no illusions that what I came up with is much healthier than any other sweet roll out there, but I did try to cut down the refined sugar, and I thought that adding the sweet potato, using some whole wheat flour, cutting the butter a teensy bit and taking out a little of the salt might help just a bit.

Y'all, they were really good! Which, of course, is why I'm sharing with you, because I wouldn't waste your time with crap.  :-)  I know there are a few steps, but none are very hard, and even the mixing is pretty straight forward.  Give it a try and let me know what you think!

Preparing the pan with the nuts and caramel topping:


Getting on with mashing up the cooked sweet potato. The heat from the potato will melt the butter:


After adding the flour, you'll get something like this:


Don't worry if it's not really well mixed. You'll knead that together so it gets nice and smooth.

Rolling out the dough is not an exact science...


On goes the yummy cinnamon filling:


Rolled and sliced, then placed in the prepared pan.  See my little wonky one in the bottom right corner? We never leave a man behind, even if it's the sad looking end pieces.  See that bench scraper in the picture on the left? It helps a lot for baking: I used it to help roll the dough (loosen parts that might be sticking to the sheet) and cutting the roll into pieces.


Puffed and ready to take out of the pan.  Looks like I could have brushed off some of the flour, though...


They need to rest, and let that gooey caramel goodness drip down onto the top.


 Voila! Sort of healthy-ish but super delicious caramel rolls!


 Unexpected Ooey, Gooey Caramel Rolls:

(Inspired by this recipe on Iowa Girl Eats)


For the Dough:

about 1 cup mashed sweet potato (or take a small sweet potato, pierce and microwave on high for 7 minutes until cooked - be sure to peel it before using in the recipe)
2 Tbsp butter
1 cup buttermilk
1 cup whole wheat flour
1.5 cups all purpose flour (plus more for rolling out)
1-1/2 teaspoons baking powder
1/2 teaspoon baking soda
3/4 teaspoon kosher salt

Throw warm sweet potato and butter into a mixing bowl and combine (if sweet potato was already mashed, melt the butter and combine with mashed sweet potato). Add buttermilk and combine until smooth.

Measure dry ingredients into separate bowl. Whisk to combine. Add to the sweet potato/buttermilk mixture and stir until the dough comes together. It might look a little shaggy, but that's okay.  Turn dough out onto a floured surface and knead a couple of times to get a smooth dough. Roll out to a 9x14 -ish inch rectangle (it doesn't really have to be exact).

Cinnamon Filling:

1 cup packed brown sugar
1 Tablespoon cinnamon
3 Tablespoons butter, melted

For the Cinnamon Filling:   Combine all ingredients in a small bowl. Set aside.

For the caramel topping:

1 cup chopped pecans
1/4 cup brown sugar
1/4 Sweet Potato Caramel (or you could substitute pure maple syrup)
1 Tbsp butter


For the pan and caramel topping: heavily butter the bottom of a 9x9 inch baking pan. Sprinkle nuts over. Combine brown sugar, syrup and butter in a small bowl, microwave for 30 seconds on high, then stir to combine.  Pour caramel over the nuts.

After you have all the components ready, spread filling over the dough. The filling has a wet sand kind of texture, so don't worry if you don't get it spread completely evenly -- I didn't.  ;-) Roll up dough from by the long end, trying to keep the roll as tight as you can (I admit I'm not very good at this part).  Cut dough into nine pieces. How do you do this, you ask? Cut off each of the ends, set them aside for now, then cut the remaining roll in half, then cut each of those pieces in half, then in half again.  And there you go.  Put rolls in the prepared pan, then take the uneven ends, smoosh them together a little, then use that as your ninth roll.  press each of the rolls down slightly.

Put pan into a preheated 400 degree oven and bake for 25 minutes. After pulling the rolls out of the oven, immediately turn over onto a serving plate, but keep the pan on top for 5 minutes. After 5 minutes, remove pan. There might be bits of the caramel-nut topping left in the pan. I just scrape that out and spread over the rolls.  Enjoy!  Makes 9.