Showing posts with label bars. Show all posts

Monday, June 29, 2015

Sunny Summer Lemon Bars


I don't know what it is, maybe the color, maybe the refreshing taste of citrus, but lemons always equal summer to me. I use a ton of them, from slices in my water or iced tea, to squeezing over salad for a refreshing alternative to dressing, I buy them by the bagful when the weather starts to heat up.

One of my favorite summer treats are lemon bars. The creamy, tart filling with the rich, buttery crust is irresistible! So when I saw a recipe posted on the New York Times website, I had to give it a try. This particular recipe is a little different from the one I normally make, in that it uses egg yolks in addition to regular eggs and olive oil as the surprise ingredient. They were also sprinkled with a touch of sea salt. The technique was also different, because it called for cooking the filling, essentially making a curd, before you poured it over the crust and baked for a little bit longer.

As you might be able to tell from the photo, this version has a much deeper yellow color, thanks to the egg yolks. It also called for adding lemon zest to the crust as well as the filling. I found, however, that you really couldn't taste the lemon in the crust, since the filling had such a strong lemon flavor. If my family's reaction was any indication, you can save your olive oil for salad dressing (or maybe these little cakes), because only one out of three preferred this kind of bar. It was good, but overly rich -- too rich for something lemony, in my opinion.


Just for comparison, I made the version from my Cook's Illustrated cookbook (an excellent book, by the way - it's a great, basic cookbook). The sacrifices I make for you people! LOL! This recipe was more traditional (at least for the lemon bars I've been exposed to) in that you whisk all the filling ingredients together and pour directly onto the hot crust, then bake (be careful transferring the pan back into the oven!) until the filling is set. Martha Stewart has a recipe that's very similar (just cut the sugar back a little and add lemon zest from one lemon to the filling). I preferred this version. I thought it was a cleaner citrus taste and the crust was lighter (flakier?).


If you love lemon bars as much as I do, maybe you would like to try these, too. Let me know what you think!

Wednesday, November 20, 2013

Caramel Apple Crisp Bars


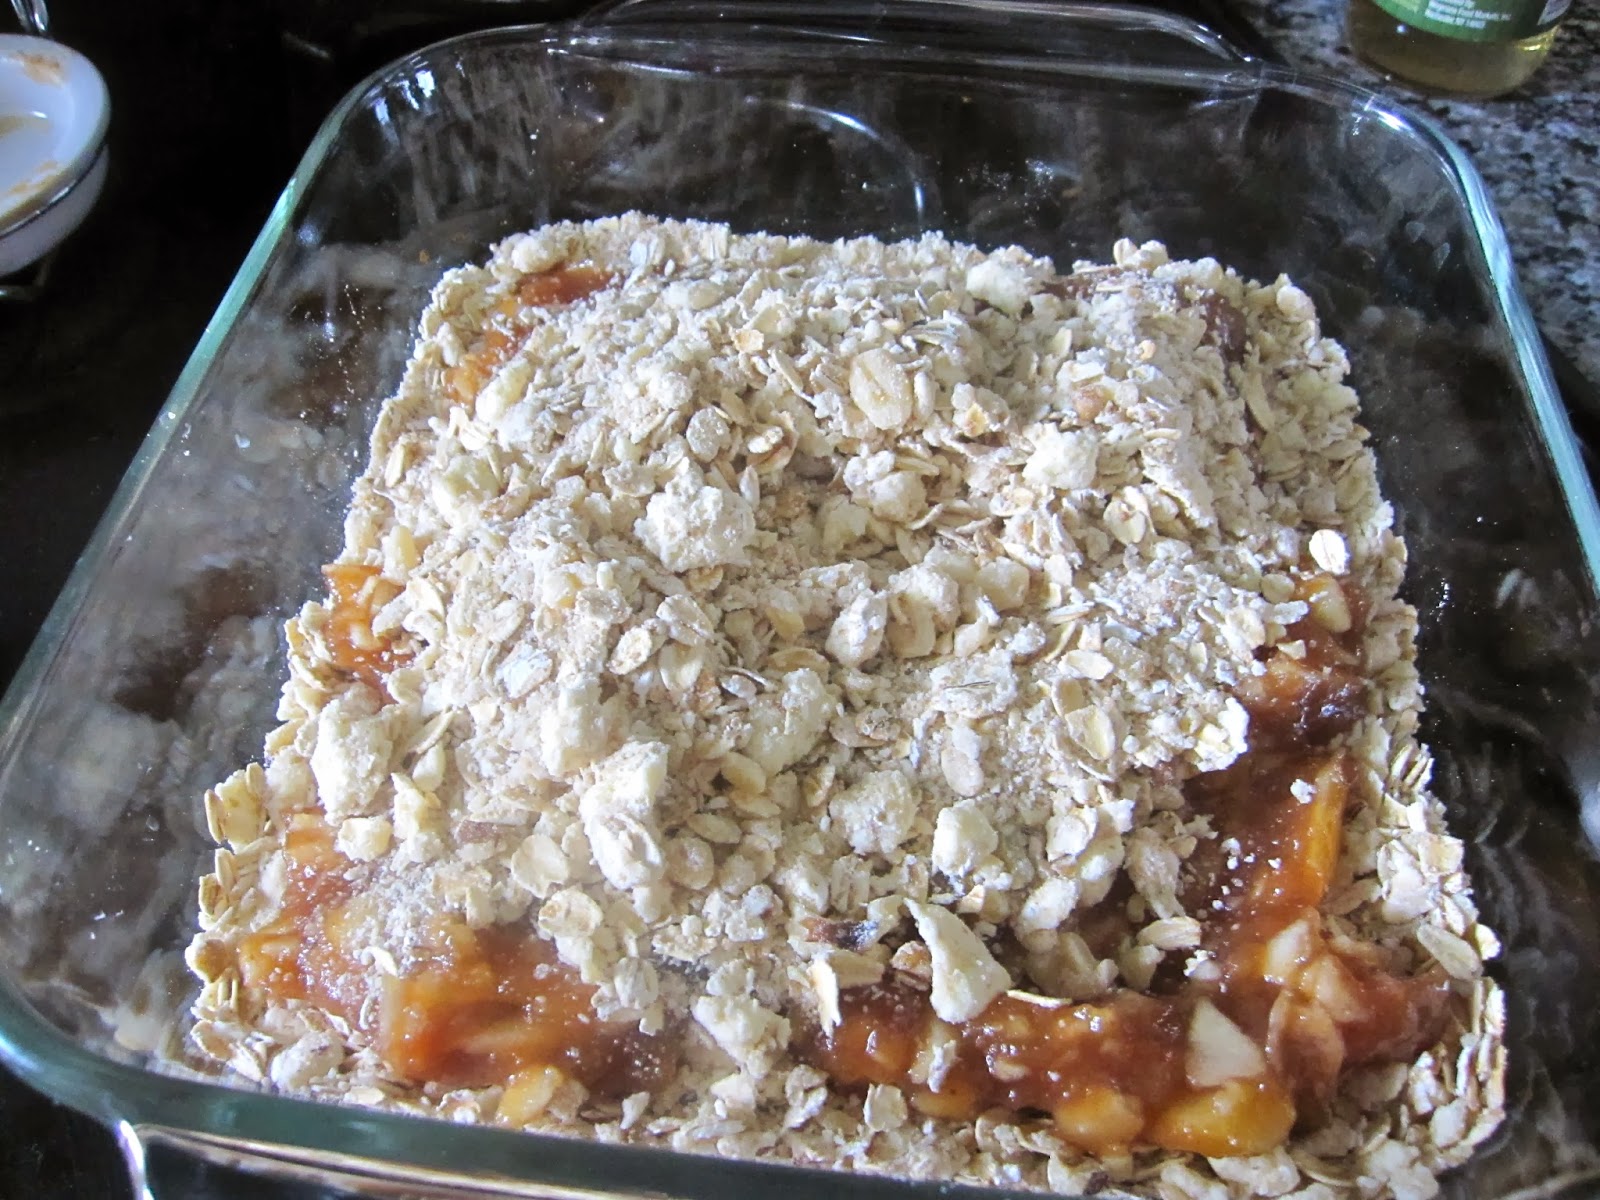
So, if you are following along with my previous posts, you probably have boatload of apple butter.  I know I did.  And, after a while, putting it on toast or muffins (insert your own joke here…) isn't cutting it anymore.  We still have some in the freezer, too.  So I came up with Caramel Apple Crisp Bars to help use some of it up.  They're really yummy.  You should make them.  :-)


I realize that you can't really see much of the bar underneath the mound of ice cream, nuts and caramel sauce, but my older son had this serving idea, and it was delicious, so I thought I would give you another idea to use (and reason to make this recipe).


Caramel Apple Crisp Bars

1 1/4 c. old-fashioned oats
1/2 c. all-purpose flour
1/2 c. brown sugar
1/3 c. butter, cold
1/2 c. walnuts, chopped
3/4 cup apple butter (homemade or not)
1 small apple, peeled and chopped (about 1/2 cup chopped)
1/2 c. caramel sauce (you can use anything you have on hand, but I highly recommend this recipe for Apple Cider Caramel Sauce from Southern Living)

Combine oats, flour, and sugar in a medium bowl, breaking up and clumps of brown sugar.  Cut the cold butter into cubes, then add to the bowl. Using a pastry blender or your fingers, incorporate the butter until the mixture is uniform sizes and crumbly.  Add walnuts and stir to combine. Set mixture aside.


[Alternate method: put oats, flour, sugar, butter and walnuts (chopped or not) in a food processor.  Pulse about 5-6 times to combine.  Butter pieces should be the size of small peas.]


Combine apple butter and chopped apple in a small bowl.  Set aside.


Butter the bottom of an 8x8 inch pan, then pour half of the oat crumb mixture in the bottom of the pan and pat down a little.  Drop spoonfuls of the apple butter/apple mixture on top of the crumb mixture, then gently spread around to evenly distribute over the crust. Combine the caramel sauce with the remaining crumb mixture, then drop by spoonfuls over the top of the apple butter layer.


I need to confess something on this step.  Initially, I put the rest of the crumb mixture on top and was going to drizzle the caramel sauce over it, but then I thought the caramel might burn before the bars were done baking, so I scraped off what I could and put it back in the bowl, then stirred the caramel sauce in to what I had.  That's why it looks kind of funky, but yours will be much prettier!

Put in a pre-heated 325 degree oven for 35-40 minutes (top should be golden and edges will be bubbling.


Cool completely.  Cut into squares and serve.  Makes about 16 (if you like them bigger) or 20 (if you like them smaller).  :-)

Tuesday, December 18, 2012

Fluffernutter Brownies - From Failure to Fantastic!


I had wanted to get this posted days ago, but then the flu happened in our house, and my time has not been my own.  So I apologize for not being able to be a more regular poster.  That will be my New Year's resolution...

Hopefully you're not sick of brownie recipes yet, because I have another one for you.  :-) And, fair warning, I have a couple of recipes you can make using up brownies, so stay tuned.  I had a lot of brownies to use up after that whole brownie experiment thing...

I didn't intend to make brownies, but sometimes things don't go your way and you need to take a different direction.  Such as today.  I had attempted to make peanut butter fudge, a recipe I saw in my latest Penzey's spice catalog (seriously, sign up for their mailing list, even if it's just for the recipes).  I should have known.  I am not very patient, and making candy takes patience. So, after letting it set up for 2 days in the fridge, I wasn't sure what I ended up with, but it wasn't fudge.  What I got was some really delicious, fluffy, peanut buttery goo that was too good to throw away. I actually made myself sick taste-testing the "fudge" to ensure that a) it tasted good, and b) it actually wasn't fudge.


Here's what I had. Clearly too soft to be fudge.

What was I going to do with this stuff?  One of my all time favorite flavor combinations is peanut butter and chocolate, so I thought, "Why not swirl some of this into brownies?" So that's what I did.

You need to make enough brownie batter for a 9x13 inch pan, so I doubled my favorite brownie recipe (nothing healthy about these, despite my previous attempts).  This is a recipe from the Laura Ingalls Wilder Country Cookbook and super simple. You can, however, use a box mix (I won't judge) to keep it simple, since you'll be putting in some time on the the peanut butter fudge.


Here's my go-to brownie recipe. I love it because you make it in one pan and it is incredibly simple.

Laura Ingalls Wilder Brownies

1 cup butter
12 Tbsp unsweetened cocoa (or about 1/2 cup)
2 cups granulated sugar
1 tsp vanilla
4 large eggs
1 1/2 cups flour
1/2 tsp salt

Fluffernutter Filling
(If you want the same consistency that I had, cook for 5 minutes, and don't use a candy thermometer. If you want to actually make the peanut butter fudge, then use a candy thermometer to make sure you get to the soft ball stage.)

Grease a 9x13 inch pan and preheat oven to 325 (F).

Combine butter and cocoa in a 3 qt. saucepan.  Heat over low heat, stirring, until butter is melted and cocoa is completely blended in until smooth.  Set aside to cool (about 5 minutes).


When cocoa is lukewarm, beat in sugar and vanilla. Then beat in eggs, one at a time. Add the flour and salt, beat until combined.


Pour brownie batter into prepared pan, then drop blobs of filling (I only used about half of the recipe) onto brownie batter, then use a knife to swirl the two together.  Bake for 30 to 35 minutes (when a toothpick is inserted near the center, it should come out with a few bits of crumbs clinging to it).

I hope you enjoy these!  They are delicious!  And, in the spirit of the season, I gave the brownies as thank yous for our trash and recycling guys.  I hope they like them!

I still have to figure out what to do with the other half of that failed peanut butter fudge...


Thursday, December 6, 2012

Healthy Brownie: Oxymoron or Attainable Dream?

I've been working on a long-term project to see if it's possible to create a "healthier" brownie.  After several tries and taste tests (yeah, it's a tough job), I actually did come up with a pretty good alternative, which I'll share with you a little later.

But first, a discussion about my brownie preferences and what I mean by "healthier." I fall into the dense and chewy camp of brownie lovers.  I definitely will not say no to a cakey brownie, especially if it has frosting, but I prefer the kind of brownie that is dense, rich, and chewy.  Usually the sugar amount is higher than the flour amount.  If it has a crackled top, that's even better!

What do I mean by "healthier?" Preferably, something that doesn't use refined sugar or wheat flour, with a better oil source (not dairy fat like butter, something with a modicum of health benefits).  I understand that, depending on your nutrition goals, my definition of healthy might not be yours, but there is a lot of room for experimentation.  There are tons of "healthier" brownie recipes on the internet, using black beans, beets, sweet potatoes, zucchini.  I tried them all, or at least a version of them.  And I invited over some friends to help me taste test them.  Here's what we tasted:


I numbered the different brownies so that no one would prejudge a taste before they actually tasted it.


Here are the notes from one of my friends.  I picked his list because he has fanatically neat writing, and his words summed up the general consensus of the group:


Here are the brownies, and a link to the original recipe, if I got it from an internet source:

1. Variation of the Wuollet brownie using almond flour, maple sugar
2. Wuollot brownie recipe (full butter, sugar, etc, for comparison)
3. Paleo brownie (raw, with nuts, dates, cocoa)
4. Red Velvet (with beets) - I love that my friend wrote "with a certain je ne sais quoi" for that one.  He was really surprised when I said they were beets.
5. zucchini brownie
6. Sweet potato brownie
7. Marna's "Healthier" Brownie (recipe below)
8. Black Bean Brownie
9. Brownies with egg whites, no flour (kind of like a flourless chocolate cake, but I made a mistake and added the sugar to the whipped whites before adding it to the flour mixture.  The texture was horrible, so I'm not even sharing the recipe with you on this one).

As you can see, there was a lot of tasting and experimenting.  I personally liked the texture of the zucchini brownie (although it had a kind of "green" smell that hit you just before you bit into it.  The smell went away once you had the brownie in your mouth) and the "Marna's Healthier Brownie" the best.  So, what did I find, given my initial premise?  You can add veggies or fruit to a brownie, which will give it more fiber and maybe some vitamins, but if you still keep the sugar. butter and processed flour in it, it's still going to be unhealthy overall.  In all my experimentation substituting different things, here's what I learned:

1) There's not a good natural substitute for white, granulated sugar. Either it's not sweet enough (honey) or gives it an odd taste (maple sugar) and there is definitely a difference in texture (not as chewy as I like)

2) Flours were also a problem, if you want a pure chocolate taste.  The almond flour was a little gritty (I didn't mind the texture, but my 8 year old did) and definitely added an almond taste to the chocolate (not unpleasant, but may not be what you want). The chickpea flour had an earthy taste, but with the chocolate, it wasn't off-putting.

3) Using half ghee and half coconut oil does make a good substitute for butter, without the dairy in it.  You still get some butter taste, but it's not overwhelming (as it is when you use only ghee), and the coconut oil is a neutral taste that blends well with the ghee. However, if you're trying to avoid saturated fats, this combo might not be for you. Click on the links for some nutritional information about each of them, if you are interested.

4) To make brownies healthier, it's better to just substitute one unhealthy thing, and leave the rest as in the original recipe. I don't think there's ever going to be a "healthy" brownie that will truly compare to the unhealthy original, but you CAN make it healthier, substituting a "healthy" ingredient for one of the unhealthy ones (depending on what your nutrition goals are and what you generally want to avoid).

Now this doesn't have to be the final word on the healthy brownie debate, or course, and I realize the use of chocolate chips (using refined sugar, oils and such) makes any brownie less healthy.  There are a lot of flours that I didn't try (if you're interested in gluten-free options). And I am still intrigued about using a flourless chocolate cake recipe as a starting point.  Where is the one with the applesauce, you may be asking?  Well, that recipe is pretty common, but frankly, I think that comes out a little too cake-y for my taste, so I didn't add it here, but if you have a good one, feel free to share it. I'm always open to new ideas!

For me, what worked best was using blends of things, as you can see from the recipe I came up with, below.


Marna's "Healthier" Brownie

1/4 cup ghee
1/4 cup coconut oil
1/2 cup natural honey
2 eggs
1/8 cup maple sugar
1/4 tsp. salt
1/2 cup natural cocoa (I get mine from Penzey's)
1/2 cup almond flour (I use Bob's Red Mill brand)
1/8 cup Chick Pea (Garbanzo Bean) Flour - again Bob's Red Mill
1/3 cup semi-sweet chocolate chips

Preheat oven to 325 degrees Fahrenheit. Grease an 8x8 inch baking pan.  Melt ghee and oil together, set aside to cool.  Beat together the eggs, honey and maple sugar.  Add oil to the egg and sugar mixture. Blend well.  Add the dry ingredients, stir to combine completely, then add the chocolate chips. Pour into prepared pan and bake for about 25 minutes (a toothpick inserted in the middle of the pan should come out with a few crumbs on it, but not gooey batter).  Remove from oven and let cool completely before cutting.  (Trick: to get a clean cut on the brownies, you have to let them cool completely.  No shortcuts -- except I will put them in the fridge after a while to finish cooling...).

Let me know what you think, and if you have any tricks to make brownies healthier, I'd love to hear them.  Personally, I'll probably just make regular brownies (I don't make them very often).  I figure, at least it's better than using a brownie mix, with its additives and such, right?

Happy baking!

Wednesday, April 25, 2012

Heaven!

Church cookbooks are awesome.  Especially the ones from the church circle heyday, back in the 50's and 60's.  My mom has a cookbook from my grandma's church that's probably 40 years old, at least.  But those recipes from the ladies' group (I think they were Martha's Circle or Miriam's circle, something like that) represent real comfort food from my childhood. If you've ever been to a church potluck, you know what I mean. No one could make potato salad like Minnie, and the meal wouldn't be complete without Ruth's chocolate cake.  Because I'm from the Midwest, Jello salads were also popular.  Those I could do without, to be honest.

Anyway, I hope to someday own that book when my mom doesn't have a use for it anymore, but there was a recipe in it for my favorite bars that I used to make when I was a kid.  Last time I was home, I finally remembered to copy down the recipe, so I could make them any time I wanted.  Which I will probably regret, because they are so rich and addictive!  They're not called Heavenly Bars for nothin'!

A chocolate-coconut-almond crust topped with a buttercream filling, then a thin layer of bittersweet chocolate.  I was surprised my boys actually liked them, but my oldest son ate four and my youngest's eyes rolled back in his head with pleasure at his first bite.  So the legacy continues.

The steps may seem fussy, but I guarantee that it's all worth it, especially for the crust, which has a chewy-crunchy texture that is so unique and delicious!

Heavenly Bars

Ingredients for crust:

1/3 cup butter
1/2 cup sugar
6 tsp cocoa
1 egg, slightly beaten
10 (double) graham crackers (about one package), crushed fine
1 Tbsp. vanilla
1 cup coconut (you can use sweetened or unsweetened -- I've used both and it's all tasty)
1/2 cup nuts, chopped fine (I used slivered almonds)

Ingredients for 2nd layer:

1/2 cup butter
1 cup powdered sugar
1 1/2 teaspoon milk

Chocolate topping:

4 Tbsp. semisweet chocolate
1 Tbsp. butter

For the crust: blend butter, sugar, cocoa and egg in the top of a double boiler set over warm water.  No particular order. As you can see, I just dumped everything in and started stirring. Note that in the first picture, I have two packages of graham crackers, but for the recipe you only need one. Didn't want anyone to be confused.


Stir until combined. Continue stirring over the hot water until warm and thick (you want to heat the mixture because of the egg, but not too much heat too fast, or the egg will cook and separate).  Take chocolate mixture off heat and add the crushed graham crackers, vanilla, coconut and nuts.  Pat into a buttered 8" square pan (I lined my pan with foil to pull them all out at once, but you don't have to do that).  Chill crust while you make the second layer.

Second Layer: Mix the butter, powdered sugar and milk and beat until smooth. Spread over crust and chill.


Chocolate topping: Melt chocolate and butter together and stir until smooth.  Pour on top of bars and spread (I just swirled the pan around until the top was covered so it would look smooth).  Return to the refrigerator to chill until the chocolate is set, about 30 minutes.


Cut into small pieces (they are rich) and enjoy!  I usually get about 25 (5 rows by 5).