I have been wanting to make the drive down to Asheville, North Carolina for a long time. As a foodie, I'm a little late to the party, since Asheville's had a reputation for great food (and local brews) for a while now, but better late than never, I always say!
Since our oldest son had a soccer tournament over part of our spring break, we didn't have a lot of time to go anywhere, so we decided to go Asheville and check out what the fuss was all about. Luckily, I had a couple of friends who went there not too long ago, so I had some recommendations from them, plus checking out a few online sites as well. I also downloaded an app (Dig Local) for my phone that gave local recommendations and reviews for places in Asheville, so I felt pretty prepared. :-)
The drive wasn't as bad as I imagined it to be. I packed a cooler full of healthy snacks (carrot sticks, hummus, apples) in anticipation of the buttery, biscuit-y goodness we would encounter later. Plus, no one threw up (we have one son who can get a little queasy in the car - nothing some Dramamine won't help). Once we got to Asheville, though, we didn't waste a lot of time on our first food move.
We headed straight over to
White Duck Taco, in the River Arts District. I had read some reviews online, and very few had a bad word to say, so that's where we headed first. It was a nice night, and there was outdoor seating available, but we stayed inside, mostly because I wanted to see how the staff all worked through the many choices available (they had an open-ish kitchen, but I hope they didn't think I was creepy peering around the side of the counter now and again). You order from the choices listed on huge chalkboards. Lots and lots of interesting choices, and, you order by the taco, so you can get any combination of tacos you want! We each ordered two, plus the salsa trio with chips. I had the Korean beef bulgogi with kimchi (really good!) and the mole roasted duck taco with crema and apple cranberry salsa - delicious! Even my picky eater loved his fish tacos and said they were the best he ever tasted!


We also got a steak and cheese taco (which was good, but nothing spectacular), Bangkok shrimp (also delicious) and another taco which was eaten too quickly to get a picture of! We left full and happy!
We also looked around the
River Arts District, but because the kids weren't interested, and it looked a little like a developing arts district (read, warehouse-type gallery spaces looked more warehouse-y than a gallery) and something hinky looked like it was going down at the park, we drove down the main strip and then headed back to the hotel.
A word about the hotel. I am sure there are a ton of lovely places to stay around Asheville, but with spring break prices, I wasn't willing to pay for them, so we ended up at the
Country Inn and Suites (Asheville West), which turned out really well. I have accepted that when you travel with kids, and you reach a certain age, there are some things that are just more important than being close the the "happening scene." Like quiet rooms, free parking, and an accessible location. That's what we found at the hotel. It's located on Old Haywood Road, and was literally 10 minutes away from everything. It was a little freaky, to be honest. We'd look up a place we wanted to go, get directions, and inevitably it would be 10 minutes away. I'm not even exaggerating. Anyway, just a side note.
Okay, now back to the food. The next morning, on the recommendation of a friend, we went to
Biscuit Head. You gotta love a restaurant whose motto is "Put some south in your mouth." True to the restaurant's name, this place sells biscuits. But man! These were amazing biscuits! We were planning on hiking a good portion of the day, so we all went for the hearty options, but I wish we would have also ordered just a plain biscuit to get the full, unadulterated experience (plus they have a "jam bar" with a bunch of locally or house-made jams that looked delicious!).
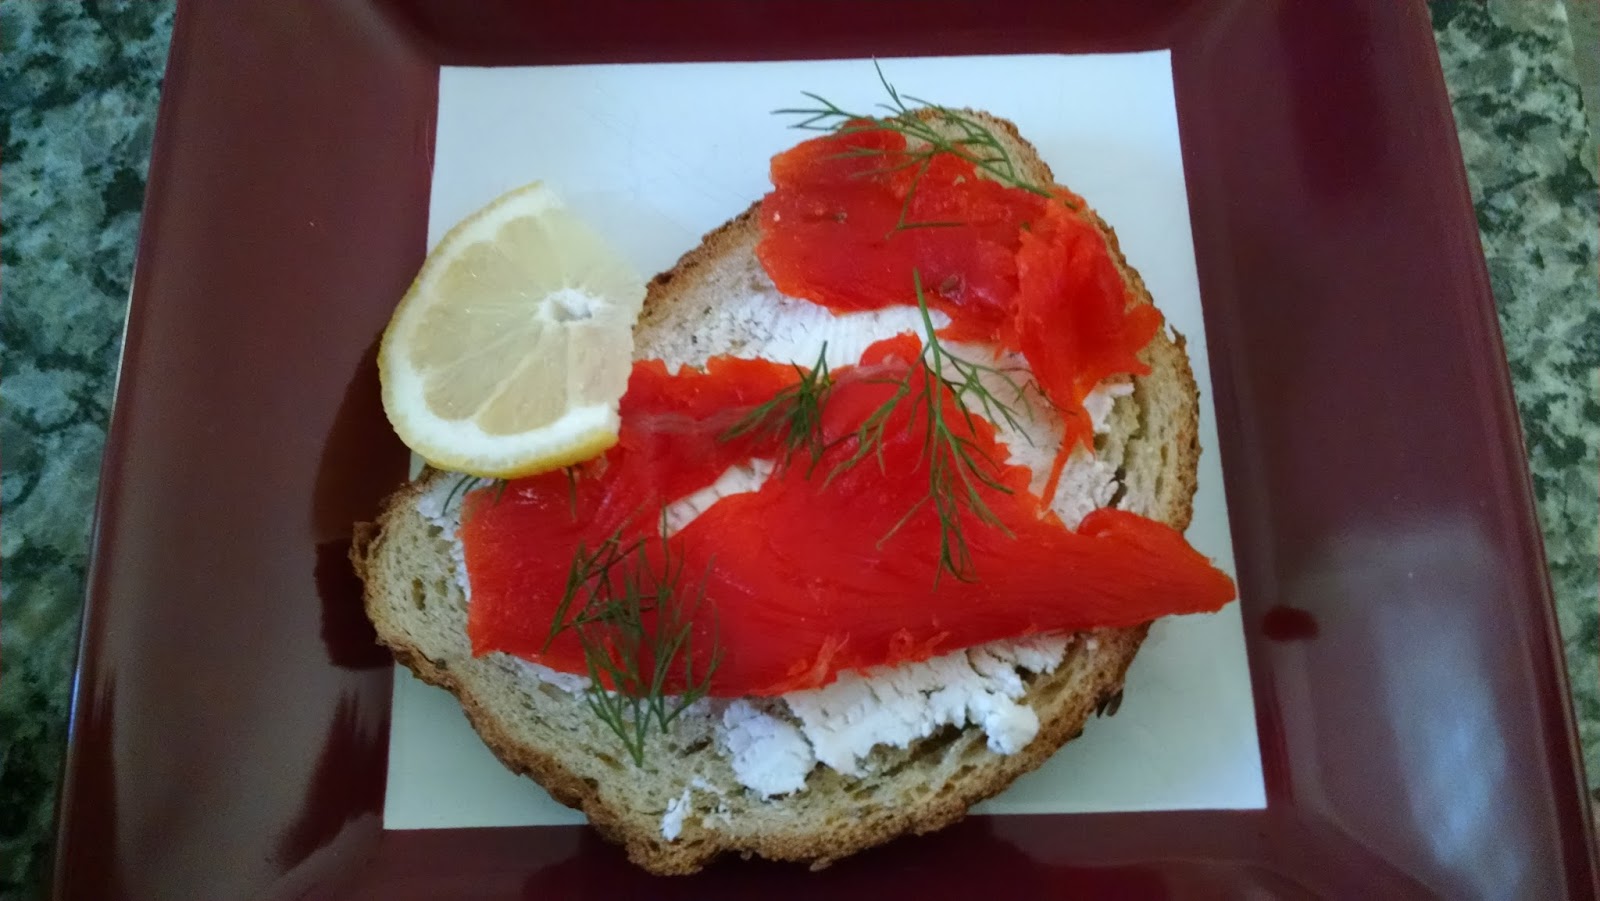
I got the Fried Green Tomato Biscuit, with a fried green tomato, perfectly poached egg, and this amazing smoked tomato hollandaise sauce. The portion was huge, but I managed to eat almost all of it! The rest of the crew got the classic (biscuit with egg and cheese), the country ham biscuit (also with a fried green tomato, but with country ham, egg, cheese and red eye gravy), and the Asheville Benedict (charred scallion cream cheese, fresh tomato, 2 poached eggs, hollandaise, roasted red peppers and a side of kale salad).


The kids got home made chocolate milk (they make their own chocolate syrup) and Jonathan got a latte (he would suggest getting an extra shot, because it's very milk-y). All of it was so, so good! We were glad that we were there on a Thursday morning, though, because there was a bit of a line, but I could imagine that it gets really crazy on the weekends (it's across from a church, so Sundays must be especially busy!). The area that Biscuit Head is located is also kind of fun and funky, with a coffee shop that roasts its own beans, an ice cream shop, bike shop and a brewery, all within walking distance of Biscuit Head.
Now that we were fat and happy, we headed out of town to find Chimney Rock, a cool rock formation that you can climb to (there are a series of steps that you take all the way to the top). Be sure to get the correct address if you are using your GPS, though, because we apparently picked the wrong listing in ours (several for "Chimney Rock" came up when we did a search), and we ended up driving up another mountain to the actual end of the road. I'm not kidding you when I say that we stopped, there was no road, and at the end of the pavement was a spray painted line that said "The End". So....we had to turn around and go down the mountain and over to another mountain. All told, our detour took us an hour out of our way. I'm glad we persevered, though, because
Chimney Rock State Park was pretty neat.
Chimney Rock is a 315 foot monolith, and by the time you get to the top, you are at an elevation of 2280 feet. You have to climb a billion stairs to get there, though. From the picture on the left, it kind of looks creepily phallic, but I didn't really notice it at the time. The climb is worth it, though, because you get views like this:

I'm not gonna lie, though. The climb was hard, and my legs felt like rubber by the time we got back down. It is something like 1500 stairs round trip.
Another part of the park, just a 10 minute hike from Chimney Rock, is Hickory Nut Falls. Super pretty and apparently part of the movie Last of the Mohicans was filmed here. I loved that film, so I kind of had to make that trek anyway. So glad we did!

Again, there were more stairs, and after the climb down from Chimney Rock, it almost did me in, but I stuck with it and carried on. The stairs to the falls added another 400 stairs, so by the end of the day, we logged in almost 2000 stairs! Glad I have fairly good knees! Plus I didn't feel so guilty indulging in an ice cream treat afterward.
When we got back to Asheville, it was still early afternoon, so we went back over towards the River Arts District to
Sow True Seeds. A friend's sister works there, and my friend asked that we pick her up a pack or two. I was interested in getting some myself, so off we went. What a neat store! They have an amazing variety of organic and heirloom seeds. I was so excited, I forgot to take pictures, but if you are in Asheville and are a gardener, check this place out! One Monica's recommendation, we decided to go to Buxton Hall for dinner, but as luck would have it, they didn't open for dinner for another hour. Not surprisingly, there just happened to be a brewery. Right. Next. Door. It was kismet. So, we spent a little time trying some of the brews at
Catawba Brewing. I wasn't a big fan of most of them, but my husband was happy, and that's what counts.
Unfortunately, the kids were getting restless and Buxton Hall still wasn't open, so I used my Dig Local app and found a chocolate shop right around the corner. So lucky!
French Broad Chocolates roasts and processes their own cocoa beans right there, and the aroma is glorious! So we kind of had dessert first (they had free samples) and bought a few more to take home for later.
Apparently, there is an affiliated
French Broad Chocolate Lounge, but we didn't go there, because at this point,
Buxton Hall was open and we wanted to get a taste of this barbeque that so many people like (it was even mentioned in a recent article in Parade magazine).

Buxton Hall has all the usual fare: pulled pork, collard greens, beans, cole slaw
As well as waffle fries and ribs (to be honest, Max was not a fan, finding then too dry, and regretted not getting the catfish, and we felt guilty for kind of pushing him towards the ribs, which he usually loves). So much family guilt and regret going around. It wouldn't be a family vacation without it, amiright?
But I cannot say the same for my dinner entree for the night: the South Carolina BBQ Hash and Rice. Described as "pork, all the yummy bits, barbeque sauce and spices," our waitress felt that she had to warn me that the "yummy bits" referred to some of offal, but I said "Bring it on!" So glad I did, because it was rich and delicious, the rice providing a textural contrast to the hash. It was something I couldn't get around where we live, so I was really glad I tried it!
The next day was our day at the Biltmore. To say the kids were excited was, well, not at all true, but to help ease the pain of doing something mommy wanted to do, we took them to a great donut shop called Hole.
Unlike some donut shops these days that pride themselves on a bazillion choices in all kinds of whacked out flavor combinations, Hole is more of a purist's donut operation. The kitchen is a simple as can be:
They only offer one type of donut (yeast-raised), with 4 different topping options (toppings can change from day to day). On the day we were there, they had plain glazed, Indian spiced, cinnamon sesame topping, and a cacao nib. On their
Facebook page, they showed various flavors such as bourbon maple, saffron almond and ginger cream cheese. Whatever you get, they are going to be glorious! They don't fry the dough until you order them. This is our dozen getting fried:
How can you not eat every single one??
They also have great chocolate milk and coffee, along with fresh squeezed OJ. Even
Bon Appetit magazine recommended it (along with a bunch of other places that we didn't get to so check out the article).
Our day at the
Biltmore had a rather inauspicious start, when GPS, yet again, led us astray. This time it was only a couple of miles out of the way, though, before we figured it out, but even so, that delay meant a huge line to wait for the shuttles that take you from the parking lot to the Biltmore house. Also, because it was early spring, not a whole lot was blooming. This photo was taken walking back from the restrooms, but you can see that there isn't much in bloom at this point.
This shot shows a little more greenery, but not much. It was clear, though, that the gardens were (or would be) gorgeous!
I didn't really take pictures of the inside of the house, because it was pretty crowded (even for a Friday) and couldn't get good, unobstructed shots, but maybe another weekday would have fewer crowds. It's really quite an amazing house, and if you've never been there, I highly recommend trying to see it if you can. The next two photos are from the back "porch," which overlooks a large portion of the estate. At one point the Vanderbilts owned 125,000 acres, but it is now "only" 8,000. A large portion of the original estate was given to the federal government to create the
Pisgah National Forest.
Here's a picture of the side of the house. The windows were huge!
If you go, plan on staying most of the day. In addition to the house, there are lots of gardens to walk through, plus there is
Antler Hill, that has farm buildings and a vineyard to visit, as well as
Biltmore Village, which started out as a planned community to house the large number of workers who made the estate run, but is now a historic community in its own right. We ate lunch at a cafe on the estate, but it wasn't much to write home about. Perfectly fine, though a bit pricey for what you got. We ordered a farro kale salad, chicken salad on a croissant, chicken tenders, and a turkey sandwich. Here's a picture of my kale salad:
On our way out, I snapped a couple of more photos. It gives you a sense for how enormous that house really is!
We had some time in the afternoon, so we went to downtown Asheville to take a look around. I highly recommend the Appalachian Craft Center, which sells all kinds of local crafts, from sculptures, to wooden toys, to pottery, even food. I bought some local honey and what was unappetizingly called "toe jam," but it turned out to be delicious and not just a goofy joke.
For dinner, we sought out the
Tupelo Honey Cafe, which strives to use local sources to produce delicious, Southern-inspired food. After our lackluster lunch, we were ready to dig in one last time to a hearty, down home meal. We ordered biscuits with blueberry jam, pickled and fried vegetables (both delicious!)

sweet tea (natch)
curry fried chicken thighs with pickled beets and greens,
Shrimp and grits (sorry for the shaky photography, but I was trying to be inconspicuous, yet take a boatload of pictures of our food. Didn't want to be THAT person, although I pretty much was)
meatloaf with mashed potatoes and mac-n-cheese,
and a "shoo mercy" burger. This is basically their version of "build your own" burger with toppings, but their choices include fried green tomatoes and pimiento cheese. I like how my husband went with the side salad. ;-)
Everything was really tasty, and I would certainly come back, if it wasn't for the bazillion other great food places yet to try in Asheville, which we must save for our next trip!
Bonus section:
On our drive back home, we made a point to stop at
Natural Bridge, Virginia. I thought it was just the natural bridge:
But there is a whole learning center, a native American (Monacan) re-created village site with costumed reenactors, as well as a water fall. By the time we got there, the Monacan village was closed down for the day and the boys didn't feel like walking all the way to the falls (apparently it's about a 2-mile round-trip hike), so we looked around the bridge and the education center, got in the car and drove the rest of the way home. I tried to get a photo of the boys next to the bear. This is what I got:
My sons are goofballs. Anyway, we loved the trip to Asheville and can't wait to go back! If you've been there, what are your favorite places to see and things to do (and eat!)?