Tuesday, October 16, 2018

It's Slow Cooker Season!


NOTE: Life gets so crazy sometimes. Believe it or not, I started this post 10 days ago. That being said, it's still a good time to check out some new slow cooker recipes!

The October 2018 issue of Cooking Light had a whole article on slow cooker recipes. I love my slow cooker! I know the Instant Pot is all the rage, but I don't have the storage room nor the inclination to go out and buy one any time soon. Besides, I only just bought a new slow cooker a couple of years ago, so I don't want to get rid of it so soon! The two features I definitely wanted when I was looking to replace mine (the on-off dial had broken off) were a warming feature, that would stop the cooking but still keep the food warm, and a heat-safe insert, so I could brown right in the insert then put it in the slow cooker, turn it on and go!

Slow cooker recipes that required browning and extra prep like that used to irritate me, since part of the convenience of the slow cooker is one-pot cooking (i.e., less to clean up), so I would totally skip over recipes that required getting out a skillet to brown or saute ingredients before putting them in the cooker. Now that my insert can be used on the stove top, however, I am much more amenable to them. Both of the recipes I tried required browning of the meat, and it does make a difference. Just be sure to get a really good, dark sear on it (which means using high heat). Because you need to have a higher heat, I don't use olive oil, sticking with canola oil, which has a higher smoke point, so less likely to burn at the higher temperatures.

Anyway, this week I tried two of the recipes feature in the Cooking Light article. The first one was Braised Pork with Potatoes and Shallots. I have to admit that, of the two, this one was my least favorite for two reasons. First, the sweet potatoes turned mushy, which I was afraid of and tried to layer them on top, but that didn't really help. Second, the sauce just wasn't that flavorful, even though I tried reducing the sauce to concentrate the flavors. Don't get me wrong, the family ate it up, but compared to the next recipe, this one came in second.

Here's the meat, getting a good char on. I love that I can do this in the slow cooker's insert!


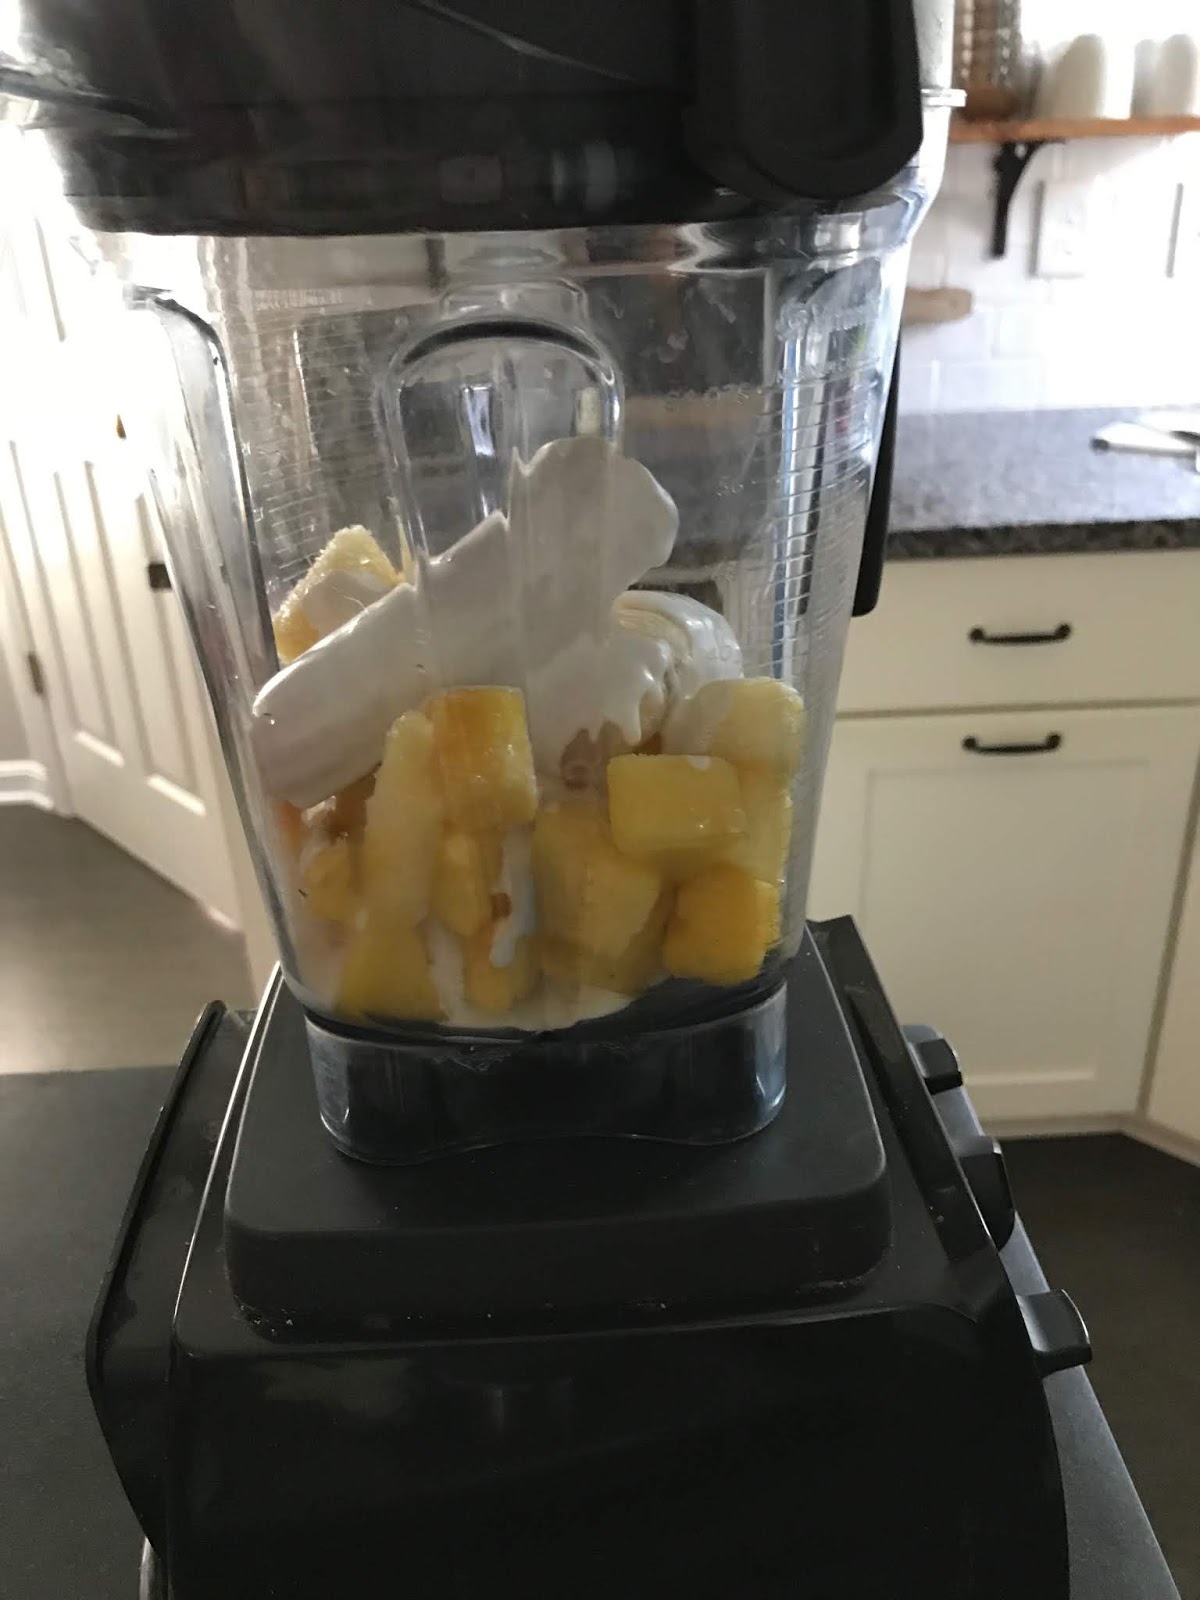
Everyone into the pool! It was pretty full....


Here's a shot of the controls on my slow cooker. High, Low and warm functions (it automatically switches to "warm" once the cooking time is done) as well as a timer sold me on this one. The fact that I could use the insert on the stove top was a bonus!


I tried to reduce the cooking liquid to concentrate the flavors. Alas, I didn't boil it down enough, because the sauce still wasn't very flavorful...


And here's the finished product!  I just piled everything on a platter to serve family-style. You can see what I mean about the mushy sweet potatoes. The family still ate it up (except for my youngest, who avoided the sweets). But you know what I did with the leftovers? I mushed up the sweet potatoes in the sauce, to make it thicker, then diced up the rest of the pork and potatoes, heated it all up and used it as a filling for savory crepes. And even son #2 at it up!


I don't have a picture of the leftovers as crepes, but here's a link to the recipe I used. I am actually including the discussion of how to make crepes, which I found helpful as well.

The second recipe was Asian Short Ribs.  This one was a winner! I couldn't find short ribs, and chuck roast was even on sale, so I used that. The recipe was pretty straight forward, but I did switch it up a little by rubbing some of the meat with gochujang sauce, a fermented chili paste. Here's the version I have, which is really the only version that I found at the grocery store. It's not super-spicy, but it added some great flavor to the beef.


The rest of the recipe was pretty easy. The trickiest part, I think, is trimming off the tendons and silverskin, the shiny, silvery part of the roast that is part of the connective tissue. I find it slippery and hard to slice off.  But anyway, I trimmed it off and still have all my fingers intact, so that's a win in my book! I didn't get quite as many pictures of the process for this recipe, but after browning the meat, it's really just dump and go with the rest of the ingredients:

Pre-cooking:


Post-cooking:


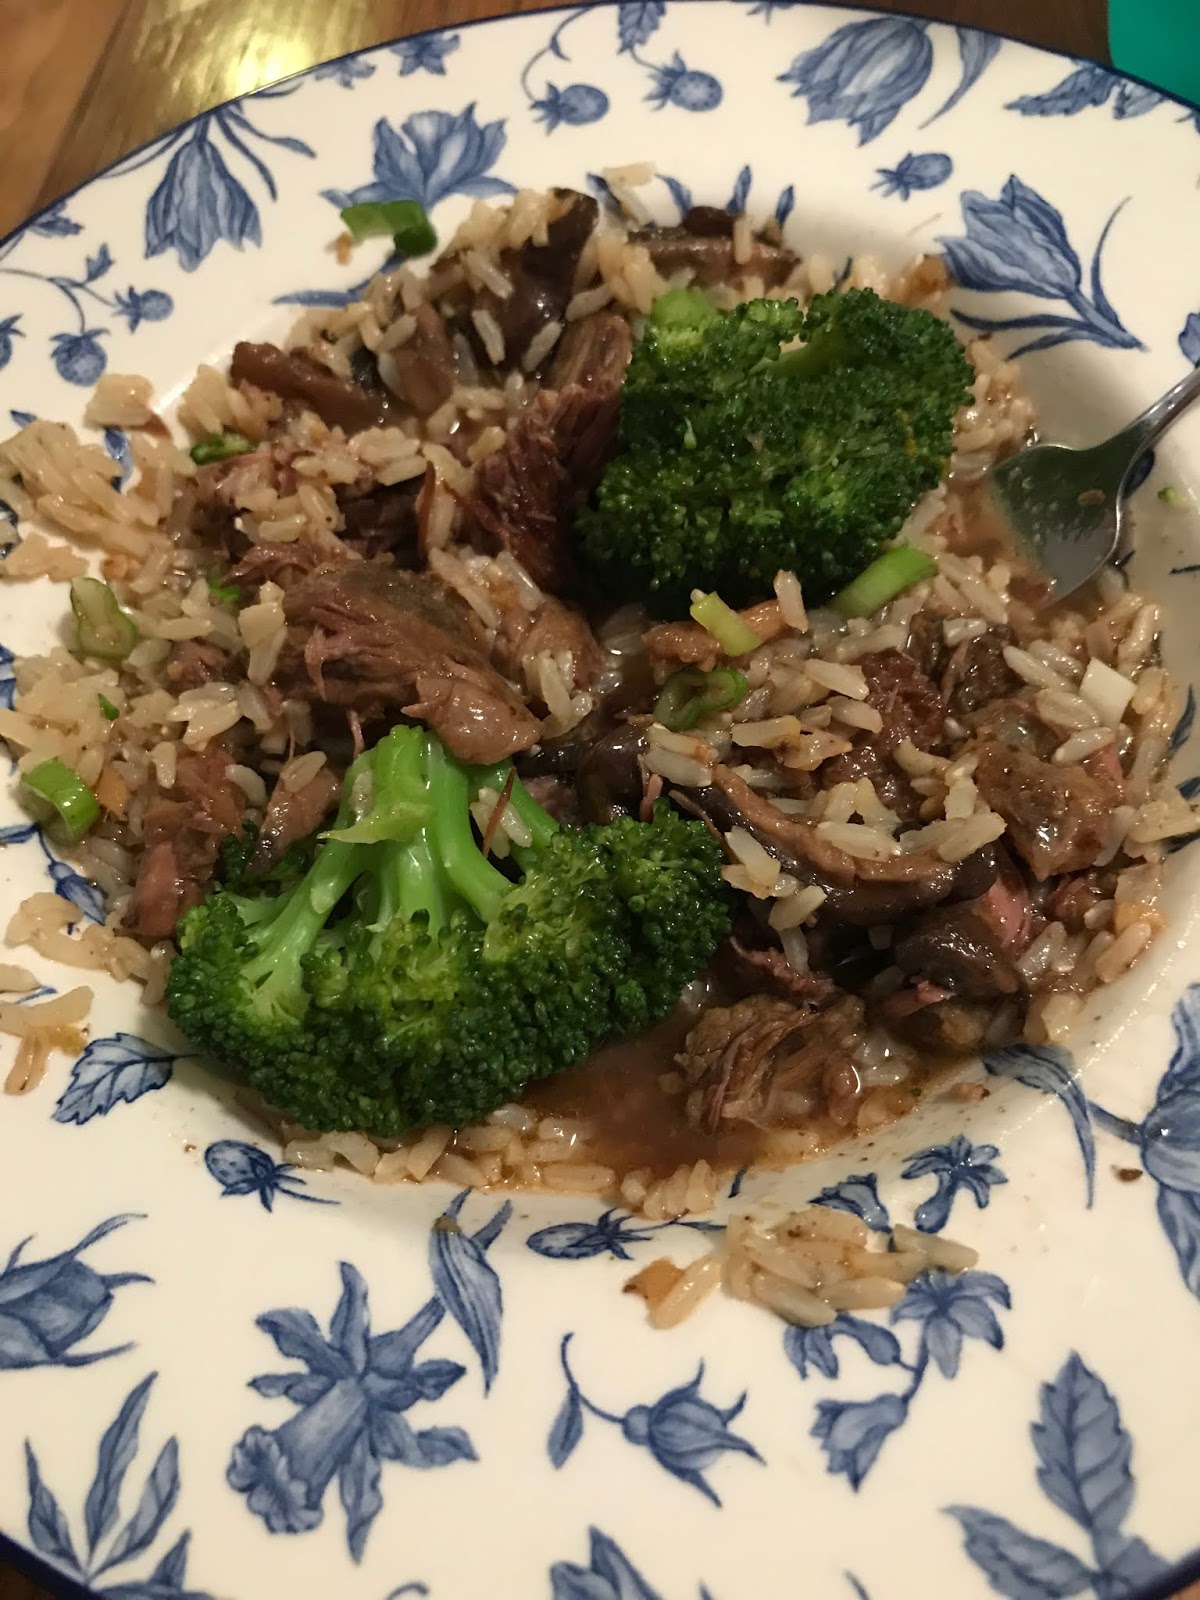
Here is a hasty picture of the finished product. I forgot to take a "pretty" picture, so this is a photo of my son's partially-eaten plate. LOL  I served it over rice with steamed broccoli, because I didn't think the mushrooms were enough to make it "healthy". It was delicious!


Do you have any new favorite recipes for your slow cooker? Let me know!

Friday, September 14, 2018

Hummus, it's what's for dinner?


I love hummus! Roasted garlic or roasted red pepper are my favorite variations, but I really like any kind of hummus and pita bread (or veggies!) for snacking. I never considered using it as an entree (unless it's part of a "snacks for dinner" line up like I've done in the past), until I saw a recipe in an email from Epicurious (my main online source for recipe inspiration).  They posted a recipe for Hummus Dinner Bowls with Spiced Ground Beef and Tomatoes that sounded really interesting, so I thought I would give it a go, despite the extremely long recipe name.  LOL

It does call for making your own hummus, but if you use canned chick peas, it's really easy to do (and more economical than buying already-made hummus).  However, no one is going think less of you if you take a short cut, especially on busy nights when you need to get something on the table FAST! One more plug for making your own hummus, though: you can make it ahead of time if you know that you're going to be pressed for time the night you want to make this. You could also put together the tomato salad ahead of time, so that the only thing you have to do was cook the ground beef, then put the bowls together.

The salad is also pretty simple: tomatoes, lemon juice, parsley. It's a nice salad to have in your arsenal, especially if you have a lot of tomatoes from your garden to use up.


All you do with the beef is brown it in a skillet with the spices:


Like I said, the hardest part, really, was browning the beef. The combination of spices was really tasty! And the whole family gobbled up every bite! The final product was very filling.

You wouldn't think that of something we generally think of as a snack food, but it was fun to kind of turn things upside down and look at a known food in a new way! If you are vegetarian, this could easily be adapted, substituting roasted vegetables for the ground beef.  If you're a cheese fan, I think throwing some feta on there would be tasty, too!


Here's the link to the recipe again, for Hummus Dinner Bowls. If you are inspired to make this, let me know what you think!

Thursday, September 6, 2018

Tomato Time! Easiest Tomato Sauce Ever!


Hopefully some of you still have an abundance of cherry tomatoes in your garden. Unfortunately, I do not, although our tomato plants, after anemically growing all summer, seem to have gone crazy the last couple of weeks. I am hopeful that in the next week or two, we'll be up to our ears in tomatoes, which will go to tomato sandwiches, BLTs and sauce. However, for now, I still have to buy them. It's kind of sad, but this recipe for Burst Cherry Tomato Sauce is really good and very easy, so I am happy to buy a few pints of tomatoes just for this!

Epicurious, where I found the recipe, claims it's a 15-minute sauce, but it took my tomatoes longer to cook, and even then, not all of them burst. If you decide to take matters into your own hands (like me) and pop the "unburst" tomatoes with a paring knife, beware of squirting juices. Consider yourself warned! Even so, with the garlic and tomato prep, you can get this started after you put a pot of water on to boil for the pasta and still have dinner on the table in less than 30 minutes, so this is a great weeknight meal to have in your arsenal.

Along with the pasta and olive oil, this is pretty much all you need for this recipe! We still have basil, so that's the one thing from our garden...


There were some suggestions in the comments, and I liked the idea of putting the garlic in the oil at the same time you put the tomatoes in, otherwise the garlic might get too brown (or even burnt). Doing it this way, the garlic still flavors the oil, but the risk of burning is less. From this picture, you can see the pasta simmering away in the background. 


I chopped up the basil while the sauce was cooking and tossed it in right at the end, just to incorporate everything before I put it on top of the noodles. And, following up on my theme last week of satisfying different palates, you could serve up some of the pasta plain (or with butter and cheese as my youngest loved when he was a todder, serving raw cherry tomatoes on the side if your child has an aversion to cooked veggies), or top the pasta just with the tomatoes, and then add the basil to the rest of the sauce for everyone else. See how easy that is? And you don't even have to dirty extra pans!


Finished product! If you are gluten free or doing Whole 30, I'm sure this would be delicious with zucchini noodles as well!


Sunday, August 26, 2018

Cooking For Different Tastes


I don't think our family is that unusual in that all of us have different preferences and levels of pickiness. My husband, for example, will eat anything I put in front of him. My older son, at 16, is pretty much the same way, because he's a teenager who eats everything in sight, really. My younger son, at almost 14, has always had a more sensitive palate (part of which, I think, stemmed from issues of lactose intolerance and reflux as a baby/toddler), and although he's getting better and is willing to try things (it's a rule at our dinner table), he is much more picky about what he eats. And it's hard to know, exactly, what he will eat, since sometimes he doesn't like something because of the flavor, other times it's because of the texture. Sigh.

For someone who is an adventurous cook and who rarely makes the same thing twice (really!), it can be a challenge to make things that are interesting yet will appeal to everyone. I never did get into the habit of being a short-order cook (making one meal for the kids and another for the adults), but I do like to make things that everyone will eat, so one of my tricks is to plate things in layers. Also, if someone doesn't like what I make, he is free to make something else of their own choosing, but I won't make it for them. My youngest son learned early on to make his own PB&J (not the healthiest thing, but I always had at least one vegetable he would eat, too).

One way I did this, especially when the kids were littler, is to make pasta, but before I put on a sauce, I would put some of the plain noodles in a bowl for my youngest, then a bowl of pasta with sauce for my oldest son, then pasta, sauce and extras (sun-dried tomatoes, artichokes, olives, etc) for my husband and me. This is relatively easy to do for pasta, but one can only eat so much pasta. Another trick is with sauces. Grill up some chicken, keep it plain for the kids, do veggies (raw carrot sticks for one, roasted or grilled for the rest of us -- no biggie, since they have to be prepped anyway), then add a sauce (pesto or romesco, for example) that people can put on their plate as they wish. Same with salads and noodle bowls (two of our favorite types of meals), along with a "snack plate" which I have blogged about before. Tacos, of course, are also popular in our house, because I just put every part out, and they make them how they want. But sometimes, you want something a little more sophisticated.

A recipe I found on Epicurious encapsulates this idea very well, and it's relatively easy to do. It's a spice-rubbed pork tenderloin with grains (you can choose farro, rice, quinoa -- whatever the majority of your family can tolerate) and a salad with a sauce, building flavor from one level to the next.


The recipe gives three options for seasoning the pork loin. I chose the middle option, which included salt, pepper, cumin and brown sugar, because I knew my pickiest would still eat it if it had cumin on it, plus, you can add a little (not as much as in the recipe) to get a hint of the spice, without being very forward with it.

I then chose to make the grain salad with farro, which I have made before. Everyone in my family is pretty adventurous when it comes to grains, so I don't have to worry about that, but this would work just as well with rice. You can see for the simplest plate I made, I separated out all the grain salad elements, which is easy to do, since you just need to set aside unseasoned tomatoes and cucumbers as you prep them (in this case, I left the cucumbers off all together, since he won't eat them). I usually just have plates out and make my son's plate as I go along. For the next level of flavor, I knew my older son didn't like olives, so I made the salad up to the point of adding the olives and feta, serving some up on his plate before I tossed everything together. To get him to try the feta, I served a small bit on his plate, separate from the grain salad.

Then, for my husband and me, I added the olives and feta to the salad, and served with the pan sauce. Because my youngest likes broccoli, I added some steamed broccoli to everyone's plates as well. It complemented the rest of the dish, and we can always use an extra helping of veggies, right?

Do you have simple ways to serve meals that appeal to different tastes? Please share your ideas!


Thursday, August 23, 2018

Dole Whip? Dole Whip? Three Dole Whips!


Anyone else have hundreds of pinned recipes on Pinterest that you have yet to make? Hopefully it's not just me. LOL

Stick with me the next several posts, because I'm going to start working my way through my pinned recipes to see if they're worth making again. I organize my pins in two different folders. My "Yum!" folder is recipes I want to try that look good, and "Family Food Favorites" are the ones I've made that I would make again.

I started out with something easy, mostly because I already had the stuff on hand, and I had some leftover pineapple from another thing I made. Plus, the Dole Whip you can buy at Disneyland seems to have cult status, so if there's a home made alternative for you to get your fix, I'm here to help.  The problem is that I never had it when we went to Disney, so I don't have a point of reference for this.

That being said, this version is super simple (3 ingredients) and quick to put together, no need for freezing after you blend it. I have a Vitamix blender, so that made it a lot simpler, but even so, I still had to use the pusher thing to get the ingredients to stay down near the blades. Plus there was some stopping to scrape down the sides. 

 This is what I mean by the "pusher thing":


The recipe is basically dump all the things in the blender and puree together. Pretty simple (as one would expect from a recipe in Real Simple magazine!).

So here are all the ingredients in the blender:


In the process of making it smooth:


Like I said, it took some stopping and scraping and pushing around to get it all smooth...


Final product:


I thought it was pretty easy, and would even stock the ingredients to make again (the only thing I don't regularly have on hand is frozen pineapple anyway). I  like it, because it has real ingredients and no processed ingredients (is coconut milk considered "processed?" IDK). This is ready to serve right out of the blender, but if you have leftovers and put it in the freezer, it gets pretty solid, so you'll have to pull it out to soften to eat. 

Rather than copy and paste the recipe, I'm posting the link to the recipe located on the Real Simple website (it's called 3-ingredient Pineapple Soft-Serve), mainly because of copyright, but also because I'm not a fast typist and this is the easiest route to take. Work smarter, not harder, I always say!

For those of you who have had the real Dole Whip, let me know what you think. Is this an adequate substitute?


Wednesday, August 8, 2018

The best cake, as told by Norwegians


In Norway, there's a cake called Kvaefjordkake or verdens beste kake (world's best cake). Now, if you know Norwegians, or Norwegian-Americans at least, you'll know that we are not a people to use superlatives very often, because we are not a bragging type of folk, not given to creating a bunch of excitement. So, when I saw the name of this cake, I knew I had to make it! It's a sponge cake that you bake with meringue right on top, sprinkled with almonds, then sliced and filled with vanilla cream or whipped cream. My first attempt didn't go well. I used a recipe from Sverre Seatre's book, "Norwegian Cakes and Cookies," but it didn't work out. The meringue was fine, although I was starting to run low on the second layer, but one of the cakes underneath didn't bake and it was hard to get out of the cake pans. I don't do as well with recipes that I have to divide stuff equally into pans, to be honest. Part of the problem is that I'm too lazy to use my scale to get it just right...

Anyway, still intent on trying this recipe, I looked online and found a couple of options. I ended up using the ratios from one, but some of the directions of the other, so I kind of mashed up the recipe. The first recipe I used is from Sweet Paul, and I used it mainly because it had the number of eggs that I had happened to have pulled out of the refrigerator to come to room temperature. The second one is from Daytona Strong, one of my go-to people for Norwegian baking. Her site will also give you the history of this cake.

So, on to the cake. It was a little fussy, but not much (would have been easier if I had 2 bowls for my Kitchen-Aid mixer, but I don't, so I made due). You don't have to toast the almonds beforehand, because they get plenty toasted while baking. I took a suggestion from the Sweet Paul post and sliced strawberries to put in between the layers. I think it added a little brightness that cut through the richness of the cake. I also added a little almond extract to the cake, to enhance the almonds on the meringue, but I couldn't taste it much. Next time I make it, I might add more.

I shared it with my Bible study group, and it was a big hit! I will definitely make this again. I think you could have fun changing the cream filling (maybe do a mocha, which would taste good with the almonds, or lingonberry sauce for something fun for the holidays), since the basic cake, while very tasty, is a bit of a blank slate between the plain sponge and the unflavored meringue and vanilla cream.

My main tip for this cake, is to make sure you have all of your ingredients ready to go for both the cake layer and the meringue layer. It makes the process go a lot smoother.


Is it the world's best cake? Most of my friends really liked it, a few definitely said yes, but my heart is with chocolate, so I don't know. Maybe I'll have to work on a chocolate version to see how that might compare! Hope you enjoy this! If you experiment with different flavor combinations, let me know how it went!

Norway's "World's Best Cake"

Ingredients for the Cake layer

10.5 Tbsp butter, softened to room temperature
2/3 cup granulated sugar
1 1/3 cups all purpose flour
1 tsp baking powder
5 large egg yolks (you'll need the whites for the meringue, recipe follows)
1/3 cup milk (I used 2%, although the original recipe used whole milk)
1/8 tsp pure almond extract (I use Penzey's) -- feel free to omit or add more (not more than 1/4 tsp though), according to your preference

Ingredients for the Meringue

5 large egg whites
1 cup granulated sugar
1/4 cup slice almonds

For the Whipped Cream layer

1 cup whipping cream
1/2 vanilla bean (again, I used Penzey's)

1 pint strawberries, cleaned and sliced

To make the cake:

Preheat oven to 350 degrees. Make sure your rack is in the middle of the oven. Line a small sheet pan (mine was 15.5 inches by 10 inches) with parchment paper. Set aside.

Cream butter and 2/3 cup sugar until light and fluffy, about 3 minutes. It should look like this:


Add the flour and baking powder, mix in to the butter/sugar mixture, then add the egg yolks, milk and almond extract.

Scrape the batter into the prepared pan, and spread into an even layer. Set aside while you make the meringue.

To make the meringue, using a clean bowl and dry beaters (I used the whisk attachment on my Kitchen Aid mixer), whip the egg whites until they start to look white and foamy, then gradually start adding the sugar. I add it in a slow stream while the mixer is running, but you can also sprinkle in a tablespoon at a time. Continue whipping egg whites until they form stiff peaks. If your whites were at room temperature, this should only take about 4-5 minutes using a stand mixer. DO NOT add all the sugar at once. it will make the meringue more marshmallow-y soft and it won't crisp up when you bake it. Believe me, I've tried it as a short cut. Don't do it.

Here's what they should look like:

Evenly and carefully (use a light touch!) spread the meringue onto the (unbaked) cake layer, then sprinkle with the sliced almonds. (hint: you don't have to spread the meringue all the way to the edges, because it spreads and puffs up a bit while baking)
This is what it looked like before baking:


Bake at 350 for about 30-35 minutes. I was nervous because my first attempt ended up with gooey cake batter, so I left it in a little longer than I needed to, but it turned out fine. Cool completely in the pan.

For the whipped cream layer, pour whipping cream into a chilled bowl (using a chilled bowl and beaters makes the whipping go faster), then split the vanilla bean and scrape the inside of the bean (those are the seeds) into the whipping cream. Discard the outer part of the vanilla bean (or add it to your vanilla extract bottle). Whip cream and vanilla seeds together until soft peaks form, about 2-3 minutes.

To assemble the cake:

Cut cake layer in half width-wise, so you have two pieces, each about 10 inches by 7 3/4 inches. Put one layer on your serving plate:


Then fill with all of the whipping cream and most of the sliced strawberries. Save about 10-12 slices for the top).


 Place second layer on top of the first layer, then place remaining strawberry slices in a line down the middle. Refrigerate for one hour before serving.  Enjoy!


I hope you enjoy this cake! It should serve about 12, depending on how big you make the slices.


Monday, April 30, 2018

Binge Baking

I have a confession to make. I get a LOT of food magazines. In my defense, some are gifts (Cooks Illustrated), some are just sent to me (I'm looking at you, Eating Well and Cook's Country) and some I really just like to read and try the recipes (Bon Appetit, Rachel Ray Every Day and Cooking Light). Plus I really look forward to Wednesdays, when the Washington Post (our local paper) puts out its weekly Food section. AND, my neighbors and I swap our magazines, so I also get Southern Living, Better Homes and Gardens, Martha Stewart Living, Woman's Day and Women's Health. There's a lot of inspiration each month, so it's not surprising that I don't make the same meal more than once (the only things I make on a sort of regular basis are tacos -- but with different proteins -- meatloaf and chili). Sometimes I think my kids would like a little regularity, but they don't complain.

It's kind of hard to keep up with all of them, but some months I find more to try than others. Case in point was this week. This month's Bon Appetit had a feature on the "New Basics" that had a very interesting Sesame Tea Cake that I wanted to try and the paper had a feature on baking with salted butter that sounded interesting. I don't usually have a lot of time to do multiple bakes in a week, but this weekend kind of opened up when some of our activities were canceled, so I took advantage and made all the things in one weekend. YIKES! My family and neighbors were happy, because I shared some with them!

The first thing I tried was the Sesame Tea Cake from Bon Appetit. It involved finding black sesame seeds, but to my surprise, my area grocery store, Wegmans, carried them in the international foods aisle. Whew! For those who can't find them in your grocery store, you can also get them on Amazon, of course or my favorite spice shop, Penzey's.


I thought it turned out really nicely, and for those who don't like very sweet treats, this is perfect for you! Slightly sweet, but a little nutty and salty, even my kids liked it (my husband and older son ate almost half of it before we brought the rest over to our friends' house to try). It was also fairly easy to put together -- no complicated techniques or anything. With its pretty swirl pattern, it would make a nice addition to a brunch dessert platter as well!

Next up was a couple of recipes from the Washington Post Food Section. They had an article that featured recipes with salted butter. Now, I don't think I've ever used salted butter (like, at all), so I was really intrigued to try these out. Because I bought a full pound (the only amount available), I decided to try two of the recipes. First up was a recipe for financiers, a fancy-sounding name for a little almond cake. This was a little more complicated because the recipe called for browning the butter and separating eggs, but those were the hardest steps. You also have to plan a little (or not have a timeline), because the batter goes in the refrigerator for at least an hour. On the plus side, once the batter has rested, it's super simple to pop them in the oven. I used mini muffin tins, as directed by the recipe, but had a good amount of leftover batter. The consistency was similar to a madeleine batter, so I made the rest using my madeleine tin. They turned out pretty well! If you really wanted to get fancy, you could dust with a little powdered sugar before serving. These go really nicely with a cup of tea. :-) You can find the financier recipe on the Washington Post website.


After I made the financiers, I still had 2 sticks of salted butter to use up, so I made the Milk Chocolate and Raspberry Jam Blondies from the same article. Unfortunately, I didn't have any milk chocolate handy, nor did I have raspberry jam. What I DID have was semisweet chocolate chips and some jammy balsamic cherries, so I gave it a shot. I really liked them! I left part of the pan unsullied by the cherries, because we have a purist in our house, so he wouldn't have liked them like that.  In the end, everyone was happy!


Now, I think I need to figure out which of these I'm going to either freeze or bring to work, since there's no way we need to have all of these sweets in the house (even with 2 teenage boys)! Plus, there's a recipe for Fluffernutter cookies I've been wanting to try....

Sunday, April 1, 2018

Nutella Makes Everything Better


As Spring is slowly showing her face, I realize indulgent comfort food is going to take a back seat to fresh spring vegetables (Hello, Asparagus!) and fruits (Yay, Strawberries!), but I wanted to post my take on Nutella Stuffed French Toast.

Normally, I made French toast by soaking it overnight, then baking it in the oven, similar to this recipe, since I've always had a hard time getting the right texture doing the stove top method (mine always seemed too soggy). However, on this occasion, I was inspired by a loaf of brioche that was on sale, which is the best type of bread to make French toast with, in my opinion. I know it's already rich, since brioche has egg in the bread itself, but it gets this wonderful crunch on the outside and melting texture on the inside that is the perfect kind of French toast!


The egg-milk batter that I dipped the bread in was pretty much your standard mix, but I added a little orange peel to complement the Nutella. And to up the crunchiness factor, I coated the French toast with corn flakes. I saw something similar on a cooking show (It might have been Diners, Drive-ins, and Dives where they did the same thing, but used Cap'n Crunch cereal).

This is my dipping set up:


Honestly, the trickiest part was transferring the dipped brioche from the dipping/crunch station to the frying pan (Once you dip the bread into the milk/egg mixture, the bread gets a little delicate), but after a couple of times, I got the hang of it.


And then, it was done! Served with a sprinkle of powdered sugar and some slices of Cara Cara oranges (our favorite), it was a big hit with the family! I thought it was sweet enough without syrup, but the kids put syrup on it anyway and liked it that way, too (we use pure maple syrup so it's not quite so sweet). Hope you enjoy making this!


Crunchified Nutella Stuffed French Toast

(makes 5 servings)

Ingredients:

One loaf of brioche bread (about 8-10 slices of bread)
Nutella
4 eggs
1/2 cup milk (any kind will do: skim, 1%, 2%, whole) -- I used 2% because that's what we have
1 tsp grated (or chopped -- it should be in small pieces) orange peel
approx. 1 cup corn flakes (may need more -- keep the box around...)
butter for the skillet
powdered sugar (optional)
maple syrup (optional)
fresh fruit for serving (optional)

To make:

Spread Nutella (using approx 1-2 Tbsp per slice) on 4/5 of the slices of bread. Cover with the other pieces of bread so that you have 4-5 Nutella "sandwiches." NOTE: start with 8 slices of bread -- for 4 "sandwiches," but I had enough of the milk-egg mixture to make a 5th serving. 

Combine eggs, milk and orange peel in a shallow pan (I used a 8-inch square dish). Pour the corn flakes in another shallow dish (I used a small plate with sides so that the corn flakes didn't slide out everywhere). Set up your dipping station:


Melt 1 Tbsp butter in a skillet. I used a small skillet to make just one at a time. If you have a larger skillet to make more than one at a time, you might need more butter. Temperature of the skillet should be about medium to medium high.

While the butter is melting in the skillet, dip one Nutella sandwich into the egg/milk mixture, then turn over to coat the other side. It should feel a little soggy. Pull the sandwich out, let the liquid drip off the bread for a second, then put on the corn flakes, pressing down onto the bread a little so the corn flakes will adhere. Flip the sandwich to get corn flakes on the other side.

Transfer the dipped sandwich onto the hot skillet. Cook on one side for about 3 minutes (check to make sure the corn flakes don't burn, but they will get a deep, golden brown, then flip to cook the other side.

Repeat with the other Nutella sandwiches. You might need to add butter to the skillet as you go (there should be a thin layer/sheen on the skillet to make sure nothing sticks) and I had to keep a close eye on the French toast, making temperature adjustments as I went to make sure nothing burned.

If you like, sprinkle a little powdered sugar on top and serve with fresh fruit and maple syrup on the side.

Enjoy!