Showing posts with label desserts. Show all posts

Monday, April 30, 2018

Binge Baking

I have a confession to make. I get a LOT of food magazines. In my defense, some are gifts (Cooks Illustrated), some are just sent to me (I'm looking at you, Eating Well and Cook's Country) and some I really just like to read and try the recipes (Bon Appetit, Rachel Ray Every Day and Cooking Light). Plus I really look forward to Wednesdays, when the Washington Post (our local paper) puts out its weekly Food section. AND, my neighbors and I swap our magazines, so I also get Southern Living, Better Homes and Gardens, Martha Stewart Living, Woman's Day and Women's Health. There's a lot of inspiration each month, so it's not surprising that I don't make the same meal more than once (the only things I make on a sort of regular basis are tacos -- but with different proteins -- meatloaf and chili). Sometimes I think my kids would like a little regularity, but they don't complain.

It's kind of hard to keep up with all of them, but some months I find more to try than others. Case in point was this week. This month's Bon Appetit had a feature on the "New Basics" that had a very interesting Sesame Tea Cake that I wanted to try and the paper had a feature on baking with salted butter that sounded interesting. I don't usually have a lot of time to do multiple bakes in a week, but this weekend kind of opened up when some of our activities were canceled, so I took advantage and made all the things in one weekend. YIKES! My family and neighbors were happy, because I shared some with them!

The first thing I tried was the Sesame Tea Cake from Bon Appetit. It involved finding black sesame seeds, but to my surprise, my area grocery store, Wegmans, carried them in the international foods aisle. Whew! For those who can't find them in your grocery store, you can also get them on Amazon, of course or my favorite spice shop, Penzey's.


I thought it turned out really nicely, and for those who don't like very sweet treats, this is perfect for you! Slightly sweet, but a little nutty and salty, even my kids liked it (my husband and older son ate almost half of it before we brought the rest over to our friends' house to try). It was also fairly easy to put together -- no complicated techniques or anything. With its pretty swirl pattern, it would make a nice addition to a brunch dessert platter as well!

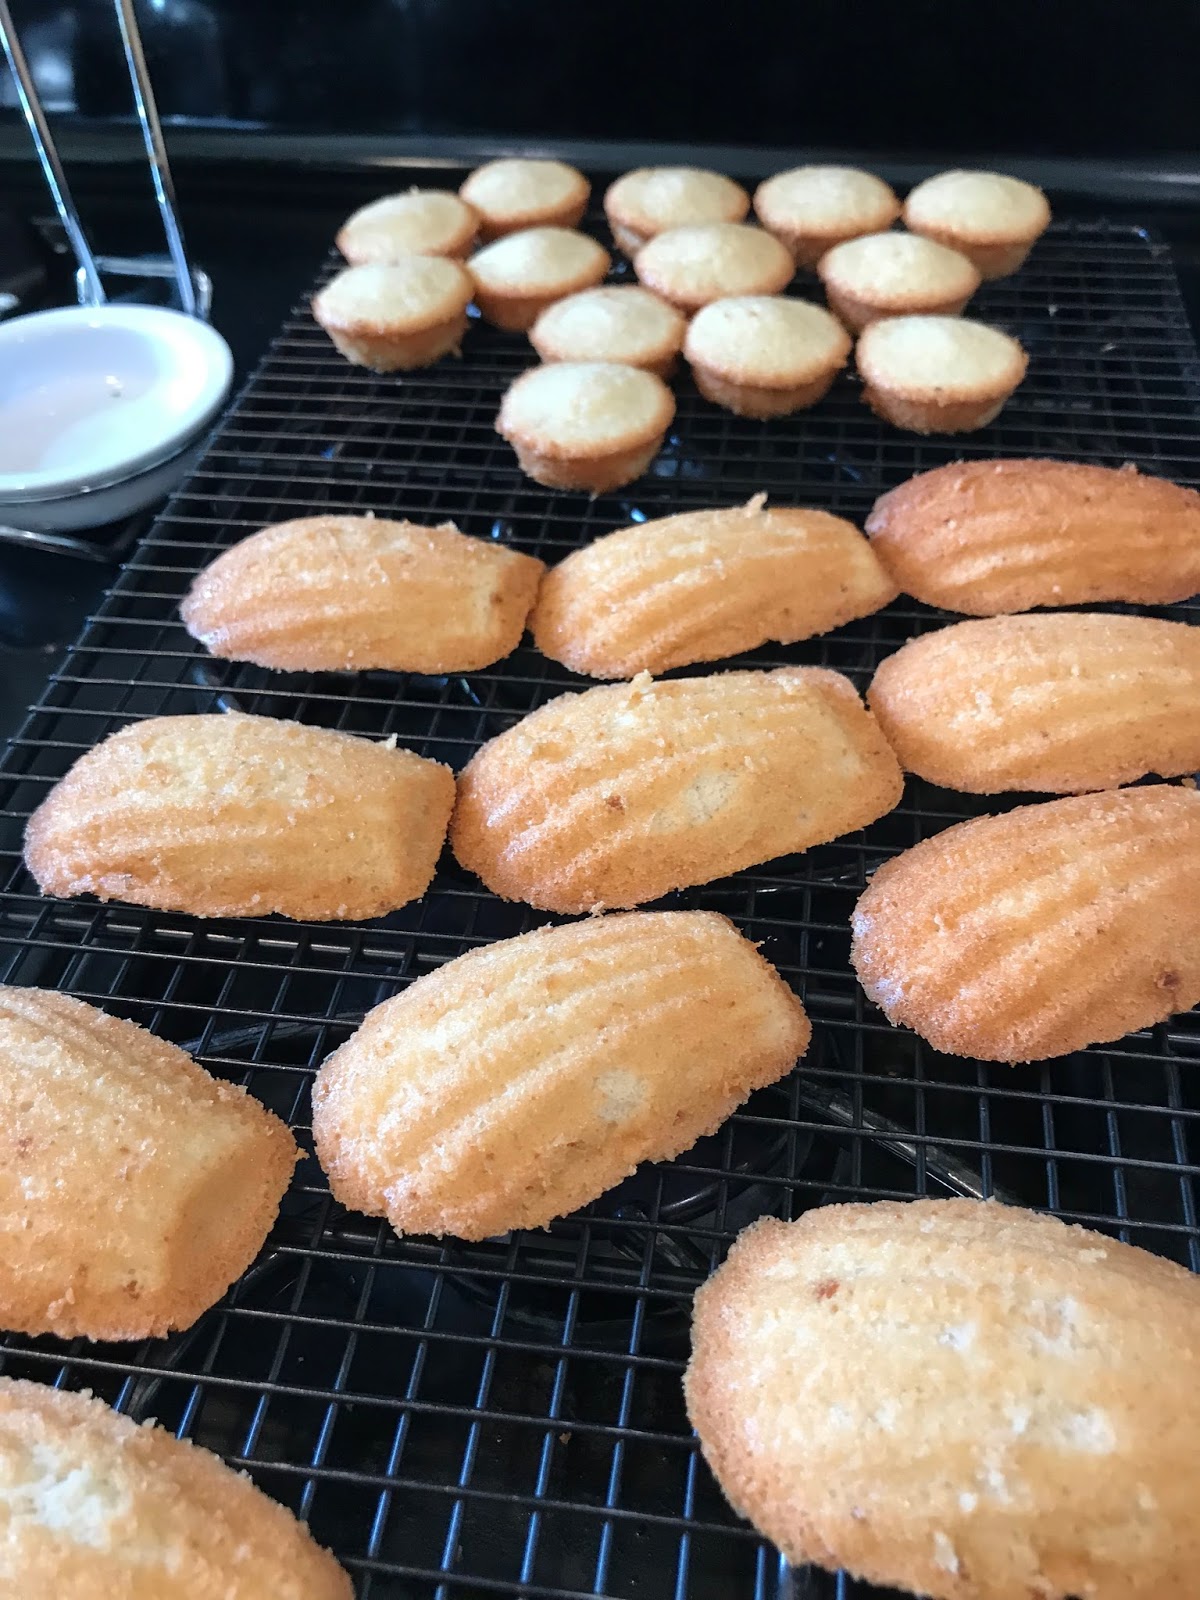
Next up was a couple of recipes from the Washington Post Food Section. They had an article that featured recipes with salted butter. Now, I don't think I've ever used salted butter (like, at all), so I was really intrigued to try these out. Because I bought a full pound (the only amount available), I decided to try two of the recipes. First up was a recipe for financiers, a fancy-sounding name for a little almond cake. This was a little more complicated because the recipe called for browning the butter and separating eggs, but those were the hardest steps. You also have to plan a little (or not have a timeline), because the batter goes in the refrigerator for at least an hour. On the plus side, once the batter has rested, it's super simple to pop them in the oven. I used mini muffin tins, as directed by the recipe, but had a good amount of leftover batter. The consistency was similar to a madeleine batter, so I made the rest using my madeleine tin. They turned out pretty well! If you really wanted to get fancy, you could dust with a little powdered sugar before serving. These go really nicely with a cup of tea. :-) You can find the financier recipe on the Washington Post website.


After I made the financiers, I still had 2 sticks of salted butter to use up, so I made the Milk Chocolate and Raspberry Jam Blondies from the same article. Unfortunately, I didn't have any milk chocolate handy, nor did I have raspberry jam. What I DID have was semisweet chocolate chips and some jammy balsamic cherries, so I gave it a shot. I really liked them! I left part of the pan unsullied by the cherries, because we have a purist in our house, so he wouldn't have liked them like that.  In the end, everyone was happy!


Now, I think I need to figure out which of these I'm going to either freeze or bring to work, since there's no way we need to have all of these sweets in the house (even with 2 teenage boys)! Plus, there's a recipe for Fluffernutter cookies I've been wanting to try....

Sunday, July 30, 2017

Peanut Butter Chocolate Bliss!


Ever since the Reese's commercial that said "Hey! You got peanut butter in my chocolate," I've been a huge fan of that flavor combination. Luckily, my oldest son loves the combo almost as much as I do, so when I showed him a picture of a peanut butter ice cream cake, he wanted nothing else but that for his birthday. 

The Today Show posted the recipe that Carson Daly's wife made for him for his birthday. Here's her version:


After reading the recipes, though, I tweaked it a little to get even more peanut flavor in there, and a little more texture by adding some chopped peanuts.  I also thought the ganache would be too hard once it was refrigerated again, and I want the gooey, almost ice cream sundae experience, so I switched the ganache for hot fudge sauce and added some of it in the middle of the cake as well. The following is my take on Siri Daly's original:

Ingredients:

  • 1 package Oreos (I used peanut butter filled Oreos, because of course!)
  • 6 tablespoons butter, melted
  • 2 pints chocolate peanut butter ice cream (I used Talenti brand - the only chocolate-peanut butter ice cream I could find at the store), softened
  • 1 pint vanilla ice cream, softened (you can let this soften in the fridge while the chocolate ice cream layer is in the freezer)
  • 1 bag Mini Reese's Peanut Butter Cups, chopped and divided (I probably used 2.5 cups total, chopped)
  • 2 - 11 oz jars of hot fudge sauce
  • 1.5 cups roasted, unsalted peanuts
  • 1/2 cup natural peanut butter
To make the cake:
1. Butter a 10-inch springform pan (preferably one that is 3 inches deep), bottom and sides. 
2. In a food processor process Oreos until finely crushed.  With processor running, pour melted butter into the crumbs and process (you will need to stop and scrape the bowl at least once). Pulse a couple of times to get the crumb mixture to a wet sand consistency that stays together when you pinch it. Using a rubber spatula (or your hands, the bottom of a metal measuring cup works well, too), place mixture into prepared pan and evenly press over the bottom and up the sides of the pan. Place in freezer for about 10 minutes.
3. Scoop out the chocolate peanut butter ice cream into the cake pan and evenly spread. Pour about one jar of fudge sauce (you might have to warm up a little to get it to a pourable consistency). Sprinkle about half of the chopped peanut butter cups and about peanuts on top (enough to get an even layer over the fudge sauce. Freeze for one hour.  
4. Scoop out the vanilla ice cream on top of the peanut butter cups and evenly spread. Freeze for one hour.
Here's a pic just before I spread the vanilla ice cream:


Note: Steps 1 through 4 can be made a day or two in advance
5. About 15 minutes before you want to serve the cake, pull cake out of the freezer and put in the refrigerator to soften slightly.  This is what it will look like when you take it out of the freezer. Kind of boring, yes, but this is when the magic starts!
6. Just before serving, take cake out, run a thin knife between the crust and the pan side to loosen it, then pull the side of the pan away from the bottom. put the cake on serving plate. Drizzle the second jar of fudge sauce on top of the cake, letting it pour down the sides. Sprinkle with the rest of the chopped peanut butter cups and peanuts. 
7. Microwave the peanut butter in a small bowl until it is pourable. Pour over the top of the cake.  Here's what the finished product looked like: 

8. Serve. If you're having a bit of an issue cutting through, run your knife under hot water dry it, then try again. We also served with whipped cream, so you could do that, too. It's gilding the lily a little bit, but oh so good!


It was a huge hit! And ice cream cakes are so easy (you just need some patience with the softening and freezing), that this is a perfect summer treat!

Thursday, July 16, 2015

Coffee Cream Ice Box Cake


I get a bunch of food magazines, which I love to read and get inspiration from. This month, one of the magazines featured ice box cakes created by famous (at least to foodies) pastry chefs. There were some really interesting ideas, so I decided that my project this summer is going to experiment with ice box cakes. They are perfect for summer, because you don't have to turn on the oven (which I hate to do when it's hot outside - just makes the air conditioner work harder), are super easy (can you whip some cream and stack cookies together?), and taste so yummy (what's better than whipped cream and cookies?)!

 It seemed like the combinations could be endless, and I was a little overwhelmed at first trying to figure out what to make first. However, I had made some coffee syrup a little while back and had wanted to use that in some way. Cruising the cookie aisle at the grocery store, I saw a package of Bischoff cookies (biscuits?) and it's tag line was something like "coffee's favorite cookie." Ding! Ding! Ding! We had a winner! So I grabbed a couple of packages of them, some whipping cream, and some creme fraiche.  Originally, I had wanted to use mascarpone cheese, thinking I needed a little tang to cut through some of the richness and sweetness, but I couldn't find it, so I used creme fraiche, which worked well. If you can't find either of those, I think a 50/50 mixture of cream cheese and sour cream would also work.

So give this a try - it really is simple!


Coffee Cream Ice Box Cake

2 packages Bischoff cookies (you won't need all of these, but some of the cookies might be broken, so it's best to have a back up package)
3 tbsp. coffee syrup (see recipe below) , more or less depending on how strong you want the coffee taste to come out
3 cups whipping cream
3 tbsp powdered sugar
2 tsp vanilla extract (or scrape the seeds of half a vanilla bean and add)
1 8 oz container of creme fraiche (or mascarpone cheese)
raspberries or sliced almond for garnish (optional)


First, you need to whip the cream. To help matters along, I usually put my bowl and beater in the fridge for a while (20-30 minutes, or even a couple of hours if I think of it early enough). Pour the whipping cream in the mixing bowl, add the powdered sugar and vanilla and whip until thick and fluffy (with my Kitchen Aid mixer on high it takes about 3 minutes). Measure out 1.5 cups of the whipped cream and set aside.

To the remaining whipped cream in the mixing bowl, add the 3 tbsp of coffee syrup and creme fraiche. Whip together until incorporated. It should look something like this:


Take about 3 tablespoons of the coffee cream and thinly spread it (I used and offset spatula) on whatever serving platter you are going to use for the cake. Then, pour a little bit of the coffee syrup mixture into a shallow bowl or plate with sides.


Dip eight cookies into the coffee syrup, then arrange on top of the coffee cream like this:


Spread about a cup of coffee cream on top of the cookies. You want to have a fairly thick layer of cream -- about a quarter inch or so. Dip eight more cookies and layer those in the same way on top of the cream. Continue layering cookies and cream until you have 4 layers, ending with cream on top. Use the remaining cream to frost the sides. Alternatively, you can make an extra layer of cookies and cream, and leave the sides of the cake open, showing some of the cookies.

This is what mine looked like at the end:


Refrigerate the completed cake for at least 8 hours, overnight is best. I even had the cake in the fridge for 3 days and it was still delicious!

To serve, I used the vanilla whipped cream (remember setting that aside at the beginning of the recipe?) and piped along the bottom edge and on the top, using some fresh raspberries for decoration. You could also decorate with chocolate (sprinkle chocolate shavings or sift cocoa powder on top).


I served this at a PTA meeting and it was a big hit! Next time you want to make something sweet, but don't want to turn the oven on, this is definitely a good one to try. You will be the hit of the potluck! Serves 8-10.

To make the coffee syrup:  Simmer 2 cups strong coffee with 1.5 cups sugar in a small saucepan until reduced by about half and syrupy -- it took about an hour at a simmer for it to cook down to the right consistency. You'll end up with about 1 and 3/4 cups syrup and you won't use all of this for this recipe.


Tuesday, July 7, 2015

Who Needs Birthday Cake?

My oldest son is now a teenager. Wow! I'm not sure what I was expecting, some sort of sudden onset of moodiness and emotions, but he's still pretty normal, so I'm counting my blessings for now.  I'm still trying to wrap my head around the fact that he's going to be in high school soon, doing all the high-school-y things that kids do. I'm not really ready for that...

The thing about Max is that he's never been much of a cake guy. He likes cake, kind of, but doesn't really like frosting (I know, sacrilege!). He gets my creative juices flowing, though, to figure out something fun to celebrate his birthday, but with something that's not cake.

In the past, I've made a cookie cake (cookies stacked in layers with whipped cream, sort of like an ice box cake), ice cream cake (this one I made for Elliot, but I made one for Max with chocolate cake, peanut butter ice cream, and Reese's peanut butter cups chopped and scattered on top), and had root beer floats. This year, we had three different celebrations (family, then a sleepover with friends, then a larger neighborhood families party), so my challenge was particularly difficult. Luckily, Max had an idea of what he wanted, so I just had to figure out the execution.

For our family night, we had molten lava cakes with strawberry filling. Basically, I made a generic molten lava cake but added a teaspoon of strawberry sundae topping to the middle of the cake (1/4 cup of batter in the ramekin, then teaspoon of topping, then another 1/4-1/3 cup of batter on top). I love lava cakes, because you can prepare them ahead of time (like, hours) and put the ramekins in the fridge until you are ready to bake. And people love individual dessert. :-) Served it with vanilla bean ice cream, whipped cream and more strawberry sauce on top. Although I prefer the traditional molten lava cake, Max seemed to really like it, so I'll call it a win!


The next night, we went a little bit over the top. I made a skillet brownie (the linked recipe is the one I used, cutting the chocolate chips in half and adding 1/2 cup peanut butter chips),  then topped it off with vanilla ice cream, homemade chocolate and peanut butter sauces, whipped cream (natch!), chopped peanuts and chopped dark chocolate. Oh my word! That was GOOD!


Finally, for the larger party (about 10 kids and 11 adults), we did a sundae bar with different ice creams, fresh fruit (strawberries, blueberries), cookies, chocolate chips, nuts, sprinkles, whipped cream and lots of different sauces. It was a lot of fun, and the kids really enjoyed it! Unfortunately, I apparently didn't take a picture of the sundae spread, although I swear I did. The sundae bar was pretty easy, since it kind of built from the previous festivities. For Max's sleepover, we did a pancake bar, where I made pancakes and we had different syrups and fruits to put on top. We had stuff left over, so pretty much everything was already prepped for the ice cream sundaes (I did cheat and used canned whipped topping, because it's easy and fun - the kids could put their own on). :-)

What are your alternatives to birthday cake? I would love to hear about your ideas!

Monday, June 29, 2015

Sunny Summer Lemon Bars


I don't know what it is, maybe the color, maybe the refreshing taste of citrus, but lemons always equal summer to me. I use a ton of them, from slices in my water or iced tea, to squeezing over salad for a refreshing alternative to dressing, I buy them by the bagful when the weather starts to heat up.

One of my favorite summer treats are lemon bars. The creamy, tart filling with the rich, buttery crust is irresistible! So when I saw a recipe posted on the New York Times website, I had to give it a try. This particular recipe is a little different from the one I normally make, in that it uses egg yolks in addition to regular eggs and olive oil as the surprise ingredient. They were also sprinkled with a touch of sea salt. The technique was also different, because it called for cooking the filling, essentially making a curd, before you poured it over the crust and baked for a little bit longer.

As you might be able to tell from the photo, this version has a much deeper yellow color, thanks to the egg yolks. It also called for adding lemon zest to the crust as well as the filling. I found, however, that you really couldn't taste the lemon in the crust, since the filling had such a strong lemon flavor. If my family's reaction was any indication, you can save your olive oil for salad dressing (or maybe these little cakes), because only one out of three preferred this kind of bar. It was good, but overly rich -- too rich for something lemony, in my opinion.


Just for comparison, I made the version from my Cook's Illustrated cookbook (an excellent book, by the way - it's a great, basic cookbook). The sacrifices I make for you people! LOL! This recipe was more traditional (at least for the lemon bars I've been exposed to) in that you whisk all the filling ingredients together and pour directly onto the hot crust, then bake (be careful transferring the pan back into the oven!) until the filling is set. Martha Stewart has a recipe that's very similar (just cut the sugar back a little and add lemon zest from one lemon to the filling). I preferred this version. I thought it was a cleaner citrus taste and the crust was lighter (flakier?).


If you love lemon bars as much as I do, maybe you would like to try these, too. Let me know what you think!

Friday, March 6, 2015

Snow Day Bonus: Loafin' Around


Yesterday, we got almost 10 inches of snow, and this morning we had a record low recorded at the airport near our house. The kids have been in school exactly 2 days this week, and it seems as if they haven't been in school a full week since January. It's been rough.


This is what it looked like outside out house yesterday morning. It snowed for another 3 hours after this.


You would think that with this forced indoors activity, I would be wildly productive, but you would be wrong. I do have lovely, uncalloused heels (home pedicures each week) and have gotten sucked into reruns of Supernatural. I keep telling myself that I'll just watch to see if Dean actually goes to hell or if they figure out a way to get him out of his contract with the demon, Lillith. Like I said, it's been rough.

Previous years, I would have been doing a lot of baking, but in an attempt to not gain a bazillion pounds each winter, I have tried not to bake as much. That control ended yesterday when I went on a baking binge. All carbs all day, people.


I did not make anything original, but I had been saving a couple of these recipes for a while to try out. The top loaf is a Chocolate-Coconut Poundcake from Bon Appetit. As pretty as it looks, it was amazingly easy, and contains coconut oil, which makes it almost healthy (not really). The middle loaf (the recipe actually makes 2 loaves) is Whole Wheat Pumpkin Bread. The one I was really excited about was the bottom loaf, Rustic Chocolate Chip Tea Bread. I saw it in yesterday's Washington Post. It's tasty and quite easy to make, using one bowl and a liquid measuring cup. The kids loved it and were a little disappointed that my friends ate the rest of the loaf when they came over for an impromptu happy hour last night. I promised to make more soon -- it's that easy!

Hope it is warm and sunny where you are, and if it's not, pray for spring to some soon!

Cheers!

Thursday, June 19, 2014

I scream, You scream...


It's hot here in Virginia.  Really hot.  And humid.  This is the part of the weather I detest the most. Honestly.  It's too hot to really make anything that requires turning on the stove or oven, so my cooking options are limited.  It's also the first week of summer break, and I've already given up a little.  Sandwiches for lunch.  Leftover ice cream cake for breakfast. I'm not kidding. I'm cutting myself some slack this week. Just one week, because I have PTA Secretary duties to get working on. Or at least, that's what I'm telling myself.  Then I will get back into the swing of things.

One thing I have started with the boys is calisthenics (burpees, mountain climbers) and stretching.  I'm a fairly flexible person for my age, and it's killing me that my boys can't even touch their toes.  So I'm on a mission to improve their flexibility.  I've actually made my youngest cry already, which makes me sound like a monster.  But then I let him have ice cream cake for breakfast, so I'm not sure what that make me (still a monster to some, best mom ever to my boys).  But I do have more plans.  Bike rides, cool science experiments, reading for 30 minutes a day (they tried to talk me down to 15 minutes, but I held firm -- I'm really such a hard ass). This time, I resolve to follow through on all of them.  :-)

First, though, I wanted to share my recipe for strawberry ice cream.  Earlier this month, I went berry picking with some friends (without the kids!) and came home with 4 pounds of strawberries.  That is an insane amount of berries that would need to be consumed in about two days (they turn fast on you!), so I was working them into everything I could think of: smoothies, salads, syrup for waffles, peanut butter and strawberry sandwiches, and, of course, just snacking. I still ended up freezing some, but I was able to use a lot up making this version of strawberry ice cream.  The best part is that you didn't have to cook anything (no eggs), yet it stayed creamy because of the small amount of vodka that I added.

So, if you find yourself with a ton of strawberries, do yourself a favor and make this.  Or go out and get yourself some strawberries on purpose and make this.  I don't care, but you should give this thing a try! It's easy, has great strawberry flavor, and your family will love you even more than they already do!


They especially love me when I let them clean out the ice cream maker.  :-)

Gadget alert: You will need an ice cream maker for this

Marna's Fresh Strawberry Ice Cream

1 1/2 cups fresh strawberries, cleaned and hulled (green tops cut off)
2/3 cup granulated sugar
1 1/4 cups heavy cream
1/3 cup regular coconut milk (not "lite")
1/2 cup 2 % milk (you could use whole if you wanted, but not any lower milk fat percentage, otherwise the ice cream will get "icy" rather than creamy)
pinch salt
2-inch piece of vanilla bean
1 Tbsp Cake-flavored vodka
1 cup coarsely chopped strawberries

Note: you can substitute a Tbsp of pure vanilla extract, if you don't have the vanilla bean and cake-flavored vodka, but that vodka is delicious and I highly recommend you buy some.  :-)

Combine the 1 1/2 cups of hulled strawberries and sugar in a food processor and blend together. It's okay if there are some strawberry chunks, but it should mostly be smooth.  Set strawberry mixture aside.


In a medium (at least 4 cup capacity) bowl, combine the heavy cream, coconut milk (be sure especially to get the hardened "cream" on the top of the coconut milk can, if there is any), milk, salt, and vodka. Split the vanilla bean and scrape the seeds out of the insides of the bean.  Add the vanilla bean seeds to the milk mixture.


Combine the milk mixture with the strawberry puree, then chill the mixture at least an hour in the refrigerator (as long as overnight).  Once thoroughly chilled, add the milk/strawberry mixture to your ice cream maker and freeze according to the manufacturer's instructions.


While the mixture churns, spread the 1 cup of coarsely chopped strawberries in a single layer on a sheet pan, then freeze for 10 minutes.

 After the ice cream has churned about 15 minutes, add the frozen strawberry chunks (break up any large chunks before adding to the mixture in the ice cream maker. Continue churning in the ice cream maker for another five minutes or so (until the ice cream is at "soft serve" consistency). Turn off ice cream maker, then transfer ice cream from freezer bowl to an airtight container.  Freeze until desired firmness (for us it was about another hour).


Enjoy!  It was particularly good with chocolate sauce and sliced almonds.  :-)


Sunday, March 30, 2014

Failure...And Coming Back

I'm going to confess that I don't always hit home runs in the kitchen.  As a matter of fact, I pretty much suck at making any kind of candy that requires more than just melting some chocolate and spreading it on a slab (i.e., chocolate bark).  Chocolate bark, I can do.  But when I have to boil stuff to a specific temperature, I fail. Every. Single. Time.  But, as an optimist (or crazy person), I keep trying, thinking I will finally "get it."  But then I don't.  Again.

This week's debacle comes from the latest issue of Bon Appétit magazine in the form of  Pecan Buttermilk Fudge:


Seriously, how could you not want to try and make that?  I also happened to have some extra buttermilk to use up. So there was that. Plus my eternal optimism.  I tend to ignore that niggling voice that says, "But Marna, you suck at making fudge from scratch." Should have listened to that voice.  I think I overcooked the fudge, because it set harder than a two-day-old baguette.  I had to literally chisel pieces using a steak knife and a meat tenderizer.  Not lying. I was too embarrassed to take a photo of that mess.

But. But. The reason I didn't throw it all in the trash is because the crumbly shards I was able to scrape off tasted really good, the texture notwithstanding. So, I broke the slab in half and put it away for a couple of days until I figured out what to do with it.

Then I figured it out. Not how to make fudge. No, that still eludes me.  I figured out what to do with this impossible-to-eat (seriously jaw-breaker hard) slab of overcooked sugar.  Here's the problem: since the recipe is based on a mistake and I'm not sure exactly what I did wrong, there's no way to replicate this.  Besides, who wants purposely screw up a batch of fudge, then use the results to make something else? That's just crazy.

Besides, the recipe would go like this:

Crust: 4 whole graham crackers
3 Wasa whole grain crackers
1/8 cup granulated sugar
3 Tbsp melted butter

Crush crackers in food processor into fine crumbs.  Stir in sugar and melted butter.  Pat into 8x8 inch pan.

Filling: 1 batch of jacked up Pecan Buttermilk Fudge
approx. 1/3 cup caramel sauce (I used Smuckers brand)

Melt the jacked up fudge on low power (I used level 4 for 7 minutes) until softened. Stir until smooth, then add the caramel sauce. Combine thoroughly, then pour over crumb crust. Bake in an oven that you set to preheat to 425 (because you're making a quiche crust so the oven was preheating for that anyway). Take the bars out when the topping is slightly bubbling around the edges.  I think it took about 5-7 minutes.

Topping: approx. 1 c. chocolate chips

Sprinkle chocolate chips over the bars, then let them melt.  Carefully spread the chocolate chips smooth over the bars.

Like I said, this can not be replicated. So, sorry about that. But if you want to try this out, go for it!

Here's the good news.  The crumb crust I made was really good.  Combining the Wasa crackers with the graham crackers gave it great texture and not too sweet. Plus it held up when I poured the melted fudge/caramel sauce mixture. I think I'll substitute Wasa crackers for some graham crackers every time I make a graham cracker crust.

But I guess the point of this post is not to share a recipe, but to show all of you that it's okay to make mistakes.  And to experiment. And be willing to keep trying, even though you've failed many times before. Honestly guys, it's just food. Get in that kitchen and start cooking!


Monday, December 23, 2013

Christmukkah 2013: Tips for Entertaining


Sorry for being lame and going so long between posts, but I know you'll understand, because everyone's so busy! This late Thanksgiving thing really puts the squeeze on holiday entertaining!

It's been crazy around here, and we actually had Christmukkah earlier this year than usual, since Hanukkah was so early.  I have to admit that I didn't do anything very original this year in terms of food, but I'll post links below to everything I made.  This post is going to be more about tips for entertaining than actual cooking, because, honestly, what's better than having family and friends over, talking and laughing over good food?

So here are my tips for entertaining:

1) Don't worry so much about your house -- how clean it is, how "undecorated" it is, or anything else. Why? Because your friends won't care.  And if the people you invite over are going to judge the type of furniture you have or the size of your house, are they really worth keeping as friends?  Personally, I don't spend a whole lot of time actually cleaning before people come over, because everything's just going to get dirty again anyway. Which leads me to my next tip:

2) Don't waste your time washing the floor and cleaning under the refrigerator (people actually do that).  Just do a once-over with with a dust cloth and the vacuum, and wipe down the bathrooms with Chlorox (or other cleaner) wipes. I do, however, put away as much clutter as I can, so people have places to set their drinks or plates as they walk around. Save the really big cleaning for after everyone leaves.  :-)

3) Do make sure bathrooms have extra toilet paper and clean towels/guest cloths, for obvious reasons.

4) Do make more food than you think you'll need.  Every year I end up with food that I don't even put out on the table because people bring food with them.  However, I know that the one year I under-provide will be the year that everyone brings wine and beer instead of food (would not be a horrible party in any case, but still).

4a) make sure the extra food is shelf-stable (crackers, smoked fish, pickles) or freezable.  That way, if you end up not using it, you can keep it until your next get-together.

5) Consider your guest list and match it to the size of your space and the "feel" you want.  Christmukkah has turned into a nearly neighborhood-wide event, which is why we turned it into an open house at this point.  The first couple of years we kept it small and actually had real food and sat down to eat, but as our guest list grew, we've had to switch the format to accommodate more people.  I'm a "more the merrier" type of person, so more people showing up makes me happier than fewer.  BUT, that type of entertaining isn't for everyone, so think about what you want to get out of it, as well as your guests.

6) Match the types of food you'll serve to the amount of people invited. What I mean by this is, the more people you have coming, the simpler the food prep should be, with dishes that can be made ahead of time being REALLY important.  There is no shame in having a nice cheese platter or vegetable tray, especially if you have some interesting cheeses/crackers or dips to go with it.  Not everything needs to be individually served and elaborately hors d'oeuvres-y.

7) Focus on one "wow" offering (if that's your thing). This year, mine was going to be the Zucchini Cakes with Smoked Trout, but I never got to serve it...Going back to tip 4a, the zucchini cakes are freezable and the smoked trout came in tins, so I'm saving it to serve on New Year's Eve.  See how that works?  That being said, everyone was happy, and eating and drinking, so I didn't sweat it that I didn't get to put out my "fancy" hors d'oeuvres.  :-)

8) This is supposed to be fun, and no one will be happy if the host is not having fun.  So be sure to enjoy yourself, and if that means serving lasagna and salad because you can make it all ahead of time, then so be it.  If you thrive on wow-ing your guests with something elaborate, go for it.  But you shouldn't stress out about having people over, since, like I said, it's supposed to be fun and enjoyable.

So, my advice to you is to just start having people over more.  It's fun. It's less expensive than going out for a meal, plus you get to pick your own music.  :-)

I forgot to take pictures during the party (are you really that surprised?), but I did get a snapshot off of the food tables before people got here. Plus I took a couple of pictures of some foods I made, after the fact.  Sorry, but I was having too much fun talking to my guests.  LOL


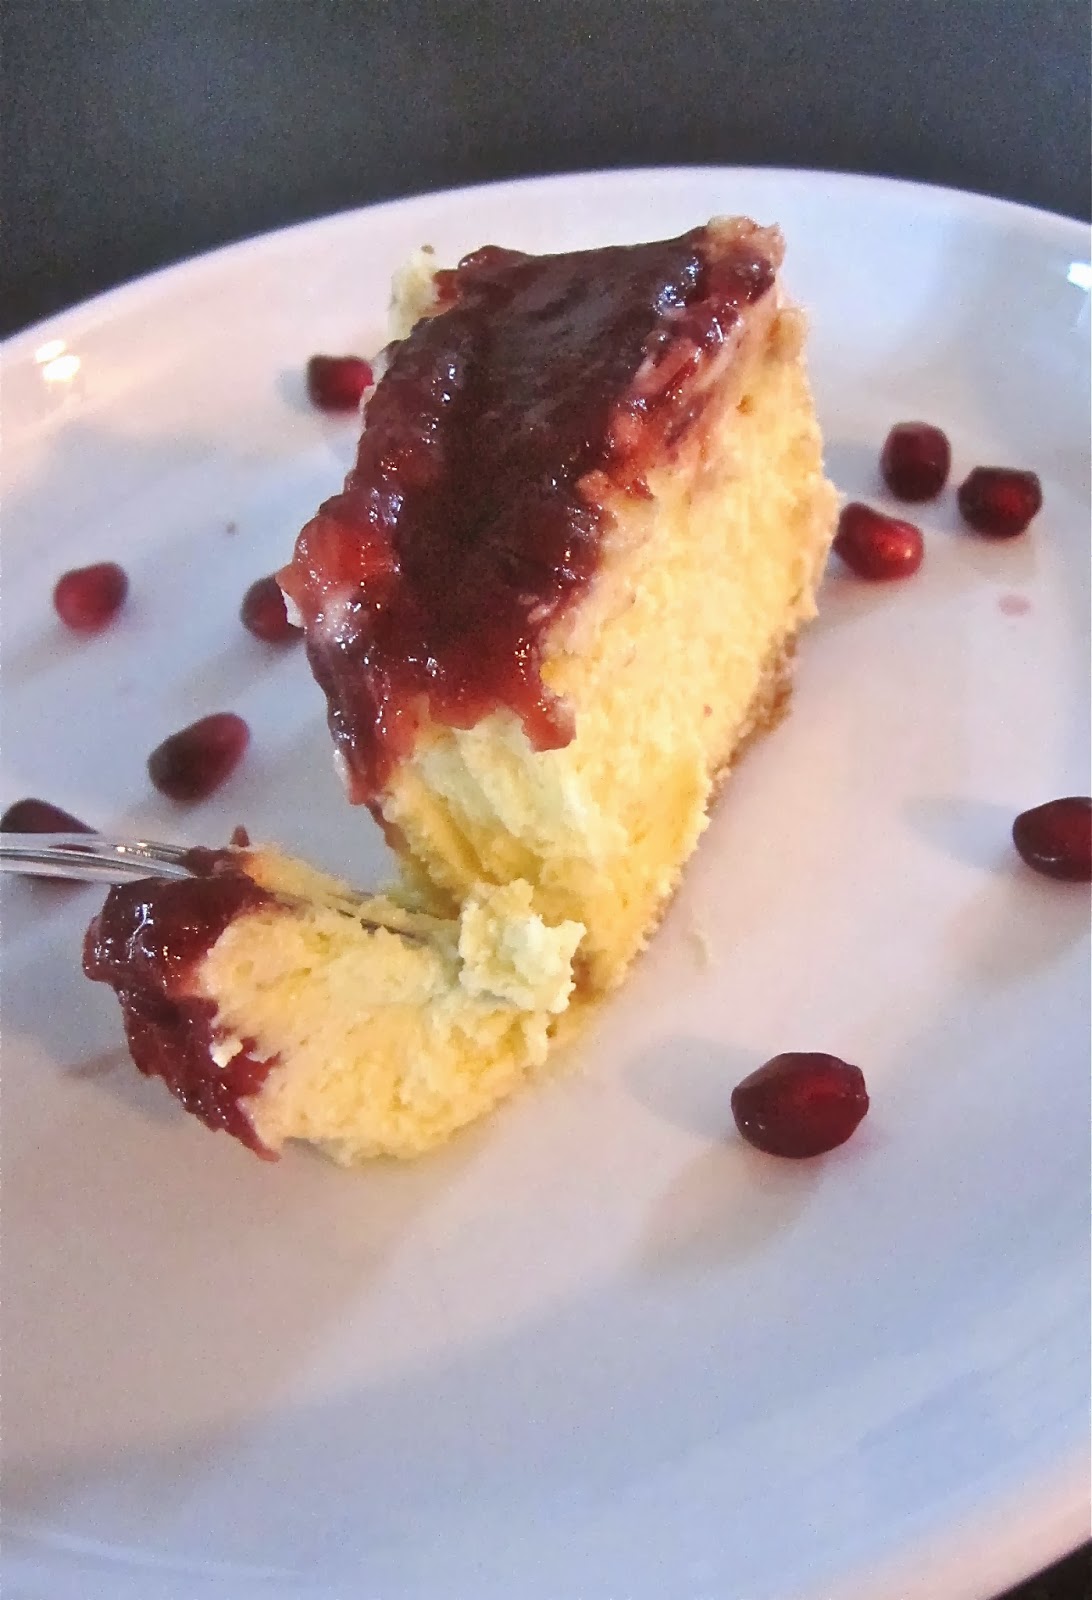
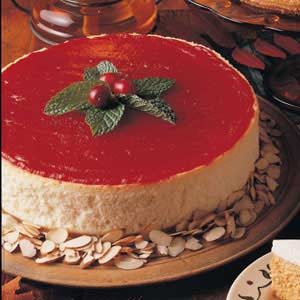
Cranberry Cheesecake                                                 Cardamom Thumbprint Cookies


Christmukkah 2013 Menu:

Swedish meatballs with lingonberry sauce (I used the recipe from "Savoring the Seasons of the Northern Heartland". The lingonberry sauce was store-bought, 'cause nobody got time for makin' lingonberry sauce from scratch…especially when you don't have access to lingonberries)

Picture of Lemon-Garlic Chick Pea Dip with Veggies and Chips Recipe

Lemon-garlic Chick Pea Dip http://www.foodnetwork.com/recipes/rachael-ray/lemon-garlic-chick-pea-dip-with-veggies-and-chips-recipe/index.html

Zucchini Cakes with Smoked Trout recipe

Zucchini Cakes with Smoked Trout http://www.epicurious.com/recipes/food/views/Zucchini-Cakes-with-Smoked-Trout-359333


Stuffed Dates http://www.beyondthepeel.net/2012/12/goat-cheese-stuffed-dates-recipe.html - I did change this up a little and used orange peel, rosemary and thyme in the goat cheese. Since dates are so sweet, I wanted to cut through that a little bit. Also, instead of nuts, I did do the pomegranate seed variation.

Cranberry Cheesecake Recipe

Cranberry Cheesecake http://www.tasteofhome.com/recipes/cranberry-cheesecake


Almond Cardamom Thumbprint Cookies http://www.outside-oslo.com/2013/11/29/cardamom-thumbprint-cookies-with-a-scandinavian-touch/

All of these were delicious (the photos are copied from the linked websites -- they're too nice to be my work!) and I would make any of them again.

Wednesday, November 20, 2013

Caramel Apple Crisp Bars


So, if you are following along with my previous posts, you probably have boatload of apple butter.  I know I did.  And, after a while, putting it on toast or muffins (insert your own joke here…) isn't cutting it anymore.  We still have some in the freezer, too.  So I came up with Caramel Apple Crisp Bars to help use some of it up.  They're really yummy.  You should make them.  :-)


I realize that you can't really see much of the bar underneath the mound of ice cream, nuts and caramel sauce, but my older son had this serving idea, and it was delicious, so I thought I would give you another idea to use (and reason to make this recipe).


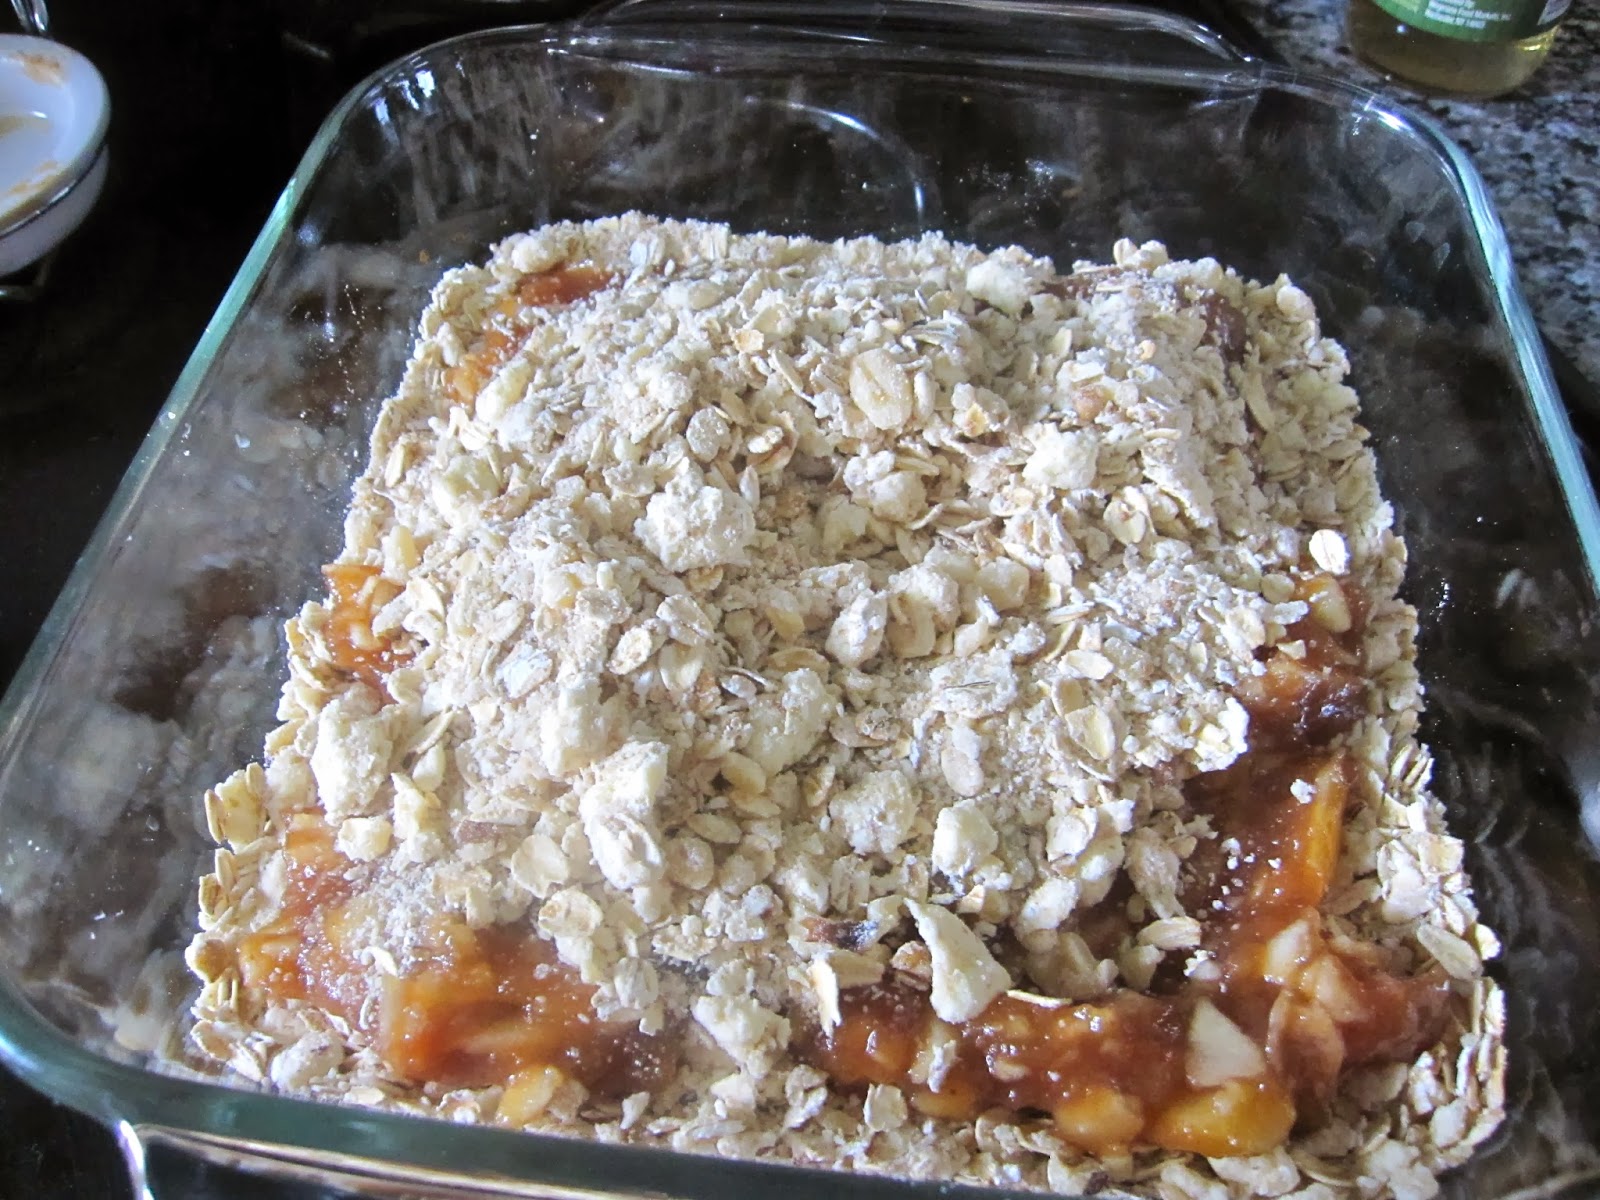
Caramel Apple Crisp Bars

1 1/4 c. old-fashioned oats
1/2 c. all-purpose flour
1/2 c. brown sugar
1/3 c. butter, cold
1/2 c. walnuts, chopped
3/4 cup apple butter (homemade or not)
1 small apple, peeled and chopped (about 1/2 cup chopped)
1/2 c. caramel sauce (you can use anything you have on hand, but I highly recommend this recipe for Apple Cider Caramel Sauce from Southern Living)

Combine oats, flour, and sugar in a medium bowl, breaking up and clumps of brown sugar.  Cut the cold butter into cubes, then add to the bowl. Using a pastry blender or your fingers, incorporate the butter until the mixture is uniform sizes and crumbly.  Add walnuts and stir to combine. Set mixture aside.


[Alternate method: put oats, flour, sugar, butter and walnuts (chopped or not) in a food processor.  Pulse about 5-6 times to combine.  Butter pieces should be the size of small peas.]


Combine apple butter and chopped apple in a small bowl.  Set aside.


Butter the bottom of an 8x8 inch pan, then pour half of the oat crumb mixture in the bottom of the pan and pat down a little.  Drop spoonfuls of the apple butter/apple mixture on top of the crumb mixture, then gently spread around to evenly distribute over the crust. Combine the caramel sauce with the remaining crumb mixture, then drop by spoonfuls over the top of the apple butter layer.


I need to confess something on this step.  Initially, I put the rest of the crumb mixture on top and was going to drizzle the caramel sauce over it, but then I thought the caramel might burn before the bars were done baking, so I scraped off what I could and put it back in the bowl, then stirred the caramel sauce in to what I had.  That's why it looks kind of funky, but yours will be much prettier!

Put in a pre-heated 325 degree oven for 35-40 minutes (top should be golden and edges will be bubbling.


Cool completely.  Cut into squares and serve.  Makes about 16 (if you like them bigger) or 20 (if you like them smaller).  :-)