Showing posts with label fruit. Show all posts

Thursday, June 19, 2014

I scream, You scream...


It's hot here in Virginia.  Really hot.  And humid.  This is the part of the weather I detest the most. Honestly.  It's too hot to really make anything that requires turning on the stove or oven, so my cooking options are limited.  It's also the first week of summer break, and I've already given up a little.  Sandwiches for lunch.  Leftover ice cream cake for breakfast. I'm not kidding. I'm cutting myself some slack this week. Just one week, because I have PTA Secretary duties to get working on. Or at least, that's what I'm telling myself.  Then I will get back into the swing of things.

One thing I have started with the boys is calisthenics (burpees, mountain climbers) and stretching.  I'm a fairly flexible person for my age, and it's killing me that my boys can't even touch their toes.  So I'm on a mission to improve their flexibility.  I've actually made my youngest cry already, which makes me sound like a monster.  But then I let him have ice cream cake for breakfast, so I'm not sure what that make me (still a monster to some, best mom ever to my boys).  But I do have more plans.  Bike rides, cool science experiments, reading for 30 minutes a day (they tried to talk me down to 15 minutes, but I held firm -- I'm really such a hard ass). This time, I resolve to follow through on all of them.  :-)

First, though, I wanted to share my recipe for strawberry ice cream.  Earlier this month, I went berry picking with some friends (without the kids!) and came home with 4 pounds of strawberries.  That is an insane amount of berries that would need to be consumed in about two days (they turn fast on you!), so I was working them into everything I could think of: smoothies, salads, syrup for waffles, peanut butter and strawberry sandwiches, and, of course, just snacking. I still ended up freezing some, but I was able to use a lot up making this version of strawberry ice cream.  The best part is that you didn't have to cook anything (no eggs), yet it stayed creamy because of the small amount of vodka that I added.

So, if you find yourself with a ton of strawberries, do yourself a favor and make this.  Or go out and get yourself some strawberries on purpose and make this.  I don't care, but you should give this thing a try! It's easy, has great strawberry flavor, and your family will love you even more than they already do!


They especially love me when I let them clean out the ice cream maker.  :-)

Gadget alert: You will need an ice cream maker for this

Marna's Fresh Strawberry Ice Cream

1 1/2 cups fresh strawberries, cleaned and hulled (green tops cut off)
2/3 cup granulated sugar
1 1/4 cups heavy cream
1/3 cup regular coconut milk (not "lite")
1/2 cup 2 % milk (you could use whole if you wanted, but not any lower milk fat percentage, otherwise the ice cream will get "icy" rather than creamy)
pinch salt
2-inch piece of vanilla bean
1 Tbsp Cake-flavored vodka
1 cup coarsely chopped strawberries

Note: you can substitute a Tbsp of pure vanilla extract, if you don't have the vanilla bean and cake-flavored vodka, but that vodka is delicious and I highly recommend you buy some.  :-)

Combine the 1 1/2 cups of hulled strawberries and sugar in a food processor and blend together. It's okay if there are some strawberry chunks, but it should mostly be smooth.  Set strawberry mixture aside.


In a medium (at least 4 cup capacity) bowl, combine the heavy cream, coconut milk (be sure especially to get the hardened "cream" on the top of the coconut milk can, if there is any), milk, salt, and vodka. Split the vanilla bean and scrape the seeds out of the insides of the bean.  Add the vanilla bean seeds to the milk mixture.


Combine the milk mixture with the strawberry puree, then chill the mixture at least an hour in the refrigerator (as long as overnight).  Once thoroughly chilled, add the milk/strawberry mixture to your ice cream maker and freeze according to the manufacturer's instructions.


While the mixture churns, spread the 1 cup of coarsely chopped strawberries in a single layer on a sheet pan, then freeze for 10 minutes.

 After the ice cream has churned about 15 minutes, add the frozen strawberry chunks (break up any large chunks before adding to the mixture in the ice cream maker. Continue churning in the ice cream maker for another five minutes or so (until the ice cream is at "soft serve" consistency). Turn off ice cream maker, then transfer ice cream from freezer bowl to an airtight container.  Freeze until desired firmness (for us it was about another hour).


Enjoy!  It was particularly good with chocolate sauce and sliced almonds.  :-)


Wednesday, November 20, 2013

Caramel Apple Crisp Bars


So, if you are following along with my previous posts, you probably have boatload of apple butter.  I know I did.  And, after a while, putting it on toast or muffins (insert your own joke here…) isn't cutting it anymore.  We still have some in the freezer, too.  So I came up with Caramel Apple Crisp Bars to help use some of it up.  They're really yummy.  You should make them.  :-)


I realize that you can't really see much of the bar underneath the mound of ice cream, nuts and caramel sauce, but my older son had this serving idea, and it was delicious, so I thought I would give you another idea to use (and reason to make this recipe).


Caramel Apple Crisp Bars

1 1/4 c. old-fashioned oats
1/2 c. all-purpose flour
1/2 c. brown sugar
1/3 c. butter, cold
1/2 c. walnuts, chopped
3/4 cup apple butter (homemade or not)
1 small apple, peeled and chopped (about 1/2 cup chopped)
1/2 c. caramel sauce (you can use anything you have on hand, but I highly recommend this recipe for Apple Cider Caramel Sauce from Southern Living)

Combine oats, flour, and sugar in a medium bowl, breaking up and clumps of brown sugar.  Cut the cold butter into cubes, then add to the bowl. Using a pastry blender or your fingers, incorporate the butter until the mixture is uniform sizes and crumbly.  Add walnuts and stir to combine. Set mixture aside.


[Alternate method: put oats, flour, sugar, butter and walnuts (chopped or not) in a food processor.  Pulse about 5-6 times to combine.  Butter pieces should be the size of small peas.]


Combine apple butter and chopped apple in a small bowl.  Set aside.


Butter the bottom of an 8x8 inch pan, then pour half of the oat crumb mixture in the bottom of the pan and pat down a little.  Drop spoonfuls of the apple butter/apple mixture on top of the crumb mixture, then gently spread around to evenly distribute over the crust. Combine the caramel sauce with the remaining crumb mixture, then drop by spoonfuls over the top of the apple butter layer.


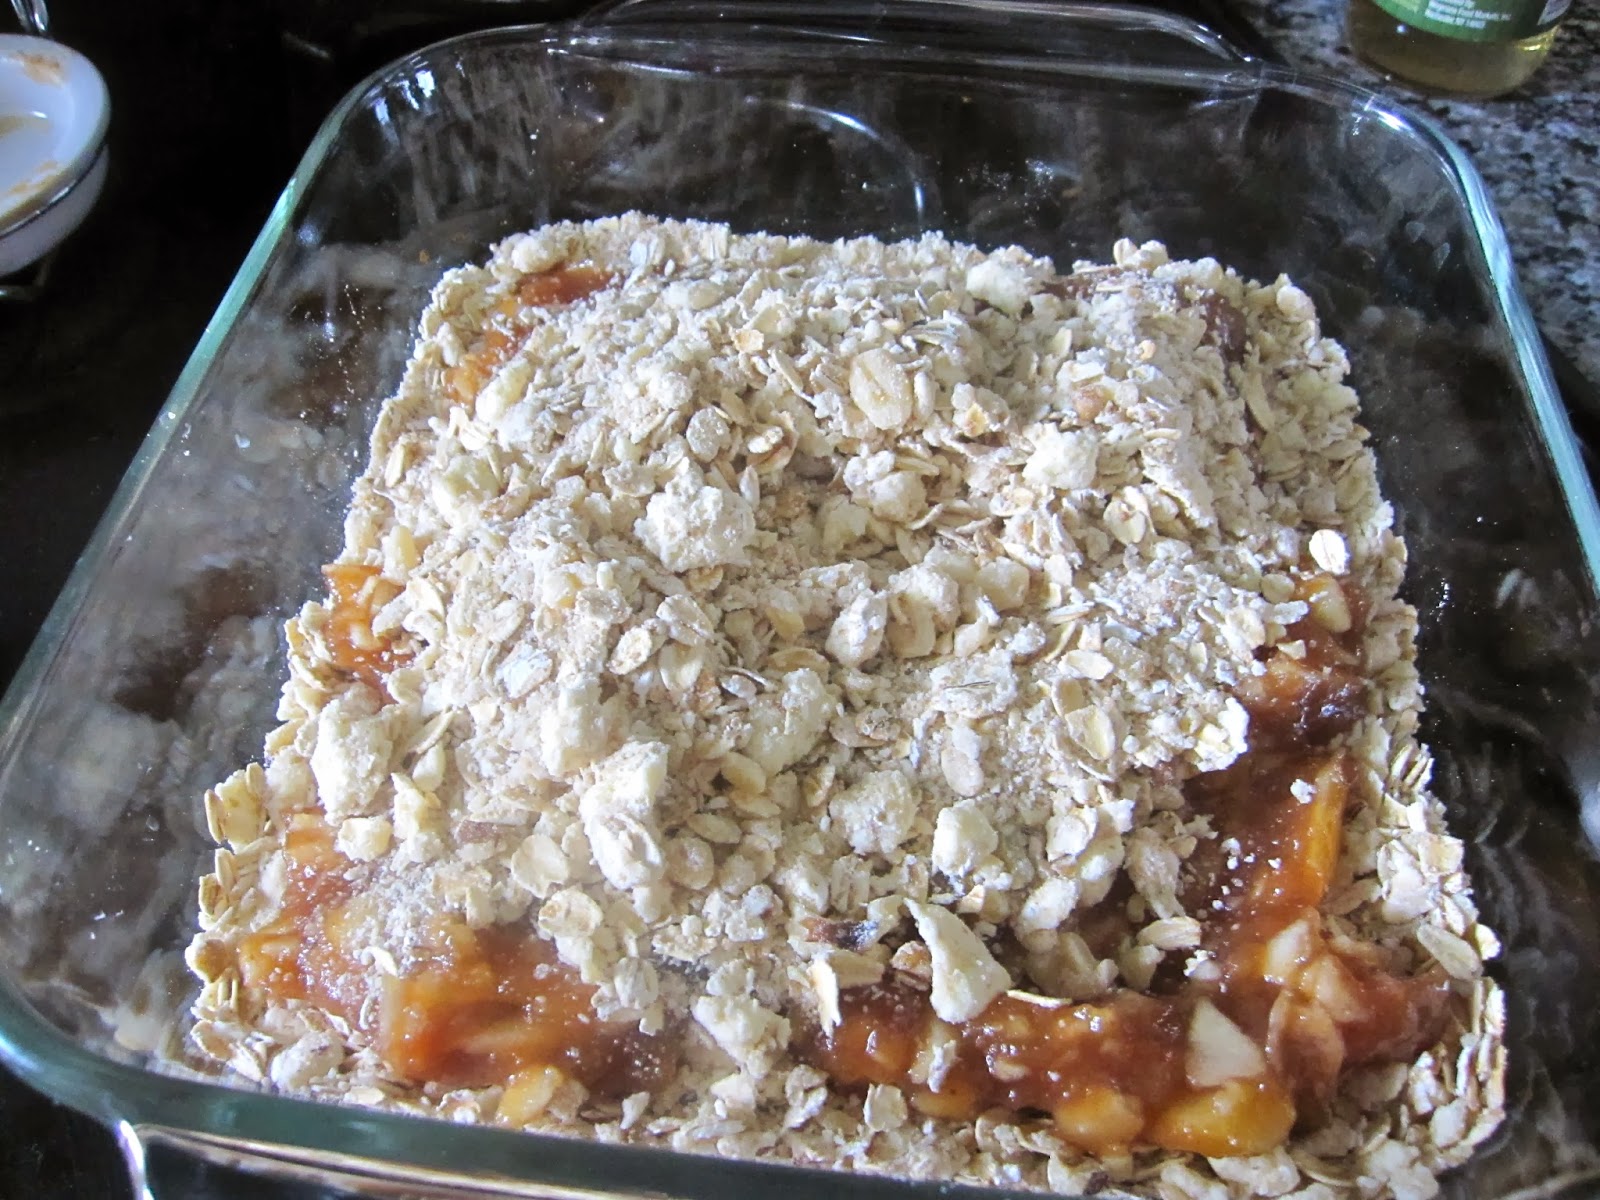
I need to confess something on this step.  Initially, I put the rest of the crumb mixture on top and was going to drizzle the caramel sauce over it, but then I thought the caramel might burn before the bars were done baking, so I scraped off what I could and put it back in the bowl, then stirred the caramel sauce in to what I had.  That's why it looks kind of funky, but yours will be much prettier!

Put in a pre-heated 325 degree oven for 35-40 minutes (top should be golden and edges will be bubbling.


Cool completely.  Cut into squares and serve.  Makes about 16 (if you like them bigger) or 20 (if you like them smaller).  :-)

Tuesday, October 29, 2013

Freakin' Awesome Apple Butter

Who's gone apple picking and, deluded (mesmerized??) by the Rockwellian outdoorsy perfection of it all, came home with 40 pounds of apples?  This gal!  Don't get me wrong. I love apples.  But after weeks of making apple cake, apple muffins, pork roast with apples, and, of course, eating them raw (many, many raw apples), you start running out of ideas.  What uses up a lot of apples, tastes delicious, and is freezer-friendly?  Apple butter!  If you're the canning sort, you could can this and give as gifts.

I don't have pictures of the process, because, well, it's me and I forgot. No worries, though, because it's kind of hard to screw up boiling and pureeing.  BUT, I do have a picture of the finished product:


I've never made apple butter before, so I went looking for recipes and found one that boils the apples to soften them, then bakes the puree in a "slow" oven (old-timey phrase to describe an oven that's not really hot) for a long time.  This method creates a wonderfully deep flavor, so I really recommend giving this a try, despite the time commitment. Even I was skeptical, but the results are absolutely fabulous!  When my husband tried it, he actually said, "This is freakin' AWESOME!"

Marna's Freakin' Awesome Apple Butter

10 apples (I used a mix of different kinds), peeled, cored and cut into chunks
1 1/2 cups apple cider
2/3 cups sugar
1 tsp cinnamon
1/4 tsp cloves
1/4 tsp dried, ground ginger

Combine diced apples (the apples don't really have to be uniform size, this is a pretty forgiving recipe), apple cider, and sugar in a 4 or 5 quart pot.  Bring to a boil over medium-high heat, then turn down to medium-low and simmer about 30 minutes, or until apples are tender.  When apples have cooked, blend (using an immersion blender) or mash (using a potato masher) until smooth.  Again, if there are chunks, that's okay, because it's going to cook more. Add the cinnamon, cloves and ginger, then stir to combine.

Lightly butter a baking dish large enough to hold the the apple puree, approximately 2 inches deep (I used a 10 inch x 12 inch dish, but an 11x7 inch dish would work, too). Bake puree for 4 hours at 275 degrees, stirring every hour, or until thick and of a spreading consistency.  Let cool for about an hour, then cover and chill.  Makes about 3 cups.


Saturday, May 18, 2013

Syttende Mai!

Yes, yes, I know it's actually May 18th, but I didn't have time to finish my post yesterday, and I am not about to let a little detail like a number get in the way of sharing some some stuff that you can do in your kitchen!   Syttende Mai is the Norway's Constitution Day (literally translated, it's "May 17th").  It's an important holiday in Norway, equivalent to our (American) Independence Day on July 4.  In honor of this holiday, I thought I'd try a traditional Norwegian dessert: Troll Cream.

Troll cream only has 3 ingredients and is amazingly simple.  It is usually made with lingonberries, but, being in Virginia, we don't have a ready supply, so I substituted blueberries.  So here's the amazing part.  You dump the sugar, berries and egg white into a mixing bowl all together, and then you just start whipping it.  It takes about 2 minutes, but it turns into this amazing, feather-light, pillowy, mousse-type of cream.  When I first read the original recipe, I was really skeptical. But, I followed the recipe as it was written and abracadabra! Everything did what it was supposed to do!

I used the troll cream as a layer in a lemon-blueberry trifle, but you could totally serve this on it's own, maybe with a little whipped cream and fresh berries and/or cookies on the side for a little texture.  It is best eaten the day it's made, I think, because the texture changes a little bit (turns more meringue-y) the longer it sits.  I have to admit, though, the leftovers still tasted pretty good the next day!  :-)

Although I thought I was taking pictures of the steps for making the troll cream, nothing was on my camera (my camera battery was low), so you'll have to just use your imagination.  Here's what it looked like in the trifle I made (it's the slightly lavender-looking layer):


Blueberry Troll Cream

1 cup blueberries, rinsed and patted dry
1 cup sugar
3 egg whites

Have all ingredients at room temperature.  Put all ingredients in a mixing bowl (I used a stand mixer, but I think a hand-held mixer would work, too).  Turn mixer onto a medium-low speed to start, then gradually increase speed to high.  Mix for about 2 minutes.  The troll cream should be light and fluffy, but not stiff.

Note: This recipe can be increased or decreased, depending on how many servings you want.  This amount was used for a trifle that served about 12, but you could decrease the amounts - 1/3 cup sugar, 1/3 cup blueberries, 1 egg white - for just 6-8 servings.


This was the only picture I got of the troll cream, which I took with my phone:


This recipe was so easy, I'm definitely going to experiment with different berries/flavor combinations!

If you want to make the trifle, here's how:

Lemon-Blueberry Trifle

1 Lemon pound cake (if you want to make this from scratch, here's a good recipe)
1 recipe Blueberry Troll cream
1 cup lemon curd (store bought or make your own)
3 cups whipped cream
1 cup fresh blueberries, rinsed and patted dry

Start by folding the lemon curd and 2 cups of whipped cream together. Set that mixture aside for a moment.


Slice thin pieces of pound cake (no more than 1/4 inch thick).  Layer slices of cake to cover the bottom of the trifle bowl.  Scatter fresh blueberries on top of the cake layer:


Then layer half of the curd/whipped cream mixture, followed by half of the blueberry troll cream.  Repeat layers (cake slices, fresh blueberries, lemon whipped cream, troll cream).  After the last layer of troll cream, top with the remaining cup of whipped cream, then scatter more fresh blueberries over top.  This is what you end up with:


Serves 12.  The curd and cake can be made a couple of days ahead, but the trifle should be put together only about 4 hours ahead of time (refrigerate until ready to serve).  Best eaten the same day, but still good a day after, too.  :-)


Thursday, January 3, 2013

A Delicious, Healthy Start to the New Year


Hi Everyone!  Happy New Year!  I've kind of been slacking on my blog the past couple of weeks, but we traveled to Minnesota, and I took a little break to enjoy quality time with family and friends back in my hometown.

For whatever reason, I was constantly eating while I was home (I'll blame my mother).  So many yummy treats (fudge, cookies, cake...) and my self control was completely AWOL.  But now that I'm back on my home turf, I'm ready to get back to healthier eating.

The first post of the New Year, I have to admit, isn't even a personal recipe, but one I got from Martha Stewart.  It's a chicken salad with apple, beets and pomegranate.  Look at that picture!  It was gorgeous, and I just had to make it.


It did not disappoint.  Even my youngest, pickiest son ate it (well, the chicken and the greens and the apples -- I separated them out for him), but he did like the dressing.  I love this because it's bright (from the orange vinaigrette), crunchy (from the pomegranate seeds and apples), and satisfying (from the roasted beets and chicken).  I also felt pretty healthy eating it, so even bigger bonus!

Hope you enjoy this salad as much as I did.  I promise I'll be back soon with something a little more original (or at least the entry I intended to post while I was in Minnesota -- dated but still tasty).  :-)

Wednesday, July 4, 2012

Little Balls of Heaven

One of my favorite all time Saturday Night Live skits is the one about Schweddy Balls. If you're familiar with that skit, I hope you're laughing at my title!  Otherwise, you might just be scratching your head at my inappropriateness.

Anyway, I used to get a bunch of different food magazines, but now I've winnowed it down to just two: Bon Appetit and Martha Stewart's Everyday Food.  These are the two magazines where I consistently find recipes that I want to try.  To be honest, for all my "foodiness", I really try to avoid recipes that involve a gazillion ingredients or stuff that I don't regularly buy.  I hate having my cupboards and fridge cluttered up with half-used bottles and jars of stuff (rosewater, chickpea flour, chili lime pickle, anchovy paste...just to name a few).  Look for future blog posts that will utilize these ingredients.  :-)

But I digress!  Back to my balls.  So in the latest edition of Bon Appetit, I found a recipe for Cocoa-Date Truffles where the only sweetener is the dates.  I made them for the staff in the front office of our elementary school.  I made them instead of, say, cupcakes, because our school is labeled a "healthy foods" school (or something like that) where we can't have sweet treats (unless it's fruit) for parties and the daily snacks that the kids bring can't have sugar of any kind in the first 3 ingredients. It's not that big of a deal, and I get why they're doing it, but at the same time, not all of the food choices the school offers in the cafeteria are exactly packed with nutrition, either.  It would be nice if they were consistent, but I'll roll with it.  Ha! I am just full of ball puns today...

So I made these date balls to show the front office that you can have a sweet but healthy (or at least healthier) treat and that just because something's sweet, doesn't mean it's unhealthy. (I'm angling to get low fat brownies allowed, but not sure how that will go over).  The other great thing about this recipe is that it's dairy-free and doesn't have nuts (at least the original recipe), so it's safe to serve anyone who has a milk or nut allergy.

Now, I didn't have raw cacao powder and just used regular cocoa powder, so I'm not sure what the taste difference would be, but I wasn't about to go searching for raw cacao powder.  I just didn't have it in me.  So, here's the recipe from Bon Appetit, with my modifications noted after.

Cocoa-Date Truffles (from the June 2012 edition of Bon Appetit)
makes about 20


3 Tbsp. raw cacao powder
1 1/2 cups Medjool dates, pitted
3 Tbsp. (or more) unsweetened, shredded coconut or quick-cooking oats
pinch of sea salt

Flavoring Options (choose one)
1 Tbsp. unsweetened shredded  coconut
1 tsp. finely grated orange zest
1 tsp. instant espresso powder

Coating Options (mix and match)
1/2 cup unsweetened shredded coconut
1/4 cup lightly toasted sesame seeds
1/2 cup crushed, lightly toasted pistachios
1/2 cup crushed, lightly toasted hazelnuts

Puree cacao powder, dates, 3 Tbsp coconut, and salt in a food processor until almost smooth, adding water by teaspoonfuls if too dry and crumbly and coconut by teaspoonfuls if too wet and sticky (the original consistently will be determined by how moist your dates are).  Add desired flavoring and pulse to combine.

Scoop date puree by the tablespoonful and roll  into 1" balls.  Can be made up to one week ahead. Cover and chill.

Roll truffles in desired coatings to cover.

Notes:

From Bon Appetit: Raw cacao powder and unsweetened, shredded coconut can be found at natural food stores, specialty food stores and some supermarkets.


Marna's notes:  Instead of the coconut or oats, I added 2 Tbsp of walnut butter plus 1/4 cup of finely chopped, toasted walnuts.  Plus, as mentioned earlier, I didn't have raw cacao powder and just used regular unsweetened cocoa instead.  I ended up having to add about 2 Tbsp of water to get things to a consistency where I could shape the mixture into balls. In terms of servings, I used a tablespoon scoop and only got about 12 balls, so you could make them smaller to get more, or just count on this making less than you originally thought (or double the recipe).

Monday, June 11, 2012

Rhubarb, rhubarb everywhere!

Nothing says "Spring" to me more than rhubarb.  Okay, that's kind of a lie.  Rhubarb, asparagus and strawberries all say spring to me.  And, yes, I realize it's summer.  Bear with me, please.  I'm new.

But this post is about rhubarb, so we'll put those other two on the back burner, mainly because it's hard to improve upon the natural tastes of strawberries and asparagus (not together, of course, gross).  If you are a Laura Ingalls Wilder fan(atic), you will be familiar with how, as a new bride, she made pies with rhubarb (also known at one time as "pie plant") and forgot to add sugar.  Her husband, Almonzo, and the hired hands were less than enthusiastic about eating it.  My point is this: rhubarb is great, but you have to do something to it, like bake it in a pie, because it's a little nasty just plain raw.


I, personally, am not much of a pie maker.  But what got me on the rhubarb kick this go around was that a friend of mine posted a recipe for rhubarb cake that sounded really good.  Her husband, like mine, is not partial to rhubarb, but she said he liked this cake, so thought I would try it.  This post will be a two-fer, since, not only did I made a rhubarb coffee cake, but I had some leftover rhubarb and streusel, so I thought I would also make a crisp.

I was fiddling around with different cake/streusel combinations, and the cake recipe I used was just too delicate for the heavy streusel, and the streusel sank a lot.   The taste was okay, but it just didn't look like a streusel coffee cake, so I'm going back to the original recipe from Martha Stewart, then tell you how I did the the rhubarb-peach crisp.


In my last post about experimentation, I had hinted that I had hit upon a great flavor combination.  At first I thought is was the innovative pairing of peaches and rhubarb, but a quick search shot that down.  Apparently, I was not the first (even the 100th) person do make that connection.  However, some folks haven't discovered the joy of cardamom paired with rhubarb and peaches, since the recipes I found did not include that spice. When you make this, people will ask what's in it, because it's just a hint, and not too many people are very familiar with the flavor.  I love cardamom, and it's used frequently in Scandinavian dishes, which is how I am most familiar with it. It lends a spicy, slightly floral flavor to both sweet and savory dishes, such as cardamom cookies, Julekage, and Swedish meatballs.  If you've never used it in baking, I highly recommend trying it out.  Maybe start with a small jar of it and work up.  I generally get a large-ish, 2.4 oz jar of it from Penzey's, which is a favorite place of mine to get spices and such.


Rhubarb-Peach Crisp                                                                              Rhubarb Coffee Cake


I coarsely chopped the rhubarb.


Martha Stewart's recipe makes a lot of crumble!


Here's the coffee cake I make using the more delicate cake.  See what I mean about the crumble sinking?


Here's the recipe for coffee cake from Martha Stewart:


Ingredients

  • For the crumb topping:
  • 3 1/2 cups cake flour (not self-rising)
  • 2/3 cup granulated sugar
  • 2/3 cup packed dark-brown sugar
  • 1 1/2 teaspoons ground cinnamon
  • Coarse salt
  • 2 1/2 sticks unsalted butter, melted
  • For the cake:
  • 1 1/2 sticks unsalted butter, room temperature, plus more for pan
  • 2 1/2 cups cake flour (not self-rising)
  • 1/2 teaspoon baking soda
  • Coarse salt
  • 1 cup granulated sugar
  • 2 large eggs plus 2 large egg yolks
  • 1 teaspoon pure vanilla extract
  • 2/3 cup low-fat buttermilk
  • 1 cup store-bought blueberry jam (optional)
  • Confectioners' sugar, for dusting

Directions

  1. Make the crumb topping: Mix together flour, sugars, cinnamon, and 1/2 teaspoon salt in a medium bowl. Pour warm melted butter over mixture, and mix using your hands until medium to large clumps form.
  2. Preheat oven to 325 degrees. Make the cake: Butter a 9-by-13-inch baking pan. Whisk together flour, baking soda, and 1/2 teaspoon salt in a medium bowl.
  3. Beat butter and granulated sugar with a mixer on medium speed until pale and fluffy, about 2 minutes. Beat in eggs and yolks, 1 at a time, then vanilla. Beat in flour mixture in 3 additions, alternating with buttermilk, beginning and ending with flour. Continue to beat until well combined.
  4. Spoon batter into pan, and spread evenly using an offset spatula. Spread with jam, if using. Sprinkle crumb-topping mixture evenly over top.
  5. Bake until golden brown and a toothpick inserted into the center comes out clean, about 1 hour. Transfer pan to a wire rack. Let cake cool slightly, about 15 minutes. Dust with confectioners' sugar. Serve warm or at room temperature.

Cook's Note

Coffee cake can be stored at room temperature for up to 5 days.
For a rhubarb coffee cake, take two tablespoons of flour from the 2 1/2 cups you would add to the cake, and toss it with 2 cups chopped rhubarb.  Fold in the rhubarb at the end of step 3.
You can also play with the spices, if you like.  I only used 1 tsp. cinnamon and added 1/2 tsp. cardamom to the crumb topping.

Rhubarb Peach Crisp


Now, for the crisp. I ended up with extra crumb topping from the above recipe, so I used two cups of the crumb topping and added about 2/3 cup of oatmeal (not instant) and sort of smushed it around with my hands to integrate it into the crumbs.
TIP: You can make crumb topping and keep extras in the freezer.  That way, you have it as a quick topping for muffins, bars or coffee cake without having to do the extra step, which sometimes I feel too lazy to do.
Into a buttered 1 quart baking dish (8-inch diameter by 2-inches deep), I dumped 1 cup chopped fresh rhubarb and 2 cups sliced, thawed frozen peaches (I'm sure you can use fresh if you have them).
In a small saucepan, combine 1/2 cup water, 1 Tbsp cornstarch, 1/4 tsp cardamom and 1/3 cup sugar. Cook over medium heat, whisking constantly, until thickened (it should coat the back of a wooden spoon). It should only take 3-5 minutes.  Pour this mixture over the fruit, then top with the crumble mixture.  Place in an oven that is pre-heated to 350 degrees and bake for about 45 minutes.  The crumble should be golden brown and be a litte crispy in places, and the sauce should be thick and bubbling up through the crumble in places.
Let it cool slightly before serving.  I love crisps served with ice cream, but this is good by itself, too.  Confession: I have also eaten it for breakfast (fruit and oats are good for you, right??), but not with ice cream.  I'm crazy, but not that crazy.  ;-)

Tuesday, May 8, 2012

Never Buy Granola Again

For someone who likes a lot of variety in my meal choices, I am amazingly routine in my breakfast of choice. My usual breakfast is granola and fruit over yogurt.  Truly, I eat it nearly every morning (or else I'm making oatmeal).  Sometimes I like a muffin or scone or cinnamon roll, but those are on very rare occasions.  Clearly, I like to get my carbs in early.  :-)


The thing about store-bought granola is that it's either too sweet, too greasy or too dry.  Not to mention expensive. It took me a lot of fiddling to make a granola I really like, but finally came up with one that has great texture, crunch, and sweetness all balanced together. But the great thing about granola, is that you can tweak it to reflect your own preferences.  Don't like nuts? Leave 'em out.  Don't have raisins? Put in whatever dried fruit you've got (or leave it out all together).  Play with spice/flavor combinations.  Try different oils.  The sky's the limit on the number of variations you can do.  It's really about proportions, so when you get the proportions that you like, then you can mess around with the different ingredients, as long as your dry vs. liquid vs. fruit proportions stay relatively the same.  Here's my one bit of advice: don't do dates.  I love dates, but just not in granola. It's an odd texture and just sticky sweet without adding much flavor to the mix.  Just my opinion.  Remember, it's just ingredients, so if you don't like a combo, toss it, or give it away as gifts (to friends or enemies, depending on how it turned out). Ha! (All my friends who have ever received food gifts -- and there are a lot of them -- are now hating me....).

This time I experimented with using coconut oil, but I'm not sure how I like it. When the granola was baking, it smelled like suntan lotion in the kitchen, and even now, it has a faint suntan lotion-y essence, but not as bad as before. On the other hand, the oil definitely enhances the coconut flavor.  It's all a matter of taste.

Be that as it may, here's the recipe for my granola:

Marna's Granola Recipe:

Preheat oven to 300 degrees

Mix together in a large bowl:

5 cups old fashioned or quick-cooking oats (not instant!)
½ cup bran or flax seed
1 cup nuts
1 cup coconut
¼ cup brown sugar


Heat in a saucepan or microwave:

½ cup canola oil
1/3 cup maple syrup or honey
1 Tbsp chopped crystallized ginger (optional)

Stir the warmed liquids to combine and add ½ tsp of vanilla and ½ tsp salt

Add the warmed liquid mixture to the dry ingredients and stir until oats and nuts are coated.

Spread mixture onto two cookie sheets and baked, stirring every 15 minutes, for about 40-45 minutes (keep an eye on it, as the coconut can start turning too brown quickly).  You might even want to switch the sheets from top to bottom, front to back, about halfway through.

Once the granola has browned and is sort of dry, take out the oven and let cool.  Return to large bowl and add 1-2 cups dried fruit (raisins, cranberries,  diced apricots, golden raisins – whatever you have on hand, really).  Stir to combine.


Makes about 10 cups of granola


This is really just for proportion – around ¾ cup (7 oz, so be exact) liquid to 7-8 cups dry.  You can play around with this a lot – more or less nuts or fruit, coconut or not. You get the picture. For this batch, I added some honey crunch wheat germ, subbed coconut oil for canola, and used golden raisins, regular raisins, and dried cherries to the mix.  I happened to forget the vanilla this time and ended up adding the salt after I had put the raw granola on the baking trays.  Still turned out pretty delicious (won't be giving it away, unless my mother-in-law asks for some, which she usually does).  Like I said, granola is pretty forgiving.

Have fun experimenting with this one! Be sure to report back any of your favorite flavor combinations!