Sunday, July 22, 2012

Simplicity

Often, the best dishes are those that are so simple, but using the best ingredients at their peak flavor.  Summer is especially good for this kind of cooking, because there are so many fresh, ripe, flavorful foods available.  There's just something about excellent ingredients, prepared in a way that honors the flavors, that I really admire and strive for.

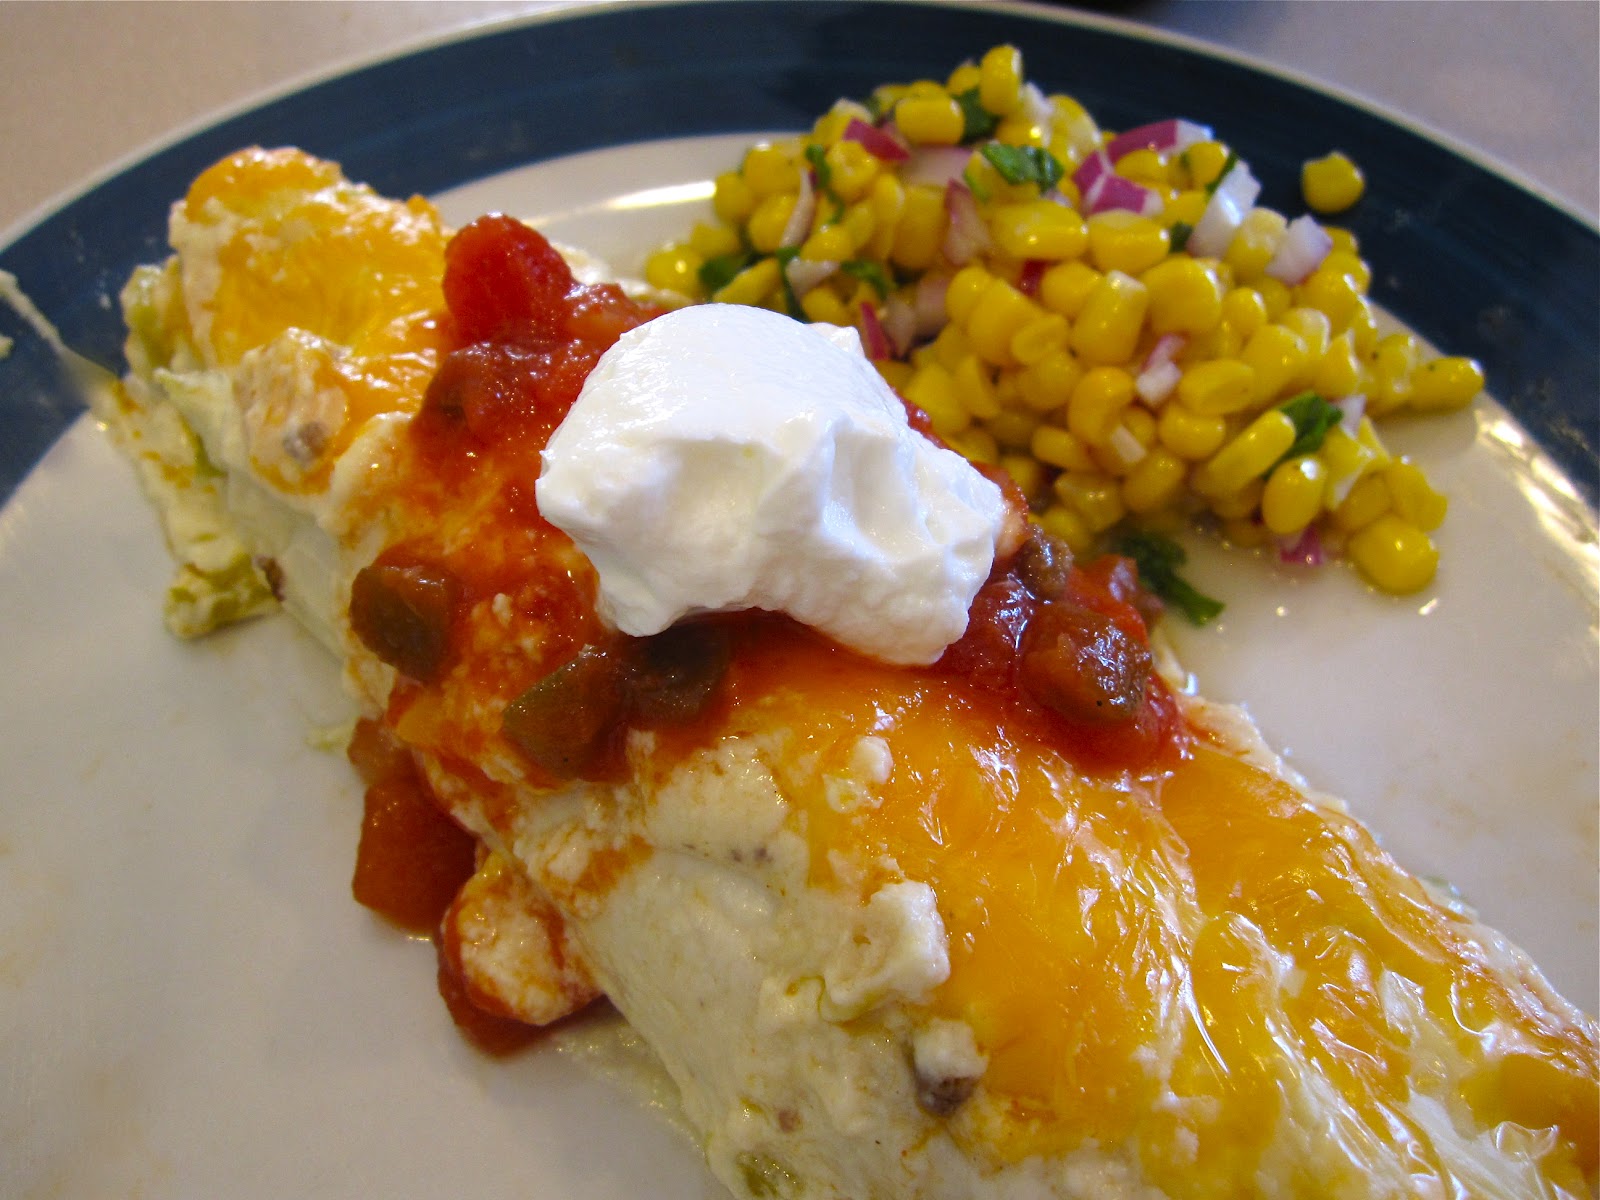
A case in point is my favorite corn salad.  It's amazingly simple, yet everything blends so perfectly that it's the best tasting little salad you've ever had.  Honestly. It positively reeks of summer.  This recipe calls for fresh corn, and it's best if you make it with corn straight from the cob, but I've made it with frozen corn with good results as well.  Just don't leave out the basil, because it really makes the dish.


I have to confess that I didn't make up this recipe.  It comes from Ina Garten, who is masterful with bringing the full flavor out of a few simple ingredients.  I love her, even though I find her voice and manner on Food Network really irritating.  Maybe that's just the way they talk up in the Hamptons.  I've never been there. If you don't own any of her cookbooks, I highly recommend them. I have the first one, "The Barefoot Contessa Cookbook," but I've looked at many, and they are all fabulous.

Ina Garten's Fresh Corn Salad:

5 ears corn, shucked
1/2 cup small-diced red onion (about one small onion)
3 Tbsp good olive oil (extra virgin)
1/2 tsp kosher salt
1/2 tsp freshly ground black pepper
1/2 cup chiffonade fresh basil leaves (that's just a fancy way of saying "cut the basil leaves cross-wise into thin strips" - I stack the leaves on top of each other, then slice cross-ways)

In a large pot of boiling, salted water, cook the corn for 3 minutes, until the starchiness is just gone (How will you know the starchiness is gone? I have no idea, I just do what Ina says, so boil those ears for 3 minutes). Drain and immerse cobs in ice water to stop the cooking and to set the color (Congratulations!  You've just blanched your corn! When you see that term in other recipes, that's what it means: cooking briefly in boiling water.  "Shocking" is what you're doing when you immerse it in the ice water to stop the cooking process. It also helps veggies keep their color).  When the corn is cool, cut the kernels off the cob, cutting close to the cob.

Toss the kernels in a large bowl with the red onion, vinegar, olive oil, salt and pepper. Just before serving, toss in the fresh basil. Taste for the seasonings and serve cold or at room temperature.

Serves 4-6

Saturday, July 14, 2012

The Recipe I Wanted To Hate


 There I was, planning meals for the week, when I asked my oldest son what he might want to have for dinner this week. I happened to be looking at my Southern Living cookbook at the time.  Big mistake.  He saw a picture of a recipe called "Smothered Enchiladas."  The son, who is a pretty healthy eater (actually chooses and eats salad at school for lunch) and generally does not like very gooey, creamy stuff, wanted these crazy creamy, smothered enchiladas.  I looked at the nutritional information per serving, which was one burrito: 712 calories (65% from fat), 51.3 g fat (nearly half of which was saturated). Gah! 

Against my better judgement and, because I love my son and he actually showed some interest, I told him I would make them.  Friends, I have to confess, this recipe made me do things.  Horrible things that I never thought I would ever do.  Like buy Cream of Chicken soup and use it with ground beef.  Like buy reduced fat cheese and light sour cream, in the desperate attempt to make this less fat-laden than a Big Mac with fries. The only redeeming ingredient in this thing was the green chiles, and it was a very small can.


 Here's the recipe from Southern Living for Smothered Enchiladas:

2 lbs. ground beef
1 (1 1/4 oz) package of mild taco seasoning
1 (4.5 oz) can chopped green chiles, divided
2 (10 3/4 oz) cans cream of chicken soup (I substituted 1 cup of 2% evaporated milk for the 2nd can of soup)
1 (16 oz) container sour cream (I used light)
8 (8-inch) flour tortillas
2 cups (8 oz) shredded cheddar cheese (I used 50% reduced fat cheddar)

Garnishes: salsa, sour cream, green onions, chopped fresh cilantro

Cook ground beef in a skillet, breaking up bigger chunks, until it crumbles and is no longer pink. Drain off any fat. Stir in taco seasoning mix and half of the chopped green chiles. Set aside.

Stir together remaining chiles, soup and sour cream.  Pour half of sour cream mixture in a lightly greased 9x13-inch baking dish.  Spoon beef mixture evenly down center of each tortilla.  Roll up and place tortillas, seam side down, over sour cream mixture in baking dish.


Here is my tortilla-filling and -rolling set up.


Spread remaining sour cream mixture over the tortillas and top with grated cheese.

Bake, uncovered, for 25 minutes in a 350 degree oven.  The enchiladas should be heated through and bubbling around the edges.  Garnish, if desired.  Serves 8.

I ended up only being able to fit 7 in the pan, but for my family of 4, it was plenty, with almost half left over. These are really filling, and actually pretty good.  You couldn't even tell I used reduced fat stuff.  And it was really good with salsa on top -- the acid from the tomatoes help cut through the richness.  Knowing that we needed vegetables with this thing, I made my favorite corn salad recipe.  I doubt I will ever make this again, unless someone asks for it for their birthday, maybe.  But I thought I would share, if only to serve as a cautionary tale: don't give your kids an open-ended question like: "What do you want for dinner?" You might not like the answer...


Wednesday, July 4, 2012

Little Balls of Heaven

One of my favorite all time Saturday Night Live skits is the one about Schweddy Balls. If you're familiar with that skit, I hope you're laughing at my title!  Otherwise, you might just be scratching your head at my inappropriateness.

Anyway, I used to get a bunch of different food magazines, but now I've winnowed it down to just two: Bon Appetit and Martha Stewart's Everyday Food.  These are the two magazines where I consistently find recipes that I want to try.  To be honest, for all my "foodiness", I really try to avoid recipes that involve a gazillion ingredients or stuff that I don't regularly buy.  I hate having my cupboards and fridge cluttered up with half-used bottles and jars of stuff (rosewater, chickpea flour, chili lime pickle, anchovy paste...just to name a few).  Look for future blog posts that will utilize these ingredients.  :-)

But I digress!  Back to my balls.  So in the latest edition of Bon Appetit, I found a recipe for Cocoa-Date Truffles where the only sweetener is the dates.  I made them for the staff in the front office of our elementary school.  I made them instead of, say, cupcakes, because our school is labeled a "healthy foods" school (or something like that) where we can't have sweet treats (unless it's fruit) for parties and the daily snacks that the kids bring can't have sugar of any kind in the first 3 ingredients. It's not that big of a deal, and I get why they're doing it, but at the same time, not all of the food choices the school offers in the cafeteria are exactly packed with nutrition, either.  It would be nice if they were consistent, but I'll roll with it.  Ha! I am just full of ball puns today...

So I made these date balls to show the front office that you can have a sweet but healthy (or at least healthier) treat and that just because something's sweet, doesn't mean it's unhealthy. (I'm angling to get low fat brownies allowed, but not sure how that will go over).  The other great thing about this recipe is that it's dairy-free and doesn't have nuts (at least the original recipe), so it's safe to serve anyone who has a milk or nut allergy.

Now, I didn't have raw cacao powder and just used regular cocoa powder, so I'm not sure what the taste difference would be, but I wasn't about to go searching for raw cacao powder.  I just didn't have it in me.  So, here's the recipe from Bon Appetit, with my modifications noted after.

Cocoa-Date Truffles (from the June 2012 edition of Bon Appetit)
makes about 20


3 Tbsp. raw cacao powder
1 1/2 cups Medjool dates, pitted
3 Tbsp. (or more) unsweetened, shredded coconut or quick-cooking oats
pinch of sea salt

Flavoring Options (choose one)
1 Tbsp. unsweetened shredded  coconut
1 tsp. finely grated orange zest
1 tsp. instant espresso powder

Coating Options (mix and match)
1/2 cup unsweetened shredded coconut
1/4 cup lightly toasted sesame seeds
1/2 cup crushed, lightly toasted pistachios
1/2 cup crushed, lightly toasted hazelnuts

Puree cacao powder, dates, 3 Tbsp coconut, and salt in a food processor until almost smooth, adding water by teaspoonfuls if too dry and crumbly and coconut by teaspoonfuls if too wet and sticky (the original consistently will be determined by how moist your dates are).  Add desired flavoring and pulse to combine.

Scoop date puree by the tablespoonful and roll  into 1" balls.  Can be made up to one week ahead. Cover and chill.

Roll truffles in desired coatings to cover.

Notes:

From Bon Appetit: Raw cacao powder and unsweetened, shredded coconut can be found at natural food stores, specialty food stores and some supermarkets.


Marna's notes:  Instead of the coconut or oats, I added 2 Tbsp of walnut butter plus 1/4 cup of finely chopped, toasted walnuts.  Plus, as mentioned earlier, I didn't have raw cacao powder and just used regular unsweetened cocoa instead.  I ended up having to add about 2 Tbsp of water to get things to a consistency where I could shape the mixture into balls. In terms of servings, I used a tablespoon scoop and only got about 12 balls, so you could make them smaller to get more, or just count on this making less than you originally thought (or double the recipe).

Tuesday, June 26, 2012

A (Wo)Man With a Plan

This will probably not come as a shock to anyone who knows me, but I try to plan at least four or five meals per week.  That usually gives me enough leftovers to kind of punt the other nights.  I know some folks think it takes a lot of time to sit down and do that kind of planning, but honestly, it doesn't, really. Now, don't get me wrong, usually "the plan" goes awry at some point in the week, but not so much so that I can't get back on track later on down the road. And I have to say that it actually saves time and stress knowing you've got the ingredients in the house to make any one of 5 different meals, whether you make the one you actually planned for on the exact night or not.

Another key tool that has helped me with planning is an online note-taking app.  I use Evernote, but there's probably a gazillion types of those apps out there. This is how I use it for meal planning:

On a given night, usually when I realize that I need to go to the store in the next day or two and don't have any meals plans, I will sit down and type in my notes (my meal planning list is called "Meals for the Week), such as:

  1. Sunday -- 
  2. Monday --  Steak, sauteed chard with bacon, tabbouleh
  3. Tuesday -- soup with chard, garlic sausage, cannelini
  4. Wednesday -- grilled pizza (pizza dough: http://www.foodnetwork.com/recipes/paula-deen/basic-pizza-dough-recipe/index.html)
  5. Thursday -- chicken and dumplings (Paula Deen, p. 74)
  6. Friday -- smothered enchiladas (Southern Living cookbook, p. 303), corn salad
  7. Saturday -- out...
At the bottom of the same note, I make a grocery list as I go, plus, as you can see, if there's a recipe that I'm using, I either provide the link (if it's online) or note the cookbook reference, so I don't forget where to go.  My old fart brain needs that kind of detail.  Having the grocery list with the meal plan helps me at the store, too, because: a) I never forget my list; and b) when I have a question why I put one thing or another on the list (or, more likely, I forget that I have a plan for, say, Thursday), I can refer back to the meal plan. Easy peasy.   :-)

I must have been sitting down on Sunday to do this, since that day was blank on this particular week, but that just shows you how flexible this can be.  If you don't need or want a plan for a particular day, just leave it blank. Monday's menu happened to consist of a steak I had bought for a barbeque that we ended up not using, plus some beautiful Swiss chard I bought at the farmer's market the Saturday before.  That kind of fresh stuff is something you need to use up within a day or two of buying it, unless you do a mid-week run to replenish fruit, veggies, and milk (as I often do).  The tabbouleh was left over from the barbeque as well.  

Tuesday's menu made use of leftovers I already had.  I made a soup with the leftover chard and bacon, added leftover garlic bratwurst that I sliced up, added a can of beans and some chicken stock and voilĂ ! You've got yourself some soup for dinner.  I also happened to have some sliced up, stale bread in the freezer, so I pulled some of that out, toasted it, tossed it on top of the soup (in the bowl), and grated some parmesan over it. It was tasty!  That's the beauty of meal planning.  You can make a little extra of something a day or two before, and it's already prepped for dinner another night, making it that much easier to get dinner on the table. Plus, you can make better use of leftovers, thereby eliminating throwing out food.  The only problem is that, sometimes, my husband will eat something as a snack or for lunch that I had been planning to use later in the week.  Oh, well.  Nothing it fool proof!

For Father's Day, I gave my husband a pan to make pizza on the grill, so that was my inspiration for Wednesday's meal.  The other days, I went with what the kids wanted, within some confines (I already had chicken and ground beef in the freezer, so they had to pick meals that used those ingredients).  Thursday's meal also works, because it cooks in the crock pot, and my son's birthday party is that day, so we'll have the meal cooking during the day and ready later in the evening, after everyone's gone home and I'm too tired out to make anything.

And Saturday, I was going out with friends to visit a couple of area wineries, so you know I wouldn't be in any shape to cook, so the plan that night was to order something or go out.  We ended up at a friend's for an impromptu barbeque, but either way, I wasn't cooking.  :-)  There are nights where I just don't feel like cooking (gasp! I know, but it happens to the best of us).  On those nights, we'll often clean out the fridge and eat up any leftovers we have from the week. I like to call it smorgasbord night.


All told, I spend about an hour planning the week's meals.  That might seem like a lot of time, but if you think about it, I don't waste any time during the week worrying about what to make that night or if I have the right ingredients (or having to make an extra, unplanned grocery store stop along the way).  I figure I'm saving money, too, since I'm not doing as much impulse-buying at the grocery store.


You can also make it easier by doing theme nights.  During the school year, we had Taco Tuesdays and Pancake Thursdays. Originally, I instituted those nights to make sure that my youngest son would have two nights where he would actually eat something, but it turned out to make meal planning even easier, since it was two nights I didn't have to think of something new to make.  We did switch things up by doing different kinds of tacos (chicken, fish, pork) and pancakes (buttermilk, chocolate chip, gingerbread, etc.).  Eventually, the boys got tired of tacos, so we're taking a break from that idea.  I do like Mexican food, though, so there's usually at least one night each week where we're eating it.


This is not to say that I do this every single week. There are some weeks that's it's nearly Wednesday before I get an actual plan together, but then I just roll the plan into the next week.


If you're not sure how to even get started, there are some websites that offer plans, complete with grocery lists.  One of my favorites is found on Martha Stewart's website.  Just scroll down or search for Grocery Bag; there are a number of different options.  Kraft Foods also has their "1 Bag 5 Dinners" website as well. Kraft's recipes, understandably, specify their products, but I tend to look past that and just use whatever brand (usually store brand) I usually buy. Rarely, because of a certain picky 7-year-old, do I use the exact same 5 meals that are offered, but will substitute something I know he'll eat based on the general ingredients used for the rest of the recipes.


No pictures this time, but I hope this is useful information, and perhaps some inspiration, for you to do a little bit more meal planning.  Maybe save some money and time along the way, too!

Thursday, June 21, 2012

You Say Tabbouleh, I Say Tabouli

As I was making tabbouleh, I remembered why I never make it.  Lots of chopping.  Lots and lots of chopping.  But I wanted to make something with some cracked wheat that's been sitting in the cupboard for a while, and we were getting together with friends for a Father's Day barbeque.  Tabbouleh is a nice side dish for the summer, because you can serve it cold or have it sit out to room temperature and it's still going to taste good.  Also, if your culinary skills aren't where you want them to be, this is an easy recipe to make, and people will think you know what you're doing.  The only "cooking" you do is boiling water, which you then just pour over the cracked wheat (also known as bulgar -- it took me a while, plus asking someone at the grocery store, to find it).

Side note: I still don't know how it's supposed to be spelled.  When I was looking for recipes, I found it spelled at least 3 different ways.

To be perfectly honest, I'm not a big fan of tabbouleh.  I think the parsley taste is often too overwhelming for me, or maybe I've had one too many instances of the cracked wheat being too crunchy. I don't know, but I did find a recipe on Epicurious that had lots of mixed herbs that served to mellow out the parsley taste, so I thought I would share it with you.  It was really tasty -- especially on a hot day when you don't want to do a lot of cooking. As I was chopping the final bunch of parsley, I realized I could probably toss everything in the food processor and pulse it to the right consistency.  I will try that next time, for sure!


(click on the title to go straight to the original recipe on Epicurious.com)

Ingredients:


  • 1/2 cup medium- or fine-grain bulgur
  • 2 tablespoons extra virgin olive oil
  • 2 garlic cloves, minced
  • 2 cups finely chopped fresh flat-leaf parsley (about 3 bunches) - I used regular, curly parsley this time
  • 3/4 cup diced red onion
  • 2 medium tomatoes, seeded and diced
  • 1/3 cup finely chopped fresh mint
  • 1/4 cup finely chopped fresh basil
  • 3 tablespoons finely chopped fresh dill
  • 3 tablespoons finely chopped fresh cilantro
  • 1/3 cup fresh lemon juice

  • 1. Bring a kettle of water to a boil. Stir together the bulgur and 1 tablespoon of the oil in a heatproof bowl. Add boiling water to cover. Cover the bowl tightly with plastic wrap and let stand for 15 minutes. Drain in a sieve, pressing on the bulgur to remove any excess liquid.

     2. Transfer the bulgur to a large bowl and toss with the remaining 1 tablespoon oil and the rest of the ingredients until everything is well mixed. Cover and refrigerate for at least 3 hours. Serve cold. Serves 8 (more if it's served as an appetizer)


    It takes a few ingredients, but the only thing you have to cook is the cracked wheat (bulgar).  You can see it in the bowl on the left with the plastic wrap on top.


    Friday, June 15, 2012

    Decadent

    That's the only way to describe the cake I made recently.  Layers of chocolate cake, filled with caramel buttercream, then topped with a spiced chocolate ganache.  Because I don't want to be 500 lbs, I invited all the kids and moms from the bus stop to have a piece after school.  But I probably could have eaten half of the cake all by myself, if given the chance. We found that one cake will feed about 16 people.

    I mean, seriously, wouldn't you want to eat this whole thing? But don't.  Just don't.  Somewhere along the way, you would regret it.


    I adapted the cake recipe  from Hershey's, and it's going to be my go-to chocolate cake recipe. It's easy and delicious!  I used a combination of all purpose and cake flour, but you could use only all-purpose, if that's what you have. The buttercream was left over from the cupcakes I made earlier, and the ganache came from a different cake recipe. I think the addition of corn syrup is what makes it stay glossy and a little softer than traditional ganache.  It's so good!


    The frosting with really soft, so it started oozing out between the layers.  I tried to work fast once the top layer was put on.  I kept it in the fridge until I was ready to put on the ganache.


    Here's the final product.  The chocolate I used had a little spice to it, so I enhanced it with a little additional cinnamon.  The combination of the chocolate, caramel and cinnamon was really delicious!


    Decadent Chocolate Cake with Caramel Buttercream and Spiced Ganache

    Cake:

    2 cups sugar
    3/4 c. all purpose flour
    1 1/3 c. cake flour
    3/4 c. cocoa
    1 1/2 tsp. baking powder
    1 1/2 tsp. baking soda
    1 tsp. salt
    2 eggs
    1 c. milk
    1/2 c. vegetable oil
    2 tsp. vanilla extract
    1/2 cup strong, hot coffee
    1/2 cup boiling water

    Caramel Buttercream:

    5 large egg whites
    1 1/2 cups sugar
    4 sticks unsalted butter, diced and softened to room temperature
    1/4 teaspoon salt
    1 tablespoon vanilla
    1/3 cup caramel sauce (I used Smucker's brand, but I would recommend a higher-quality or home-made version to get a deeper caramel flavor)

    Spiced Chocolate Ganache:

    6 oz. semisweet chocolate
    5 Tbsp. whipping cream
    3 Tbsp. cold unsalted butter, cut into 4 pieces
    1 tsp. light corn syrup
    1/2 tsp. vanilla extract
    1/4 tsp. cinnamon

    To make the cake:


    1. Heat oven to 350 degrees. Grease two 9-inch round cake pans. Cut parchment paper into two circles to fit inside the pans. Grease the parchment paper.
    2. Stir together sugar, flours, cocoa, baking powder, baking soda, and salt in large bowl. Add eggs, milk, oil and vanilla. beat on medium speed of mixer for 2 minutes. Stir in hot coffee and boiling water (batter will be thin). Pour batter into prepared pans, dividing evenly between the pans.
    3. Bake 30 to 35 minutes or until a wooden pick (toothpick) inserted in center comes out clean. Remove pans from oven and cool in pans for 10 minutes. Run a thin knife around the outside of the cake layers to help loosen the cake layers.  Remove layers from cake pans and peel parchment paper off.  Let layers cool completely.

    For the Caramel Buttercream:

    1. Combine egg whites and sugar in a bowl placed over simmering water. Bring mixture to 150 degrees F while whisking constantly (it took about 10 minutes for me, but if you have a candy thermometer, I suggest you hook that to the side of your bowl so you know for sure). The point of heating the egg whites and the sugar together is to get the sugar completely dissolved, so it should feel smooth and not at all gritty when you rub some of the mixture between your fingers. 
    2. Transfer mixture to stand mixer bowl, fitted with a whisk attachment, and beat mixture, starting on low, then gradually increasing speed up to medium-high until mixture cools and doubles in volume.  It should be completely cool and will form stiff peaks if you pull the beater out.
    3. Add butter in one piece at a time, mixing to incorporate after each addition. The mixture may appear clumpy and almost curdled looking-this is normal. Keep mixing and it will become even and smooth again. Add salt and vanilla and mix to combine. Add caramel sauce and mix to combine.

    For the Spiced Chocolate Ganache:

    1. In a double boiler, with the bowl over warm water over low heat, combine whipping cream and chocolate and heat until just melted and whisk smooth.
    2. Remove from heat and whisk in butter, piece by piece, until smooth, then add corn syrup, vanilla extract, and cinnamon.  Let cool slightly

    Assemble the cake:

    Place one layer on platter or serving plate. Slide 4-5 strips of waxed paper or parchment paper under the bottom layer (between the cake and the serving platter). Spread half of buttercream on bottom layer, top with second layer. Top the second layer with the rest of the buttercream. Refrigerate layers for 30 minutes. Pull out the parchment strips.  Pour ganache on top of cake, letting it fall and drip over the sides of the cake.

    TIPS:

    You can use as much or as little of the buttercream as you like.  If you don't want a thick layer of it, then don't use as much.  I like frosting, so I used all of it.  :-)

    If all of these steps seem daunting all at once, you can definitely do it in parts.  The cake can be made ahead and frozen (wrap in a layer of plastic wrap then another layer of aluminum foil...unthaw in the fridge), and the buttercream can be made up to 3 days ahead and refrigerated until you're ready.  Even the ganache can be made ahead and warmed up in the microwave until it's thin enough to pour.

    If you don't like the coffee taste in the cake, you can leave it out and just use a full cup of boiling water.  I find that a little coffee flavor helps enhance the chocolate, but not everyone likes that.  Make it to your own taste!


    Monday, June 11, 2012

    Rhubarb, rhubarb everywhere!

    Nothing says "Spring" to me more than rhubarb.  Okay, that's kind of a lie.  Rhubarb, asparagus and strawberries all say spring to me.  And, yes, I realize it's summer.  Bear with me, please.  I'm new.

    But this post is about rhubarb, so we'll put those other two on the back burner, mainly because it's hard to improve upon the natural tastes of strawberries and asparagus (not together, of course, gross).  If you are a Laura Ingalls Wilder fan(atic), you will be familiar with how, as a new bride, she made pies with rhubarb (also known at one time as "pie plant") and forgot to add sugar.  Her husband, Almonzo, and the hired hands were less than enthusiastic about eating it.  My point is this: rhubarb is great, but you have to do something to it, like bake it in a pie, because it's a little nasty just plain raw.


    I, personally, am not much of a pie maker.  But what got me on the rhubarb kick this go around was that a friend of mine posted a recipe for rhubarb cake that sounded really good.  Her husband, like mine, is not partial to rhubarb, but she said he liked this cake, so thought I would try it.  This post will be a two-fer, since, not only did I made a rhubarb coffee cake, but I had some leftover rhubarb and streusel, so I thought I would also make a crisp.

    I was fiddling around with different cake/streusel combinations, and the cake recipe I used was just too delicate for the heavy streusel, and the streusel sank a lot.   The taste was okay, but it just didn't look like a streusel coffee cake, so I'm going back to the original recipe from Martha Stewart, then tell you how I did the the rhubarb-peach crisp.


    In my last post about experimentation, I had hinted that I had hit upon a great flavor combination.  At first I thought is was the innovative pairing of peaches and rhubarb, but a quick search shot that down.  Apparently, I was not the first (even the 100th) person do make that connection.  However, some folks haven't discovered the joy of cardamom paired with rhubarb and peaches, since the recipes I found did not include that spice. When you make this, people will ask what's in it, because it's just a hint, and not too many people are very familiar with the flavor.  I love cardamom, and it's used frequently in Scandinavian dishes, which is how I am most familiar with it. It lends a spicy, slightly floral flavor to both sweet and savory dishes, such as cardamom cookies, Julekage, and Swedish meatballs.  If you've never used it in baking, I highly recommend trying it out.  Maybe start with a small jar of it and work up.  I generally get a large-ish, 2.4 oz jar of it from Penzey's, which is a favorite place of mine to get spices and such.


    Rhubarb-Peach Crisp                                                                              Rhubarb Coffee Cake


    I coarsely chopped the rhubarb.


    Martha Stewart's recipe makes a lot of crumble!


    Here's the coffee cake I make using the more delicate cake.  See what I mean about the crumble sinking?


    Here's the recipe for coffee cake from Martha Stewart:


    Ingredients

    • For the crumb topping:
    • 3 1/2 cups cake flour (not self-rising)
    • 2/3 cup granulated sugar
    • 2/3 cup packed dark-brown sugar
    • 1 1/2 teaspoons ground cinnamon
    • Coarse salt
    • 2 1/2 sticks unsalted butter, melted
    • For the cake:
    • 1 1/2 sticks unsalted butter, room temperature, plus more for pan
    • 2 1/2 cups cake flour (not self-rising)
    • 1/2 teaspoon baking soda
    • Coarse salt
    • 1 cup granulated sugar
    • 2 large eggs plus 2 large egg yolks
    • 1 teaspoon pure vanilla extract
    • 2/3 cup low-fat buttermilk
    • 1 cup store-bought blueberry jam (optional)
    • Confectioners' sugar, for dusting

    Directions

    1. Make the crumb topping: Mix together flour, sugars, cinnamon, and 1/2 teaspoon salt in a medium bowl. Pour warm melted butter over mixture, and mix using your hands until medium to large clumps form.
    2. Preheat oven to 325 degrees. Make the cake: Butter a 9-by-13-inch baking pan. Whisk together flour, baking soda, and 1/2 teaspoon salt in a medium bowl.
    3. Beat butter and granulated sugar with a mixer on medium speed until pale and fluffy, about 2 minutes. Beat in eggs and yolks, 1 at a time, then vanilla. Beat in flour mixture in 3 additions, alternating with buttermilk, beginning and ending with flour. Continue to beat until well combined.
    4. Spoon batter into pan, and spread evenly using an offset spatula. Spread with jam, if using. Sprinkle crumb-topping mixture evenly over top.
    5. Bake until golden brown and a toothpick inserted into the center comes out clean, about 1 hour. Transfer pan to a wire rack. Let cake cool slightly, about 15 minutes. Dust with confectioners' sugar. Serve warm or at room temperature.

    Cook's Note

    Coffee cake can be stored at room temperature for up to 5 days.
    For a rhubarb coffee cake, take two tablespoons of flour from the 2 1/2 cups you would add to the cake, and toss it with 2 cups chopped rhubarb.  Fold in the rhubarb at the end of step 3.
    You can also play with the spices, if you like.  I only used 1 tsp. cinnamon and added 1/2 tsp. cardamom to the crumb topping.

    Rhubarb Peach Crisp


    Now, for the crisp. I ended up with extra crumb topping from the above recipe, so I used two cups of the crumb topping and added about 2/3 cup of oatmeal (not instant) and sort of smushed it around with my hands to integrate it into the crumbs.
    TIP: You can make crumb topping and keep extras in the freezer.  That way, you have it as a quick topping for muffins, bars or coffee cake without having to do the extra step, which sometimes I feel too lazy to do.
    Into a buttered 1 quart baking dish (8-inch diameter by 2-inches deep), I dumped 1 cup chopped fresh rhubarb and 2 cups sliced, thawed frozen peaches (I'm sure you can use fresh if you have them).
    In a small saucepan, combine 1/2 cup water, 1 Tbsp cornstarch, 1/4 tsp cardamom and 1/3 cup sugar. Cook over medium heat, whisking constantly, until thickened (it should coat the back of a wooden spoon). It should only take 3-5 minutes.  Pour this mixture over the fruit, then top with the crumble mixture.  Place in an oven that is pre-heated to 350 degrees and bake for about 45 minutes.  The crumble should be golden brown and be a litte crispy in places, and the sauce should be thick and bubbling up through the crumble in places.
    Let it cool slightly before serving.  I love crisps served with ice cream, but this is good by itself, too.  Confession: I have also eaten it for breakfast (fruit and oats are good for you, right??), but not with ice cream.  I'm crazy, but not that crazy.  ;-)