Monday, December 23, 2013

Christmukkah 2013: Tips for Entertaining


Sorry for being lame and going so long between posts, but I know you'll understand, because everyone's so busy! This late Thanksgiving thing really puts the squeeze on holiday entertaining!

It's been crazy around here, and we actually had Christmukkah earlier this year than usual, since Hanukkah was so early.  I have to admit that I didn't do anything very original this year in terms of food, but I'll post links below to everything I made.  This post is going to be more about tips for entertaining than actual cooking, because, honestly, what's better than having family and friends over, talking and laughing over good food?

So here are my tips for entertaining:

1) Don't worry so much about your house -- how clean it is, how "undecorated" it is, or anything else. Why? Because your friends won't care.  And if the people you invite over are going to judge the type of furniture you have or the size of your house, are they really worth keeping as friends?  Personally, I don't spend a whole lot of time actually cleaning before people come over, because everything's just going to get dirty again anyway. Which leads me to my next tip:

2) Don't waste your time washing the floor and cleaning under the refrigerator (people actually do that).  Just do a once-over with with a dust cloth and the vacuum, and wipe down the bathrooms with Chlorox (or other cleaner) wipes. I do, however, put away as much clutter as I can, so people have places to set their drinks or plates as they walk around. Save the really big cleaning for after everyone leaves.  :-)

3) Do make sure bathrooms have extra toilet paper and clean towels/guest cloths, for obvious reasons.

4) Do make more food than you think you'll need.  Every year I end up with food that I don't even put out on the table because people bring food with them.  However, I know that the one year I under-provide will be the year that everyone brings wine and beer instead of food (would not be a horrible party in any case, but still).

4a) make sure the extra food is shelf-stable (crackers, smoked fish, pickles) or freezable.  That way, if you end up not using it, you can keep it until your next get-together.

5) Consider your guest list and match it to the size of your space and the "feel" you want.  Christmukkah has turned into a nearly neighborhood-wide event, which is why we turned it into an open house at this point.  The first couple of years we kept it small and actually had real food and sat down to eat, but as our guest list grew, we've had to switch the format to accommodate more people.  I'm a "more the merrier" type of person, so more people showing up makes me happier than fewer.  BUT, that type of entertaining isn't for everyone, so think about what you want to get out of it, as well as your guests.

6) Match the types of food you'll serve to the amount of people invited. What I mean by this is, the more people you have coming, the simpler the food prep should be, with dishes that can be made ahead of time being REALLY important.  There is no shame in having a nice cheese platter or vegetable tray, especially if you have some interesting cheeses/crackers or dips to go with it.  Not everything needs to be individually served and elaborately hors d'oeuvres-y.

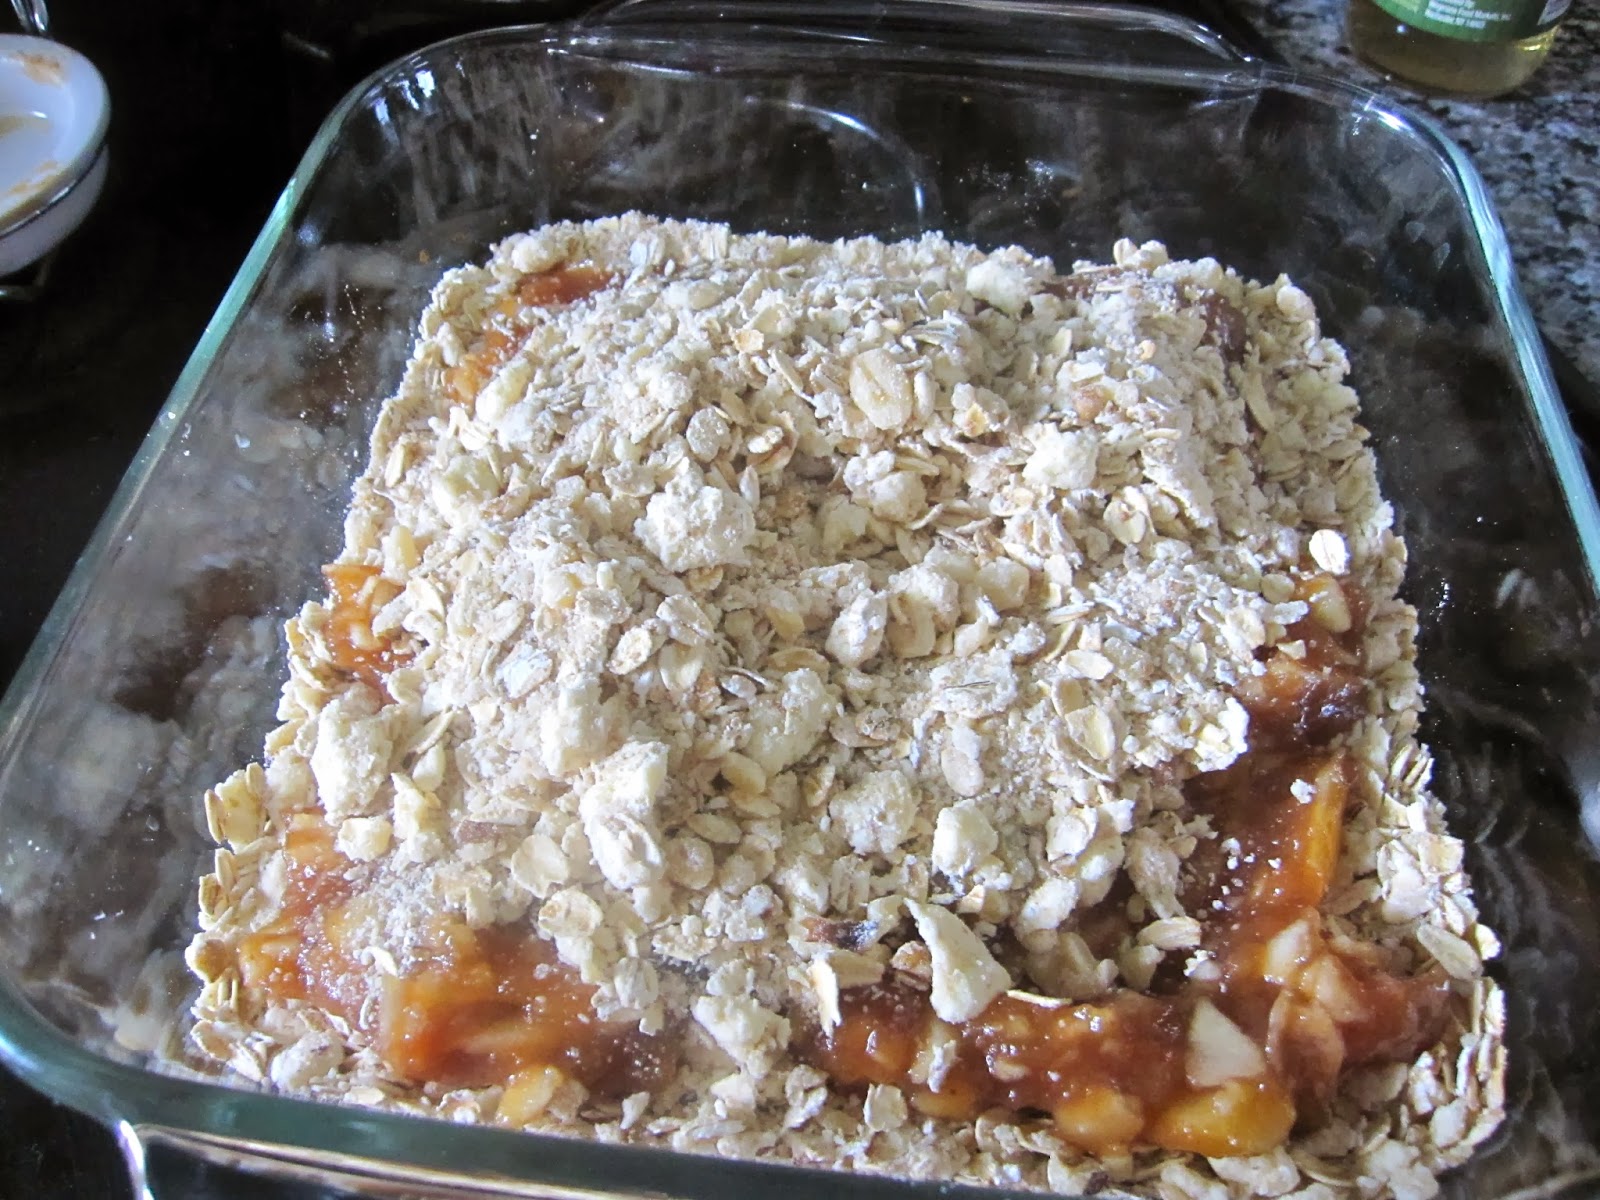
7) Focus on one "wow" offering (if that's your thing). This year, mine was going to be the Zucchini Cakes with Smoked Trout, but I never got to serve it...Going back to tip 4a, the zucchini cakes are freezable and the smoked trout came in tins, so I'm saving it to serve on New Year's Eve.  See how that works?  That being said, everyone was happy, and eating and drinking, so I didn't sweat it that I didn't get to put out my "fancy" hors d'oeuvres.  :-)

8) This is supposed to be fun, and no one will be happy if the host is not having fun.  So be sure to enjoy yourself, and if that means serving lasagna and salad because you can make it all ahead of time, then so be it.  If you thrive on wow-ing your guests with something elaborate, go for it.  But you shouldn't stress out about having people over, since, like I said, it's supposed to be fun and enjoyable.

So, my advice to you is to just start having people over more.  It's fun. It's less expensive than going out for a meal, plus you get to pick your own music.  :-)

I forgot to take pictures during the party (are you really that surprised?), but I did get a snapshot off of the food tables before people got here. Plus I took a couple of pictures of some foods I made, after the fact.  Sorry, but I was having too much fun talking to my guests.  LOL


Cranberry Cheesecake                                                 Cardamom Thumbprint Cookies


Christmukkah 2013 Menu:

Swedish meatballs with lingonberry sauce (I used the recipe from "Savoring the Seasons of the Northern Heartland". The lingonberry sauce was store-bought, 'cause nobody got time for makin' lingonberry sauce from scratch…especially when you don't have access to lingonberries)

Picture of Lemon-Garlic Chick Pea Dip with Veggies and Chips Recipe

Lemon-garlic Chick Pea Dip http://www.foodnetwork.com/recipes/rachael-ray/lemon-garlic-chick-pea-dip-with-veggies-and-chips-recipe/index.html

Zucchini Cakes with Smoked Trout recipe

Zucchini Cakes with Smoked Trout http://www.epicurious.com/recipes/food/views/Zucchini-Cakes-with-Smoked-Trout-359333


Stuffed Dates http://www.beyondthepeel.net/2012/12/goat-cheese-stuffed-dates-recipe.html - I did change this up a little and used orange peel, rosemary and thyme in the goat cheese. Since dates are so sweet, I wanted to cut through that a little bit. Also, instead of nuts, I did do the pomegranate seed variation.

Cranberry Cheesecake Recipe

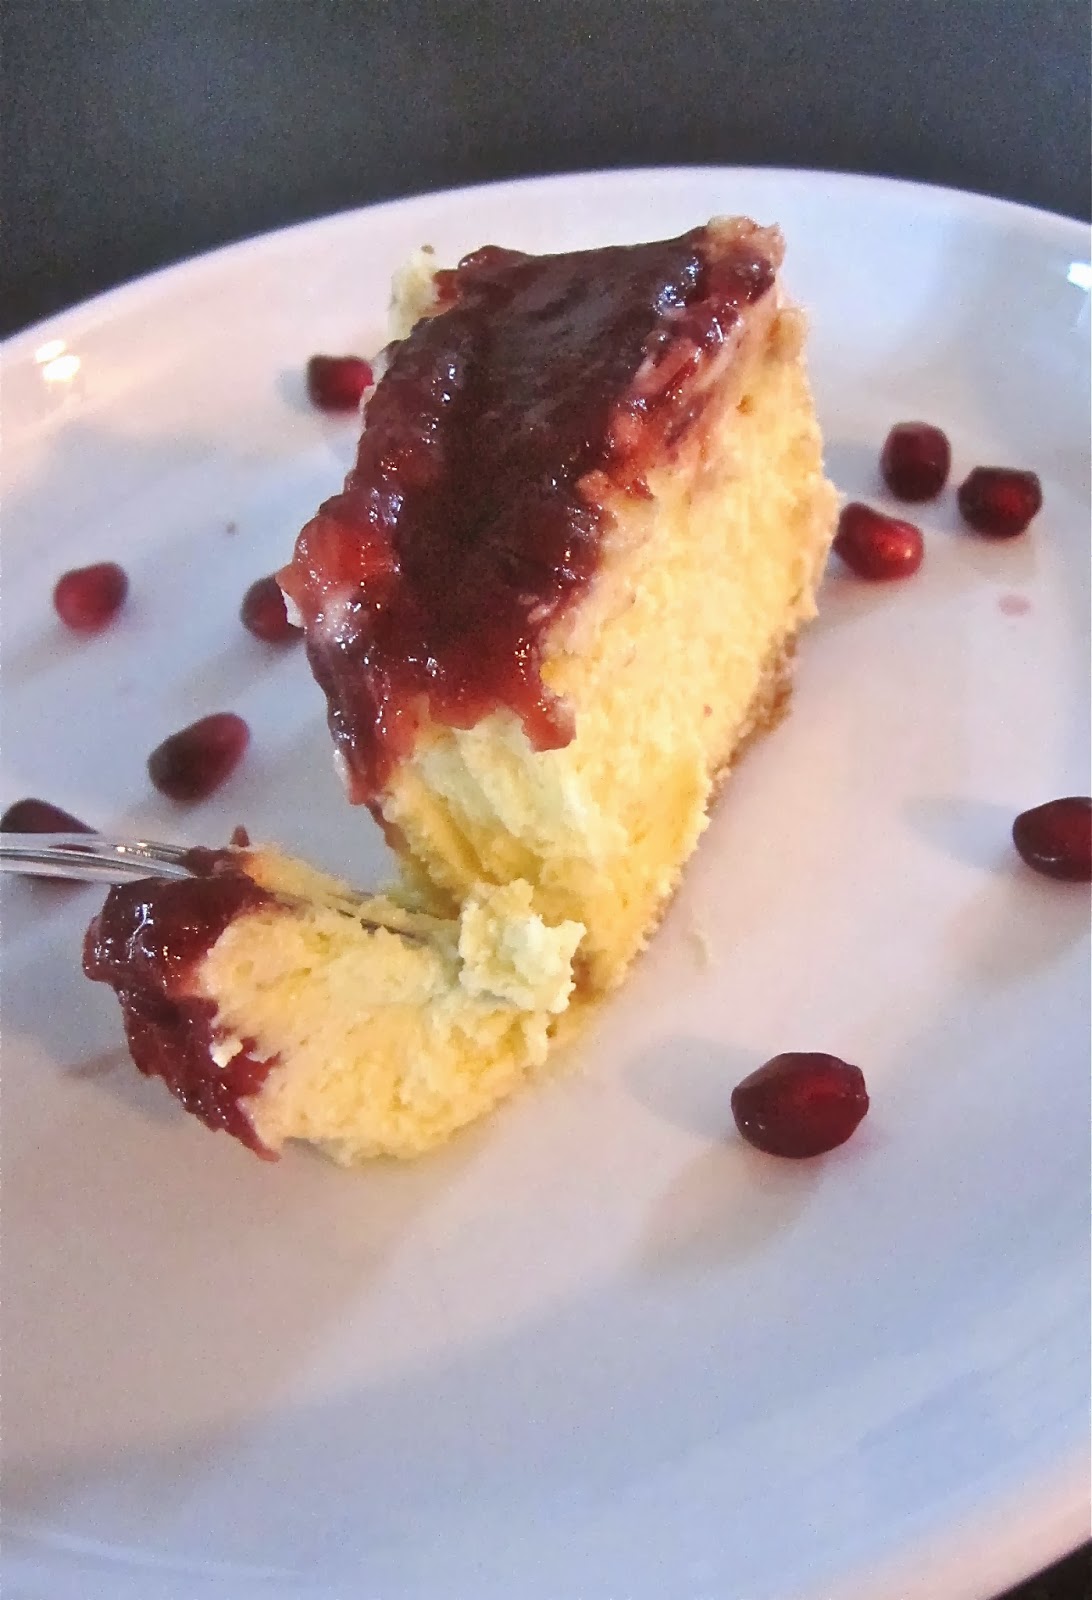
Cranberry Cheesecake http://www.tasteofhome.com/recipes/cranberry-cheesecake


Almond Cardamom Thumbprint Cookies http://www.outside-oslo.com/2013/11/29/cardamom-thumbprint-cookies-with-a-scandinavian-touch/

All of these were delicious (the photos are copied from the linked websites -- they're too nice to be my work!) and I would make any of them again.

Wednesday, November 20, 2013

Caramel Apple Crisp Bars


So, if you are following along with my previous posts, you probably have boatload of apple butter.  I know I did.  And, after a while, putting it on toast or muffins (insert your own joke here…) isn't cutting it anymore.  We still have some in the freezer, too.  So I came up with Caramel Apple Crisp Bars to help use some of it up.  They're really yummy.  You should make them.  :-)


I realize that you can't really see much of the bar underneath the mound of ice cream, nuts and caramel sauce, but my older son had this serving idea, and it was delicious, so I thought I would give you another idea to use (and reason to make this recipe).


Caramel Apple Crisp Bars

1 1/4 c. old-fashioned oats
1/2 c. all-purpose flour
1/2 c. brown sugar
1/3 c. butter, cold
1/2 c. walnuts, chopped
3/4 cup apple butter (homemade or not)
1 small apple, peeled and chopped (about 1/2 cup chopped)
1/2 c. caramel sauce (you can use anything you have on hand, but I highly recommend this recipe for Apple Cider Caramel Sauce from Southern Living)

Combine oats, flour, and sugar in a medium bowl, breaking up and clumps of brown sugar.  Cut the cold butter into cubes, then add to the bowl. Using a pastry blender or your fingers, incorporate the butter until the mixture is uniform sizes and crumbly.  Add walnuts and stir to combine. Set mixture aside.


[Alternate method: put oats, flour, sugar, butter and walnuts (chopped or not) in a food processor.  Pulse about 5-6 times to combine.  Butter pieces should be the size of small peas.]


Combine apple butter and chopped apple in a small bowl.  Set aside.


Butter the bottom of an 8x8 inch pan, then pour half of the oat crumb mixture in the bottom of the pan and pat down a little.  Drop spoonfuls of the apple butter/apple mixture on top of the crumb mixture, then gently spread around to evenly distribute over the crust. Combine the caramel sauce with the remaining crumb mixture, then drop by spoonfuls over the top of the apple butter layer.


I need to confess something on this step.  Initially, I put the rest of the crumb mixture on top and was going to drizzle the caramel sauce over it, but then I thought the caramel might burn before the bars were done baking, so I scraped off what I could and put it back in the bowl, then stirred the caramel sauce in to what I had.  That's why it looks kind of funky, but yours will be much prettier!

Put in a pre-heated 325 degree oven for 35-40 minutes (top should be golden and edges will be bubbling.


Cool completely.  Cut into squares and serve.  Makes about 16 (if you like them bigger) or 20 (if you like them smaller).  :-)

Saturday, November 9, 2013

The Fresh Market Opens at One Loudoun in Ashburn


Open for business!


Gorgeous produce!


I seriously wanted to try a little of everything in that case!

(above photos copied from The Fresh Market's Facebook page)


Some of my friends have been buzzing about The Fresh Market ever since they announced earlier this year that they would be opening a new location at One Loudoun in Ashburn.  I was lucky enough to get there on opening day and it was a lot of fun!  Lots of specialty items that I haven't been able to find in other stores (high quality tuna in oil or different varieties of capers, for example) and just a beautifully laid-out market.  Because the store is on the smaller side, by necessity the items they carry are well-edited, even if some are on the pricey side.  I've signed up for their weekly specials newsletter, because the specials they were running were really good (BOGO on quick bread loaves -- I bought the banana chocolate chip and the pumpkin), but generally the prices do run a little higher on a lot of things, but seems comparable on others.  Go take a look and see what you think!

Check out all the fun things I bought!


It will be really fun to go back when I need to put together any foodie gift baskets for friends or other winter events coming up!  I could also see popping in there to pick up fun items for a picnic lunch (go out and enjoy this beautiful fall weather) or when you need some quick appetizer ideas.  I stocked up on some Stonewall Kitchen jellies and jams (also a BOGO special) to have on hand.  Their red pepper jelly spread over a block of cream cheese makes a delicious and easy appetizer if you need one at the last minute.

Now, it would take a lot to tear me away from Wegmans as my main grocery store, but here is what I will go back for regularly at The Fresh Market:  Nueske bacon (if you've never had it, you are so missing out), their peanut butter power chews (bulk food bins), chili lemon rounds (rice crackers - also found in the bulk food section), their cucumber salad (at the olive bar) and their coconut shrimp with mango dipping sauce.  Nom, nom, nom.

Because I am a baker, and have lived in France, I do have a quibble with what they call "napoleons." The Fresh Market version looks like cake layers with cream and fruit layered between.  A true napoleon (or mille-feuille in French), in my opinion, has to have the puff pastry layers.  I am a traditionalist like that, and I want to make sure we Americans know the real thing.  :-) They do, however, have lovely baked goods that would be a hit at any dinner party, or just a sweet treat (they have many single-serve options)!  I tried their apple pie (very tasty, although I like mine with lots of cinnamon), banana chocolate chip bread (yum!) and pumpkin nut bread (good, but needs more nuts) and two types of cupcakes -- a chocolate and vanilla (with swirled frosting) and their cannoli cupcake.  Both were really good!  They had a lot more varieties that I will want to try...

I also wasn't a big fan of their sushi. I got their spicy tuna roll, but thought the rice on their version was too soft and "glue-y" and the tuna wasn't all that flavorful.  My husband and son, on the other hand, liked the tuna, even though they agreed with me on the rice issue. Just a matter of opinion, of course.

I bought some of their name brand items to see how they compared to what I would make, and we really enjoyed their cornbread stuffing mix and their "Anything Goes" spice rub.  I used the spice rub on their chicken breasts (a good deal at $2.99/lb) and baked them in a 350 degree oven for 45 minutes (until the thermometer registered 170 degrees).  Supper tasty and moist. I think the spice rub would taste even better on pork, so that's up next.  I highly recommend getting a tin of it, and this is coming from a Penzey's girl.  :-)


Below is my take on their cornbread stuffing:


The Fresh Market Cornbread Stuffing, Marna's Way

Adapted from The Fresh Market Basic Stuffing Recipe

3 slices of Nueske bacon
One medium onion, chopped (about 1 cup)
3 stalks celery, chopped (about 1 cup)
2 2/3 cups chicken stock
1/2 cup unsalted butter
1 Box of The Fresh Market Cornbread Stuffing Mix
Pepper to taste

Cut bacon cross ways (across the short side) into 1/4 inch strips.  Heat a large skillet and sauté bacon until the fat starts to render, but before it is crispy.  Add celery and onion and cook together until the bacon is crispy and the onions are soft and translucent.  Add butter and chicken stock and cook until butter is melted.  Take off heat and set aside. Open stuffing mix box and pour onto a large, heat-proof bowl.  Add the onion/celery mixture to the dry stuffing mix and stir until all the stuffing has been moistened (you might have to let it sit a few minutes to soak up all the broth). Put the stuffing in a buttered baking dish (the one I used was 10x12 inches) and bake, covered with foil, for 40 minutes at 350 degrees. If you like your stuffing with a little crispity crunchiness on top, remove the aluminum foil for the last ten minutes of baking. 


Tuesday, October 29, 2013

Freakin' Awesome Apple Butter

Who's gone apple picking and, deluded (mesmerized??) by the Rockwellian outdoorsy perfection of it all, came home with 40 pounds of apples?  This gal!  Don't get me wrong. I love apples.  But after weeks of making apple cake, apple muffins, pork roast with apples, and, of course, eating them raw (many, many raw apples), you start running out of ideas.  What uses up a lot of apples, tastes delicious, and is freezer-friendly?  Apple butter!  If you're the canning sort, you could can this and give as gifts.

I don't have pictures of the process, because, well, it's me and I forgot. No worries, though, because it's kind of hard to screw up boiling and pureeing.  BUT, I do have a picture of the finished product:


I've never made apple butter before, so I went looking for recipes and found one that boils the apples to soften them, then bakes the puree in a "slow" oven (old-timey phrase to describe an oven that's not really hot) for a long time.  This method creates a wonderfully deep flavor, so I really recommend giving this a try, despite the time commitment. Even I was skeptical, but the results are absolutely fabulous!  When my husband tried it, he actually said, "This is freakin' AWESOME!"

Marna's Freakin' Awesome Apple Butter

10 apples (I used a mix of different kinds), peeled, cored and cut into chunks
1 1/2 cups apple cider
2/3 cups sugar
1 tsp cinnamon
1/4 tsp cloves
1/4 tsp dried, ground ginger

Combine diced apples (the apples don't really have to be uniform size, this is a pretty forgiving recipe), apple cider, and sugar in a 4 or 5 quart pot.  Bring to a boil over medium-high heat, then turn down to medium-low and simmer about 30 minutes, or until apples are tender.  When apples have cooked, blend (using an immersion blender) or mash (using a potato masher) until smooth.  Again, if there are chunks, that's okay, because it's going to cook more. Add the cinnamon, cloves and ginger, then stir to combine.

Lightly butter a baking dish large enough to hold the the apple puree, approximately 2 inches deep (I used a 10 inch x 12 inch dish, but an 11x7 inch dish would work, too). Bake puree for 4 hours at 275 degrees, stirring every hour, or until thick and of a spreading consistency.  Let cool for about an hour, then cover and chill.  Makes about 3 cups.


Friday, October 11, 2013

Baklava -- It's Easier Than You Think


Want to become a pastry chef without actually making pastry?  Use phyllo dough.  Unlike puff pastry (a pain to make, to be honest), I don't know anyone who actually makes their own, so no chef can "one up" you by saying they make their phyllo dough "in house."  :-)

Once you get the hang of it, phyllo is pretty easy to use.  Plus, if it rips, it's no big deal -- just layer it on anyway and brush with a boatload of butter.  Fool proof!  The original recipe I found didn't use enough cinnamon, in my opinion, so I upped the spice.  Plus more honey.  More flavor, more goodness. Also, there's no way I wanted an entire large pan of baklava sitting around our house (the original recipe made a 9x13 pan) -- the temptation would be too great to eat it all in two days.  As it was, we ate this smaller pan in 2, and we only gave away 4 pieces to our neighbors.  I have no willpower...


Enjoy!

Baklava My Way

Adapted from a recipe found on Allrecipes.com

1/2 package of phyllo dough
2 cups finely chopped walnuts
1 Tbsp cinnamon
2/3 cup butter, melted
1/2 cup water
1/2 cup granulated sugar
1/3 cup honey
1 tsp vanilla

Preheat oven to 350 degrees.  Butter the bottom and sides of an 8x8 inch pan.  Combine finely chopped walnuts and cinnamon in a medium bowl. Unroll phyllo dough, and place a damp, clean towel on top of it to keep it from drying out.  Take a couple of sheets and line the bottom of the pan.  Brush with melted butter.  Layer another sheet, brush with butter. Repeat until you have about 8 layers on the bottom. Spread 1/3 of the walnut mixture on top of the phyllo layers.  Layer and butter 3 more phyllo layers, then spread the second 1/3 of walnuts, then another 3 sheets with butter.  Top with the remaining sheets, buttering in between each layer.  Carefully cut the baklava into 9 squares, then cut each square in half, making 18 triangles.

Bake for about 50 minutes, until golden brown.  While the baklava is baking, combine water and sugar in a small saucepan, heat until sugar dissolves, then add honey.  Bring mixture to boil, then reduce heat and simmer for 10 minutes until thickened and syrupy (you should still have about 1/2 cup of syrup).  Take off heat and add vanilla.

After baklava has finished baking, remove pan from oven and drizzle honey syrup over the entire pan of baklava.  Let cool for at least an hour (2 hours is best, if you have the willpower), so that the pastry can soak up the syrup.

Makes 18 servings (or 9, if you're my family, because you can't eat just one piece).

Sunday, September 22, 2013

Pintester Challenge: Meat. Balls.

So, it wouldn't be a Pintester Challenge without inappropriate references and childish sniggering over innocuous words (like, "duty" gets me every time).  So today I made meatballs.  Let the sniggering begin.

I have to admit that I'm pushing up against the Sunday, Sept. 22 deadline, so I can't be very witty or snarky. I just need to get this shit done, so here's what happened:

I found this pin for Thai Green Curry Meatballs on Mel's Kitchen Cafe:

Thai Green Curry Meatballs


I mean, who doesn't like a good meatball (snigger)?  And I like curry, especially green curry, so I thought I'd give it a try.  Here's the deal. They were delicious!  Sorry, no fails, no ball-rolling nightmares (har har).  Just full on goodness. :-)  I did change up the recipe a little by decreasing the oats (hate too much filler) adding finely minced carrots (I try to get veggies into my kids any way I can) and baking the balls (ha!), 'cause mama ain't got time for sauteing in batches. But other than that, made it just like the pin. ;-) True confession, though. One of my kids didn't like the sauce, but liked the meatballs.  I still count it as a win.

Here's my version:


Thai Green Curry Meatballs (adapted from Mel's Kitchen Cafe)
YIELD: SERVES 6 
INGREDIENTS
    Meatballs:
  • 3 large eggs
  • 1 cup rolled oats
  • 1/4 cup milk
  • 2 pounds lean ground beef or turkey
  • 1/2 cup finely minced carrots
  • 1 tablespoon minced fresh ginger
  • 1 tablespoon Thai green curry paste
  • 2 tablespoons fish sauce
  • 1 teaspoon sugar
  • 1/2 cup chopped cilantro
  • 1 1/2 teaspoons salt
  • 2 cloves garlic, finely minced
  • 3 green onions, white and green parts finely chopped
  • Sauce:
  • 2 cans (13.5-ounce each) unsweetened coconut milk
  • 2 tablespoons green curry paste
  • 1/2 tsp. sugar
  • 2 tsp cornstarch stirred into 1 tsp cold water to make a slurry
  • 1/4 cup lime juice (from about 2-3 limes)
  • Hot cooked rice for serving
DIRECTIONS
  1. In a large bowl, combine the eggs, oats and milk. Let the mixture stand and soak for 5-10 minutes. Add ground beef or turkey, carrots, ginger, curry paste, fish sauce, sugar, cilantro, salt, garlic and green onions. Mix to combine and distribute all the ingredients through the meat. The best way to do this is to use your hands. Really.  Just get in there and squish everything around.
  2. Heat oven to 375 degrees. Line a large baking sheet with parchment paper.  Roll meat mixture into balls (about golf-ball size - I like big meatballs) and place onto lined baking sheet.  Once all the balls have been rolled and placed on the sheet, bake in the oven for about 20 minutes.
  3. While the meatballs bake, heat a large skillet to medium heat and stir in the coconut milk, green curry paste and sugar. Bring to a simmer, then add the cornstarch mixture and stir to combine.  Cook on low heat until thickened.  
  4. When the meatballs are done baking, pull them out of the oven and place the meatballs in the skillet with the sauce. Go ahead and pile them all in, trying for a single layer. Simmer the meatballs and sauce for 8-10 minutes until the meatballs are cooked through, flipping the meatballs once or twice.
  5. Stir in the lime juice. Add salt and pepper to taste. Serve over hot, cooked rice.

See? These directions just write their own jokes, really.  Giggle away, friends!

Does this qualify for the Pintester Movement? I'm pretty sure Sonja, the original Pintester, didn't make this, but I don't have time to search through her pins and find it (or another pin she DID do), so I'm submitting this anyway. It IS something that I pinned, but I'm not sure that counts. Personally, I consider this a public service, because it's one less dinner you have to think about.  You're welcome. Seriously, though, you have to make these Thai balls (snort)!

Friday, September 13, 2013

Flippin' Cornbread

So here is why I'm kind of a nightmare cook - and a horrible blogger:  I wanted to make cornbread quickly (i.e., no extra trip to a store). Why did I need it quickly, you might ask?  Well, I had just made Chicken Marabella (my all-time favorite chicken dish, BTW), pulled it out of the oven, and realized I had nothing to sop up the super-delicious sauce, which is the best part.  Instead of making rice, I got it into my head that I should make cornbread (I could have made biscuits, but that seemed fussier, for the single reason of having to roll the dough out). The good news is that Chicken Marabella can hold and even be served at room temperature, so I had a little time to make the bread.

The problem?  I didn't have enough cornmeal, no buttermilk, no self-rising flour (these were all needed for any one of the recipes I found in my cookbooks). So I used what I had: whatever amount of cornmeal (about 1/2 cup), wheat flour to make up the difference, sour cream, honey (instead of sugar), barely enough baking powder. Didn't have time to mess with completely melting the butter, so I just stirred it up to soften the not-quite-melted parts and dumped it in with the wet ingredients. No time for getting things to room temperature or sifting or such.

After I stirred everything together, it seemed a little stiff, so I added a little milk.  Still thick, but I didn't have time to mess with it anymore, so I threw it in a greased, heated cast iron skillet (I put the greased skillet in the oven while it pre-heated), spread the batter around and hoped it would taste okay.

Here's why I'm a bad blogger about it: no pictures, no actual measurements (good luck recreating this monster), no real technique (stirred wet stuff together, then dumped dry stuff on top and mixed it all in one bowl).  So, sorry about that, but thank you for sticking with me!

The result was surprisingly good, if a little sweet for my taste (note for future attempts: use less honey).  I did manage to snap a photo when it came out of the oven:


Um, yeah. Here is the afterthought picture:


Not too helpful, is it?  I was just one drink in, so I can't blame the nearly empty glass in the background for my lame blogging. ;-)

The lesson is this: baking is not as exacting as people make it out to be, so don't be intimidated by it. I do suggest you follow an actual recipe until you get the hang of things, though. I still do, sort of...   :-)