Sunday, July 21, 2013

Baby, it's hot outside!

I live in Virginia, where the summers are hot and humid.  Both of those conditions were in full force this week, which made me not want to use the stove AT ALL.  Actually, I didn't do much of anything, because the heat just drains all the energy out of me.  It doesn't matter that I spent much of the time either in my air-conditioned home or my air-conditioned car. Oh no.  It is still an excuse, because I had to take one son to his swim practice every morning and swelter on the pool deck, and take my other son to his week-long camp, so the car sits out just long enough to get oven-baking hot, yet the A/C doesn't really cool things down before we're home.

Yes, yes. I know you're saying, "Boo hoo, whine, whine. What does this have to do with food?" Whatever, peeps.  My blog, my whining. But I promise to get to the food.

My kids love it when we do a smorgasbord of random things that they get to put together themselves and call it a meal.  Cheese, crackers, lunch meats, veggies, dips and fruit.  Or whatever. This week, I did a little more prep than I usually do for something like this, and I did actually turn on the stove (and oven). These recipes are not my own, but they were delicious, so I'll provide the links for you to try them as well.

I had been thinking about chilled soups which, generally, are not my favorites (gazpacho tastes like I'm eating runny salsa, IMHO), but I do like vichyssoise (potato and leek soup).  Surprisingly, none of my cookbooks actually had a vichyssoise recipe, but I did have one that had a recipe for "Potage Parmentier", which had leeks and potato and cream in it, so I figured it had to be pretty much the same thing. [And yes, I realize I could have just looked up a recipe online, but I was stubborn enough to think I had to have an acceptable recipe in my cookbook collection]  Williams-Sonoma's blog recently provided a long list of chilled soups that I am eager to try out.

The rest of the meal consisted of White BeanTapenade and Marinated Summer Vegetables, both from the June 2013 issue of Bon Appetit magazine, antipasto peppers, a cured Italian sausage, some deli meats and cheeses, mustards, sweet gherkins, cherry tomatoes and mozzarella balls (perline) and a variety of crackers.

Here's what the spread looked like:


I apologize that I didn't get a good shot of the soup.  I took the picture after the boys started eating. :-)

Now, as I mentioned before, I did have to actually turn on the stove to make the soup and the oven to cook the veggies for the marinated salad, so if you're really sweltering, this particular line-up won't help you.  BUT: I did both in the morning before it got really hot and I got too tired to do anything but make sandwiches.  You could also grill the veggies, so at least you're not heating up the house, or if you are grilling a meal earlier in the week, you could grill up extra vegetables to use for the salad later.  Lots of possibilities there. There's also the option of just buying a variety of salads, dips, spreads, meats and cheeses from the prepared food section of the grocery store and setting it out for everyone to taste.  I get that it's hot, people are tired and cranky and food needs to get on the table. I'm not judging.

For the marinated vegetables, I used a lemon olive oil, which gave it a nice citrus punch. If you don't happen to have that, you could add a little lemon zest instead (or leave it out -- the original recipe doesn't call for any sort of lemon).  I also didn't have oregano, so I used fresh thyme (I have a nice patch growing just outside my back door). You know me; I make do with what I've got, and I hope it gives you ideas how you can play with your food, too.

What are your favorite meals to fix when it's too hot to cook?

Here's the recipe I used for our chilled soup:

Potage Parmentier

Adapted from Bistro Cooking by Patricia Wells (I highly recommend this book for delicious, yet simple, French bistro basic recipes)

3 large potatoes (I used Russet), peeled and quartered
2 leeks, just the white and pale green parts, sliced
1 quart of water
1 cup beef stock (you could also use chicken stock, but beef is what I had)
3/4 cup heavy cream
Salt and pepper, to taste
3 tablespoons chopped chives, for garnish (optional) - the original recipe suggested chervil or tarragon

Combine the potatoes, leeks, water and broth in a large saucepan. Bring to a boil over high heat. Reduce to simmer and cook until vegetables are meltingly soft, 35-40 minutes.

Using an immersion blender, blend vegetables in the pot until smooth. Add cream and heat through.  Add salt and pepper to taste.  If you don't have an immersion blender, you can use a regular blender, in batches (be sure to keep the small hope at the top of your blender cover open to let heat escape) or a food mill. 

Serve either warm or cold (it's delicious either way), garnished with fresh herbs, if you like. Note: It took a while for the soup to chill (about 4 hours in the fridge, and it still was more lukewarm than chilly), so be sure to factor that in, time-wise.

Serves 6 to 8

Tip: To get all the sand out of leeks, I fill my sink with water, then put the leeks, already sliced into rings, in the water.  I then separate all of the rings, swishing them around and then letting the sand fall to the bottom of the sink. Then I scoop up the leeks either with my hands or a medium-mesh (not fine) sieve.


Thursday, July 11, 2013

Another PINTESTER Challenge

So again, Sonja Foust, the intrepid Pintester, has issued a call to other bloggers.  This time, she's invited us to try out one of her previously-tested pins.  I had, like, 3 weeks to figure out what I was going to do, but here I am, scrambling because I haven't figured out what I wanted to do.  Here were my two criteria: 1) It had to be on the first page of one of her categories, because I don't have time for messing around with the "back" and "refresh" buttons; and 2) I had to have the ingredients or supplies at home (or at least close substitutions), because it's hot out and I don't want to leave the house.


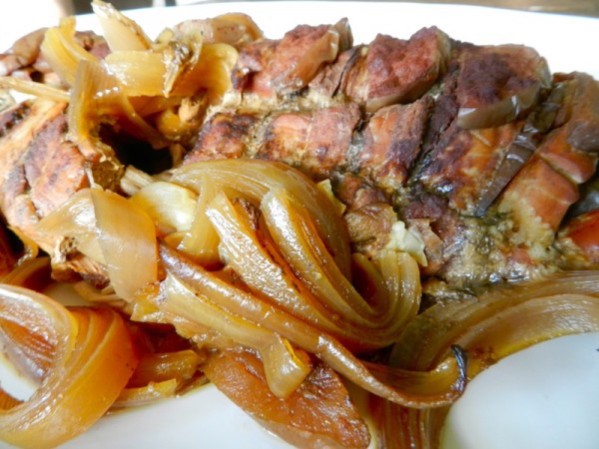
Given those criteria, I picked her Apple Cinnamon Slow Cooker Pork.  Here's the original pin/recipe. And here is the Pintester version. True to the Pintester tradition, I did not have exactly the right ingredients, and I was a little leery of trying it because it didn't taste that great, but what the heck, here's to livin' on the edge.  Am I right? Plus, slow cooking in the summer is awesome, because you have a hot meal, but didn't heat up the kitchen.  Win, win. I'm all for salads and sandwiches in the summer to keep things cool, but sometimes you need a hot meal for it to feel like an actual dinner.

I kinda screwed my husband (make your own joke, here), 'cause I used the last two (expensive) apples on this recipe, which he usually takes an apple with his lunch each day. It calls for 3, but, whatever.  Those expensive apples ($2.99/lb for freak's sake) better be delicious, 'cause I'm already mad at myself for buying those stupid thing. I also didn't have honey, but I had maple syrup, which is actually better, IMHO.  Plus, since there was a little issue with flavor, the maple will boost that, hopefully.  Plus I added salt.  Salt boosts flavor, people.  Remember that. With the pork, apple, maple flavors going on, it's more of a fall-ish feel, so that's going to be strange, seasonally speaking, but we'll survive.

The other thing I like about this recipe is that you just dump everything in (ingredients prep aside).  No browning of the meat beforehand or any of that nonsense (side rant: what's up with that, anyway?  Browning meat before you put it in a crock pot is stupid and totally defeats the convenience of the crock pot in the first place.  If I wanted to actually use the stove, I'd just braise the fucker). Unfortunately, my crock pot is round, rather than oblong, so when I put the pork in it, I had to sort of coil it around.  It means it doesn't look quite like either of the other two tries.  Just keep that in mind when you look at my crappy and completely unappetizing picture.  :-)


It also uses a boatload of cinnamon. Two tablespoons is crazy, but I did it.  If this thing turns out well, I'm sending my version over to Penzey's, because that's the brand of cinnamon I used. If you are not already acquainted with that store, I beg you, for all that is good and tasty, to get there and order your spices.  They rock, and it really does make a difference. But then again, I'll probably have to make the recipe again and actually measure everything out...


Anyway, so here's my version (amounts are approximate, because, well, I don't have time for actual measuring and stuff, plus it's just more I have to clean up):

Slow Cooker Maple Pork Tenderloin with Apples and Onions:

3 lb. pork tenderloin
2 onions, sliced in 1/4 inch slices
2 apples (they do not need to be the expensive, fancy Koru apples I had, but something more flavorful than Red Delicious, if you have access to it), cored and sliced into approximately 1/2-inch slices
1/4 cup pure maple syrup (I used Grade B)
2 Tablespoons (yes, Tablespoons) of cinnamon
Salt

Put the onions in the bottom of the crock pot.  Sprinkle with a little salt.  Make slices in the tenderloin -- do not cut all the way through.  Layer the pork in the crock pot, then put an apple slice in each of the slices you made in the pork.  Put any extra slices on top of the meat.  Sprinkle a little more salt over the meat, then sprinkle the cinnamon over everything.

Turn on low and cook about 7 hours until tender.

Results:

The pork turned out really well!  For a less sweet taste, you might want to knock the maple syrup back to 2 - 2 1/2 tablespoons.  The meat was really tender, too tender to actually slice, because it just fell apart when I tried to pull it out of the crock pot, thus the not-so-appetizing "after" picture.  Also, the apples got really mushy, so they didn't have nice-looking slices by the time I took everything out of the pot.  If I made it again, I might try it with Granny Smith apples that might hold its shape more (and be less sweet).  In my final version picture, I served it with polenta, but in the fall or winter, it would taste really good with mashed potatoes and roasted Brussels sprouts (nice call, Sonja).  :-)

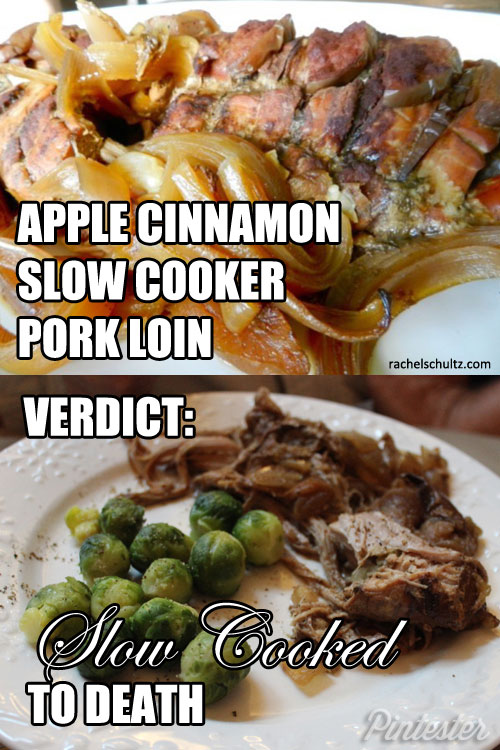
So, to re-cap, here's the original pin:


Here's the Pintester version:

pork-loin

And here's my attempt:


Monday, July 1, 2013

Brussels Sprouts Slaw with Maple Mustard Dressing (and lessons learned...again!)


Sometimes, in the interest of saving time, you end up not saving much time at all in the end.  Case in point: I saw shaved Brussels sprouts at the grocery store the other day and thought, "I hate shaving those darn things!  This will save me so much time and effort!" Friends, I was wrong.  Here's why.

I bought those pre-shredded things at the store, thinking they would be good for an easy slaw as a side dish with salmon.  When I tasted them before I got started making the slaw, they were really bitter (who knows how long they've been sitting in transit and such before they got to the store shelf?). So, to make them a little less bitter and bring out some sweetness, I ended up roasting them for a few minutes. I also added some carrots to offset the bitterness some more.  While the final product was still really tasty, the lesson to be learned here is to use the freshest ingredients you can.  Sometimes it takes a few missteps (mistakes??) to set us back on the right path...


Brussels Sprouts Slaw with Maple Mustard Dressing

1 package (14 oz) shaved Brussels sprouts
2/3 cup julienned carrots
olive oil, salt, pepper
1/2 cup Maple Mustard Dressing

Preheat oven to 425 degrees (F).  Toss sprouts and carrots with a little olive oil to coat, and salt and pepper.  I did this in a bowl, but if you're careful, you could do it directly on the baking pan you'll be using.  NOTE: If you are using fresh Brussels sprouts (like, from the garden or farmer's market), you can skip the whole roasting step and use them raw.

Put the prepared veggies on a large baking sheet and spread them out to an even layer.  Roast in the oven for just a few minutes -- about 10.  After the first 5 minutes, stir the veggies around a little.  The roasting will bring out a little more of the sweetness and decrease any bitterness the sprouts might have.

Pull the veggies out of the oven and let cool for a couple of minutes, then transfer to a large bowl.  While still a little warm, toss with about half of the dressing (1/4 cup) and let the veggies soak up some of the flavors of the dressing.  Once cooled to room temperature, you may add more dressing, to your taste.  This dish can be served at room temp or cold.

Serves 4

Tuesday, June 25, 2013

I Scream, You Scream...

Sorry for the long time in between posts.  It's been a busy time, with the end of school, start of swim team and a 6-day trip to California's Sonoma County thrown in there.  But I'm back, and I thought I'd give you a fun, summery treat to make:  brownie ice cream sandwiches.

These are not hard, but they do take some time, as I unfortunately found out.  The day after we came back from California, we were getting together with friends to celebrate one of our birthdays, and I had volunteered dessert.  We had nearly nothing in the fridge (or pantry), but I thought I had a box brownie mix (don't judge), at least, and eggs to make the brownie part of the sandwiches before I had to run the boys out to the dentist.  In retrospect, I really did not plan any of this well. It turns out that I didn't have brownie mix in the house, so I had to do a quick brownie from scratch (don't laugh, it's possible, and I'll show you how). It made us a couple (literally two) minutes late for the dentist, but it was okay. Then I had to stop at the grocery store to get ice cream. Why not just get a brownie mix then, you might ask (and I might call you a smart ass)? Because the brownies needed to not only bake, but also cool completely before you can spread the ice cream on them. So there.

I apologize for the picture quality of the final product.  For some reason, my camera refused to focus on the brownie.  After taking, like, 15 pictures I just gave up.  Sorry. This was the best I could do.

The bad part was that the ice cream didn't harden up in time for the birthday celebration, so we ended up not eating them.  It's okay, though, 'cause I'm planning a taco party later this week, so we can serve them as dessert then.  See? It all works out in the end...

Brownie Ice Cream Sandwiches

Brownie layer:

This is a simple, one-bowl (one-saucepan, actually) brownie. If you have all the ingredients, it should only take about 10 minutes to throw together. Honest!

3/4 cup butter (1 1/2 sticks)
8 Tbsp unsweetened cocoa
1 1/3 cups granulated sugar
1 tsp vanilla
3 large eggs
1 cup all-purpose flour
1/2 tsp salt

Pre-heat oven to 325 degrees (F). Prepare two rimmed baking sheets (10 inches by 14 inches).  DO NOT SKIP THIS STEP! Grease (I used Crisco, but you can use butter or other type of shortening) the inside of the pan, then line with parchment paper (or waxed paper if you don't have parchment). Grease the parchment paper.  Sprinkle with unsweetened cocoa, then tap the pans until they are coated with cocoa. Like this:


 TIP: if you're pressed for time, melt the butter and cocoa first, then while it cools, prepare the pans. Melt butter and cocoa in a 3 quart saucepan over low heat.  Stir until combined, then allow to cool (5 minutes or so).  Add sugar and vanilla, stir to combine thoroughly, then add one egg at a time, stirring after each egg to incorporate completely before adding another.  Add flour and salt, mix together until the flour is completely incorporated (you shouldn't see any white).  :-)


Evenly divide the batter between the two pans. I am horrible at this, so I used a measuring cup to help get the batter sort of equal.


Bake for about 25 minutes, until firm to the touch but not crispy or dark brown on the edges.  Pull pans out of the oven and let cool completely.

If you use a brownie mix, don't use the family-sized box of brownies.  Just get the kind that makes an 8x8 or 9x9 inch pan.

Sandwich Assembly:

Allow 1.5 quarts of vanilla ice cream to soften.  If you have the time, you could let it soften in the fridge for a couple of hours, which would probably be preferable, but I had a deadline looming, so I didn't have time to do it the "right" way.  I let my container sit on the counter for about 20 minutes.  When the middle still wasn't soft enough, I plopped it in a large bowl and just started stirring.  That helped a little.

Once the ice cream is soft (but not too melty), spread it evenly over one of the pans of brownie. Run a knife around the edge of the other brownie pan, then turn it over on top of the ice cream-covered brownie.  Pull off the pan and the parchment paper, then cover completely with plastic wrap and return to the freezer and freeze until ice cream is firm.  This took a lot longer than I thought, so you want to allow at least 4 hours for this.


After the ice cream has hardened, remove from freezer.  Remove plastic wrap. Run a knife that you ran under hot water along the edges of the brownies (a warm knife will cut through the frozen brownie and ice cream easier and cleaner), place a cutting board (larger than the brownie pan) on top of the brownies, then flip the whole thing over so that the pan is now on top.  Lift off the pan and the parchment paper.


If you want the sandwiches to look really nice and even, you could trim off the sides (keep those trimmings, put them in a bowl and snack on them while you're finishing up...just a suggestion.  Don't want things to go to waste).  TIP: I use a pizza cutter to slice through the brownies. Cut bars into desired size (I got about 16). Wrap in squares of parchment paper and store in the freezer if you're not serving them right away.

Final thoughts:

You can customize these in so many ways.  I chopped up chocolate chips and toasted almonds and rolled the edges in them.  I also thought of spread raspberry sauce (you can see it in the picture) on one side of the brownie before I put it on top of the ice cream. I didn't do that this time, because a) I thought of it too late, and b) I was making these for kids and wasn't sure if they would eat them that way.  You also could use a different ice cream or cover in a ganache and freeze for a chocolate-covered brownie ice cream sandwich.  So decadent!


Wednesday, May 29, 2013

It's A Movement!


One of my favorite blogs ever is Pintester, where the intrepid Pintester (Sonja Foust) tries out various pins from Pinterest.  She is hilarious!  I found out that she is looking to start a movement to get as many people as she can to try a pin they've been meaning to try and link them all together on her blog.  Honestly, it sounds like she might be leaving for vacation (totally allowed, BTW) and is looking to make sure she's got some interesting posts for a while...

But I digress. As luck would have it, I have a Pinterest board called "Gotta Try This," so I thought Sonja's idea was a perfect way for me to actually try one of those pins (confession: in the 3 years I've had a Pinterest account, not once have I actually attempted one of the "Gotta Try This" pins).  I also have a board called "Cool Ideas I Will Never Do," but all of those things are way more complicated, and, frankly, I didn't want to come off as being a liar.

Of course, even though I've had a week to think about it, I only started working on this the day before we are all supposed to post, so I had to choose a pin that didn't require extra shopping.  Since I'm not crafty at all, that posed quite a restriction.  You will be pleased to know that I had, in fact, all the necessary items to attempt this:

[image%255B15%255D.png]


The original post was from Thrifty Decor Chick, but the picture didn't link to any sort of instructions.  So, not wanting to go in blind, I googled "apple candles" and found instructions here.
It didn't seem too hard.  I just happened to have 3 apples left in the house, and three votives (I have a ton of votives, because you can't just buy, say 3 or 4; they always seem to come in these huge packs of 50, which lasts me approximately 10 years -- more, because we're still counting - and I still have 20 left from my pack).

Sorry, more digressing.  Anywho, so I gathered my supplies:


I would advise using bigger apples, because these didn't have a lot of room around the top once the holes were cut for the candles, but these were literally the last three apples in the house, so I did not have much of a choice. None at all, truth be told.


 Now, the directions said to mark the circle using a pen, and then cut out the circle, but I couldn't find a pen that worked, plus that seems like an unnecessary extra step, so I just held the votive in place and lightly scored across the top to give me a guide. This method could have ended with me driving, one-handed, to the ER, but all was well.  I'm used to using kitchen knives, so I wasn't worried, but if we were using, say, a craft knife of box cutter, I might have been in trouble (side note: my first ER trip ever happened only 2 years ago, at 44 years old, and involved a box cutter, which I am no longer allowed to use without supervision...also, no one will ask me to make decorations for their class party ever again).

After I cut around the guide marks a little deeper, I cut across the top, making an X to make it easier to pry the pieces out from the top.


Then, you cut away more of the insides so that the votive will fit into the apple.  I think the instructions said you should use a spoon to scrape out the insides, which might have worked better, but that would have entailed messing up another utensil and the kids were going to be home from school soon, so I couldn't be bothered with grabbing another thing when I had a perfectly good knife in my hand.


Here's the finished product.  I know, it's a little lopsided, but if you turn your head the opposite way, it looks great, so just go with that.


Original pin:                                                      Nailed it (to use Pintester's vernacular):


[image%255B15%255D.png]

Conclusion: Although it was relatively easy to do, frankly, I thought it was a waste of some tasty apples.

One final note: you might want to use an apple that doesn't turn brown very quickly, because, about 5 minutes after I took the final picture, you could see a ring of brown starting to form around the holes where the candles were.  Maybe you could rub lemon juice on the inside. Or do a better job of cutting than I did...


Friday, May 24, 2013

A Little Drinky-drink

So, it's Friday, and I'm tired and I need to unwind.  Now, I'm usually a beer or wine kind of person. Nothing complicated.  But the other day I was talking with a friend, who remarked on the sizable amount of liquor we have in the house.  Not in a critical way, just more of an observation, because, well, frankly, we do have a lot because we just don't drink hard liquor very often. But it got me to thinking, so the next time I went to the store, I got a few mixer-type items (really, just a couple of juices and tonic water, to be honest).

So, here we are back at Friday, and I have liquor on my mind.  Specifically, the Godiva chocolate-raspberry vodka taking up space in the freezer.  So I take it out, along with a couple other things, and come up with this:


I'm not sure if it's an original recipe or not (I didn't follow a recipe, but that doesn't mean it doesn't already exist out there somewhere).  Y'all, for not being much of a "mixologist" (like, not at all), this thing was pretty tasty, if on the sweet side.  I don't know what to call it, so we'll just go with Chocolate-Raspberry Cocktail.  :-)  I had two, they were so yummy!

Marna's Chocolate-Raspberry Cocktail

1 part Godiva Chocolate-Raspberry Vodka
3 parts cran-raspberry juice
1 tsp. Penzey's Raspberry Enlightenment (it's a sauce)
Chocolate sauce (to make fancy designs on the glass)

Put the first 3 ingredients in a cocktail shaker with some ice (I used a handful) and shake to blend.  If your chocolate sauce isn't already in a squeeze bottle, you'll need to put it in one, then squeeze the chocolate sauce around the inside of your glass making a fun pattern (mine looked a little like a flower, but a swirl would be fun, too). Strain your cocktail into the prepared glass.

Serves one (generously...)

Saturday, May 18, 2013

Syttende Mai!

Yes, yes, I know it's actually May 18th, but I didn't have time to finish my post yesterday, and I am not about to let a little detail like a number get in the way of sharing some some stuff that you can do in your kitchen!   Syttende Mai is the Norway's Constitution Day (literally translated, it's "May 17th").  It's an important holiday in Norway, equivalent to our (American) Independence Day on July 4.  In honor of this holiday, I thought I'd try a traditional Norwegian dessert: Troll Cream.

Troll cream only has 3 ingredients and is amazingly simple.  It is usually made with lingonberries, but, being in Virginia, we don't have a ready supply, so I substituted blueberries.  So here's the amazing part.  You dump the sugar, berries and egg white into a mixing bowl all together, and then you just start whipping it.  It takes about 2 minutes, but it turns into this amazing, feather-light, pillowy, mousse-type of cream.  When I first read the original recipe, I was really skeptical. But, I followed the recipe as it was written and abracadabra! Everything did what it was supposed to do!

I used the troll cream as a layer in a lemon-blueberry trifle, but you could totally serve this on it's own, maybe with a little whipped cream and fresh berries and/or cookies on the side for a little texture.  It is best eaten the day it's made, I think, because the texture changes a little bit (turns more meringue-y) the longer it sits.  I have to admit, though, the leftovers still tasted pretty good the next day!  :-)

Although I thought I was taking pictures of the steps for making the troll cream, nothing was on my camera (my camera battery was low), so you'll have to just use your imagination.  Here's what it looked like in the trifle I made (it's the slightly lavender-looking layer):


Blueberry Troll Cream

1 cup blueberries, rinsed and patted dry
1 cup sugar
3 egg whites

Have all ingredients at room temperature.  Put all ingredients in a mixing bowl (I used a stand mixer, but I think a hand-held mixer would work, too).  Turn mixer onto a medium-low speed to start, then gradually increase speed to high.  Mix for about 2 minutes.  The troll cream should be light and fluffy, but not stiff.

Note: This recipe can be increased or decreased, depending on how many servings you want.  This amount was used for a trifle that served about 12, but you could decrease the amounts - 1/3 cup sugar, 1/3 cup blueberries, 1 egg white - for just 6-8 servings.


This was the only picture I got of the troll cream, which I took with my phone:


This recipe was so easy, I'm definitely going to experiment with different berries/flavor combinations!

If you want to make the trifle, here's how:

Lemon-Blueberry Trifle

1 Lemon pound cake (if you want to make this from scratch, here's a good recipe)
1 recipe Blueberry Troll cream
1 cup lemon curd (store bought or make your own)
3 cups whipped cream
1 cup fresh blueberries, rinsed and patted dry

Start by folding the lemon curd and 2 cups of whipped cream together. Set that mixture aside for a moment.


Slice thin pieces of pound cake (no more than 1/4 inch thick).  Layer slices of cake to cover the bottom of the trifle bowl.  Scatter fresh blueberries on top of the cake layer:


Then layer half of the curd/whipped cream mixture, followed by half of the blueberry troll cream.  Repeat layers (cake slices, fresh blueberries, lemon whipped cream, troll cream).  After the last layer of troll cream, top with the remaining cup of whipped cream, then scatter more fresh blueberries over top.  This is what you end up with:


Serves 12.  The curd and cake can be made a couple of days ahead, but the trifle should be put together only about 4 hours ahead of time (refrigerate until ready to serve).  Best eaten the same day, but still good a day after, too.  :-)